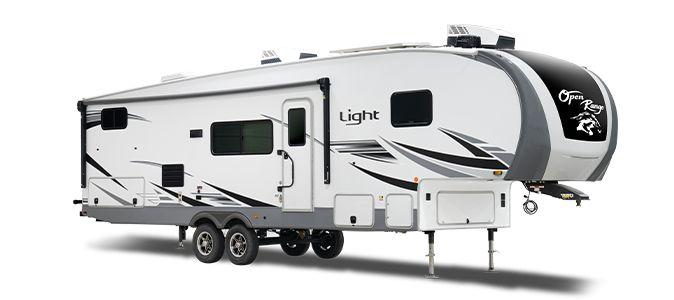
Categories
Classes of RVs

Can You Upgrade Bathroom Fixtures in Your RV? Absolutely! Here’s How.

Upgrading your RV’s bathroom fixtures can be a functional necessity or a way to enhance your RV’s style and comfort. Whether you’ve purchased a used RV that needs refreshing or simply want to give your older model a modern touch, upgrading your faucets, showerheads, and other fixtures can make a significant difference.

Why Upgrade Your RV Bathroom Fixtures?

  • Improve Quality – Stock fixtures may not always be the most durable or stylish.
  • Modernize Your RV – A few updates can make an older RV feel brand new.
  • Increase Comfort – Upgraded fixtures can enhance water flow, usability, and aesthetics.
  • Customization – Create a space that better fits your personal taste and needs.

Can You Upgrade Bathroom Fixtures in Your RV?

Yes! Upgrading bathroom fixtures in an RV is absolutely possible—and it can be an easy DIY project. Many manufacturers offer different trim levels, so even if you didn’t buy the most luxurious model, you can still enhance it with higher-end fixtures to get the best of both worlds.

Even small changes, like swapping out a basic showerhead for a high-pressure model or replacing a plastic faucet with a sleek metal one, can turn a standard RV bathroom into a more stylish and comfortable space.

Stay tuned for tips on choosing the right fixtures and installing them with ease!

Check Your RV Warranty Before Upgrading Fixtures

When purchasing an RV, you don’t always get the chance to test the water flow or assess how well the fixtures fit your daily needs. It’s only after your first few uses that you might realize the kitchen faucet is too low, making it difficult to fill large pots, or that other fixtures don’t function quite as expected.

Why Your Warranty Matters

Before replacing faucets, showerheads, or other fixtures, check your RV warranty to ensure that modifications won’t void your coverage. Some manufacturers require all upgrades to be done by authorized dealers to maintain the warranty. If you’re unsure about the terms, contact your RV dealer or manufacturer before making any changes.

What If You Bought a Used RV?

Even if your RV is pre-owned, some warranties may still be in effect—especially on newer models. Always review any existing warranties before making modifications. However, if your RV is no longer under warranty, you have full control over upgrades, as long as they comply with DMV regulations and safety standards.

Taking these precautions ensures you can upgrade your RV confidently without risking warranty coverage or creating potential safety issues.

Essential Tips for Upgrading Your RV Bathroom Fixtures

Upgrading your RV’s shower faucets, sink faucets, and outdoor shower units can improve both function and style. Whether replacing worn-out parts or upgrading for a fresh look, these tips will help ensure a smooth installation process.

Finding Replacement Fixtures

  • Search online for RV replacement fixtures, as many websites and RV stores carry compatible parts.
  • If you want the exact same fixture, contact your RV manufacturer to check for availability.
  • When switching to a different model, verify that dimensions, pipe lengths, and threading match your existing setup. You may need adapter pieces for a proper fit.

Step 1: Turn Off the Water Supply

Before removing any fixture, always shut off the water source:

  • If connected to city water, turn off the main supply.
  • If boondocking and using the fresh water tank, turn off the water pump.
  • Open the fixture’s spigots to drain any remaining water from the lines.

Step 2: Prevent Water Damage

  • Keep rags, towels, sponges, or a small bucket nearby to catch any residual water.
  • After installation, check for leaks periodically—water damage in an RV can be costly and difficult to repair.

Step 3: Carefully Remove the Old Fixture

  • Take notes or photos during removal so you can reverse the process when installing the new fixture.
  • If your RV is older, consider replacing water supply hoses while you’re at it for added reliability.

Step 4: Install the New Fixture

  • Use pipe thread tape and plumber’s putty where needed to prevent leaks.
  • Tighten fittings securely, but don’t overtighten, as many RV plumbing components are plastic and can crack.
  • Double-check that everything is properly aligned and level—an extra set of hands may help with this step.

Step 5: Test for Leaks

  • Once everything is installed, slowly turn the water back on and check for leaks immediately.
  • If no leaks are present, replace any access panels or doors and secure them properly.

Accessing Your Fixtures

  • Some RVs have exterior access panels, while others require access from inside the RV (e.g., under the sink).
  • If space is tight, be patient—RV plumbing access can be tricky.
  • If unsure, ask an RV service technician for guidance or watch YouTube tutorials for step-by-step demonstrations.

Final Thoughts

If you’ve done plumbing work in your home, you can likely handle an RV fixture replacement. However, always double-check fittings and water flow to avoid costly leaks. If needed, get help from a friend or professional to ensure a smooth installation.

Now, let’s go over some common upgrade scenarios.

How to Replace a Shower or Sink Faucet in Your RV

Replacing a shower or sink faucet in your RV follows a similar process, whether it’s for the kitchen or bathroom. This guide focuses on bathroom fixture replacements, ensuring you get the job done efficiently and leak-free.

Step 1: Prepare for Replacement

  • Before starting, confirm that your new fixture matches the dimensions and connections of the old one. If it’s a different model, ensure you have any necessary adapters.
  • Turn off your water source and pump before removing any plumbing components.
  • Take photos or notes during disassembly to make installation easier.

Step 2: Remove the Old Faucet

  1. Drain the water lines by opening both hot and cold valves.
  2. Disconnect the hot and cold water lines and drain any remaining water into a bucket or wipe with a towel.
  3. If PEX lines are present, they may be color-coded (red for hot, blue for cold). If not, label them for future reference.
  4. Loosen the couplers securing the faucet to the sink or shower wall.
    • If working on a shower faucet, disconnect the shower wand assembly if necessary.
    • If replacing a sink faucet, detach the drain stopper and note its length. Some RV sinks may use manual plugs instead of pull/push stoppers.
  5. Once the couplers are removed, lift out the faucet assembly and clean the surrounding area.

Step 3: Install the New Faucet

  1. Apply plumber’s putty if the original installation used it.
  2. Insert the new faucet and align it properly.
  3. Secure it in place by tightening the collar couplings.
  4. Reconnect the hot and cold water lines, using thread tape (wrapped clockwise) for a leak-free seal.
  5. Double-check all fittings for tightness before turning the water back on.

Step 4: Test for Leaks

  • Slowly turn the water back on and check for leaks.
  • Open both hot and cold valves and inspect all connections.
  • If everything is dry, your new faucet is successfully installed!

Note: The process for replacing a kitchen sink faucet is nearly identical.

Replacing an Outdoor Shower on Your RV

If your RV has an outdoor shower, the replacement process is slightly different but still straightforward.

Step 1: Locate and Access the Shower Unit

  • Determine where your outdoor shower is installed and how to access it from inside your RV.
  • If you’re installing a new outdoor shower, choose a location with proper plumbing access.

Step 2: Remove the Old Outdoor Shower Unit

  1. Turn off the water supply and pump.
  2. Open the valves to drain the water lines, marking hot and cold if not already labeled.
  3. Remove the hoses and check if they need replacement.
    • Some outdoor showers store the hose and wand inside the compartment.
    • Others require detaching the hose and wand after each use for storage elsewhere.
  4. Once detached, loosen the couplers holding the faucet unit in place.
  5. Remove the entire faucet assembly, clean the area, and prepare for installation.

Step 3: Install the New Outdoor Shower Unit

  1. Insert the new unit and align it properly.
  2. Secure it in place by tightening the couplers.
  3. Attach the water hoses, using pipe thread tape if needed.
  4. Turn the water back on and check for leaks.

Considering an Upgrade?

If your outdoor shower requires frequent assembly and disassembly, consider upgrading to a larger built-in unit.

  • Some models require expanding the existing opening or installing a deeper unit that sits further into the RV.
  • If modifications seem complex, consult an RV dealership service department to ensure proper installation.

By following these steps, you can successfully replace or upgrade your RV’s bathroom and outdoor shower fixtures, improving both functionality and convenience.

Installing an Outdoor Shower in Your RV

If your RV doesn’t already have an outdoor shower, installing one can be a fantastic upgrade. It provides convenience for washing off dirt, sand, or pets before entering your RV. However, this installation requires cutting into your RV’s exterior, so careful planning is essential.

Step 1: Choose the Installation Location

  • Find a suitable spot for your new outdoor shower. It should have easy access to both hot and cold water lines inside your RV.
  • Many outdoor shower kits come with weatherproofing materials to ensure a watertight seal. You will likely need caulk to seal any seams and prevent leaks.

Step 2: Tap into Your Water Lines

  1. Locate your existing water lines inside the RV.
  2. Determine where to cut the lines and install a tee fitting to create a new connection for the outdoor shower.
  3. Use SharkBite fittings or threaded connectors for a secure attachment. (If you’re unfamiliar with SharkBite fittings, a quick Google search will explain their benefits.)
  4. Before cutting, turn off the water supply and drain the lines by opening the faucets.
  5. Once the tee fittings are installed, run the new water lines to the shower location and attach the appropriate connectors.
  6. Connect the shower fixture’s hot and cold water lines to your new plumbing.

Step 3: Cutting the Opening for the Shower Unit

  • The next step is cutting a hole in your RV’s exterior wall to install the shower compartment.
  • Follow the measure twice, cut once rule (or even three times, just to be sure!).
  • Use a template (often included with the shower kit) to outline the cut area. You may also place it inside the RV first to check for obstructions.
  • Check for wiring, insulation, or other water lines before cutting.
  • Drill pilot holes in all four corners of your outline, then move to the exterior and align the template with these holes.
  • Use a metal-cutting saw blade to carefully cut the opening.

Step 4: Securing the Shower Compartment

  • Once the opening is cut, you’ll likely need to frame the inside edges to provide structural support.
  • Use wood or metal framing, depending on the RV’s construction.
  • Insert the outdoor shower assembly, making sure it fits snugly and is properly aligned.
  • Seal around the edges with weatherproof caulk to prevent water leaks.
  • Secure the shower compartment with screws.

Step 5: Connect Water Lines and Test for Leaks

  1. Install the faucet assembly, ensuring it is level and properly aligned.
  2. Attach the couplers and water hoses, using pipe thread tape to prevent leaks.
  3. Turn on the water supply and pump, then check for leaks at all connections.
  4. If everything is dry, attach the shower hose and wand.

Professional Help & Warranty Considerations

  • If this installation feels too complex, consult your RV dealership’s service department. They may offer installation services and provide a warranty on their work.
  • Before modifying your RV, check your manufacturer’s warranty. Some warranties may become void if major modifications are made.

Final Thoughts: Making Your RV Your Own

Adding an outdoor shower is just one of the many ways you can customize your RV to better fit your lifestyle. RV supply stores and RV shows are great sources of design inspiration. If you see a fixture you love, take photos for reference.

Weight Considerations

Many factory-installed RV faucets and showers are made of lightweight plastic to reduce overall vehicle weight. If you’re upgrading to metal fixtures, keep in mind that added weight affects fuel efficiency and towing capacity.

With the right tools and planning, you can turn your RV into a true home on wheels—customized exactly the way you want it.

Categories
Classes of RVs

Is an RV the Same as a Motorhome?

The terms RV and motorhome are often used interchangeably, which can be confusing for those new to the world of recreational vehicles. Let’s clear up the distinction.

An RV (Recreational Vehicle) is a broad term that refers to any vehicle designed for camping or travel. This includes both motorized RVs (such as motorhomes) and towable RVs (such as travel trailers and fifth wheels).

A motorhome, on the other hand, is a specific type of RV that has a built-in engine, meaning you can drive it without needing a separate towing vehicle. Motorhomes come in various classes—Class A, Class B, and Class C—each offering different sizes and features.

So, while all motorhomes are RVs, not all RVs are motorhomes. Whether you’re looking for a drivable RV or a towable one, understanding these differences can help you choose the right option for your adventures.

What Is an RV (Recreational Vehicle)?

The term RV (Recreational Vehicle) refers to any vehicle designed for travel, camping, or recreational use. This includes both motorized and towable options, offering a range of styles and features to suit different needs.

Common types of RVs include:

  • Class A Motorhome – Large, bus-style motorhome with luxury features.
  • Class B Motorhome – Compact, van-style RV with essential amenities.
  • Class C Motorhome – Mid-sized motorhome with a distinctive cab-over design.
  • Toy Hauler – Available as a motorhome or trailer, featuring a garage space for ATVs, motorcycles, or other gear.
  • Travel Trailer – Towable RV that hitches to a vehicle.
  • Teardrop Trailer – Small, lightweight trailer with a compact sleeping space.
  • Fifth Wheel Trailer – Large towable RV that connects via a specialized hitch in a truck bed.
  • Hybrid Trailer – A mix between a travel trailer and a pop-up camper, often featuring expandable tent sections.

Each RV type comes in various models, floor plans, and annual updates, offering a wide range of options for travelers and outdoor enthusiasts. No matter the style, if it’s built for recreation and mobility, it falls under the RV category.

Understanding Motorhome RVs: What They Are and How They Work

A motorhome RV is a fully self-contained vehicle designed for travel and living. Unlike towable RVs, a motorhome combines living quarters and driving capabilities in one unit, meaning there’s no need for a separate towing vehicle. Motorhomes typically include kitchen facilities, sleeping areas, storage, and sometimes even luxury features like full bathrooms and entertainment systems.

Motorhomes are categorized into several classes based on size, features, and functionality:

Class A Motorhome

The largest and most luxurious motorhome option.

  • Length: Up to 45 feet
  • Amenities: Full kitchen, bathroom, multiple sleeping areas, and spacious living quarters
  • Fuel Efficiency: Low, due to size and weight
  • Best for: Large families or full-time RV living
  • Identifiable by its large, boxy shape

Class A motorhomes are known for their residential-style comfort, but their size can make parking and maneuvering more challenging.

Class B Motorhome

The most compact motorhome, often called a camper van.

  • Length: 17-23 feet
  • Amenities: Small kitchen, bathroom (sometimes), and sleeping space for 1-2 people
  • Fuel Efficiency: High, compared to other motorhomes
  • Best for: Solo travelers or couples looking for a more mobile, fuel-efficient option
  • Identifiable by its van-like appearance

Class B motorhomes are perfect for those who prioritize maneuverability and ease of parking over space and luxury.

Class C Motorhome

A mid-sized option that balances comfort and convenience.

  • Length: 20-33 feet
  • Amenities: Larger kitchen, bathroom, multiple sleeping areas, and decent storage
  • Fuel Efficiency: Moderate, lighter than Class A but larger than Class B
  • Best for: Families or travelers needing more space but not wanting a massive RV
  • Identifiable by the cab-over bunk above the driver’s area

Class C motorhomes provide a good mix of space, comfort, and drivability, making them a popular choice among RVers.

Toy Hauler Motorhome

A motorhome with built-in garage space for recreational vehicles.

  • Features: Living area plus a rear garage for ATVs, motorcycles, or other gear
  • Versatility: The garage can double as additional sleeping space or a party deck
  • Best for: Outdoor enthusiasts who bring along adventure equipment
  • Identifiable by the rear ramp and garage area

Toy hauler motorhomes are ideal for travelers who want both luxury and functionality, allowing them to bring their favorite outdoor toys on the road.

Each motorhome class has its own advantages, so choosing the right one depends on your travel style, space requirements, and budget.

Is an RV the Same as a Motorhome? Understanding the Key Differences

The terms RV and motorhome are often used interchangeably, leading to some confusion for those new to recreational vehicles. However, there are key differences between the two.

What Is an RV?

An RV (Recreational Vehicle) is a broad term that includes both motorized and towable camping vehicles. This category encompasses a wide range of travel-friendly options, such as:

  • Motorhomes (Class A, B, and C) – Self-powered RVs with built-in living spaces.
  • Travel Trailers – Towable RVs that attach to a towing vehicle.
  • Fifth Wheels – Larger towable RVs requiring a special truck hitch.
  • Toy Haulers – RVs designed to carry recreational vehicles like ATVs or motorcycles.
  • Teardrop & Hybrid Trailers – Compact, lightweight options for easy towing.

Essentially, every motorhome is an RV, but not every RV is a motorhome.

What Is a Motorhome?

A motorhome is a type of self-contained, drivable RV that combines a living area with driving capabilities, eliminating the need for a separate towing vehicle. Motorhomes come in several different classes:

Class A Motorhome

  • Size: Up to 45 feet, offering the most space.
  • Amenities: Full kitchen, bathroom, multiple sleeping areas, and high-end features.
  • Best for: Full-time RV living or large families.
  • Fuel Efficiency: Low, due to size and weight.
  • Appearance: Large, bus-like structure.

Class B Motorhome (Camper Van)

  • Size: 17-23 feet, the most compact motorhome.
  • Amenities: Small kitchen, sometimes a bathroom, and space for 1-2 people.
  • Best for: Solo travelers or couples prioritizing mobility.
  • Fuel Efficiency: High, compared to other motorhomes.
  • Appearance: Looks like a van but converted into a livable space.

Class C Motorhome

  • Size: 20-33 feet, a mid-sized option between Class A and B.
  • Amenities: Larger kitchen, full bathroom, multiple sleeping areas.
  • Best for: Families or travelers needing more space without a massive RV.
  • Fuel Efficiency: Moderate.
  • Appearance: Identifiable by the cab-over bunk above the driver’s seat.

Toy Hauler Motorhome

  • Features: A motorhome that includes a built-in garage space for ATVs, motorcycles, or other equipment.
  • Versatility: The garage area can convert into a sleeping space or outdoor deck.
  • Best for: Outdoor enthusiasts who need to transport recreational gear.
  • Appearance: Recognizable by its rear ramp door and garage section.

Choosing Between an RV and a Motorhome

If you want a drivable unit, a motorhome is the best choice. If you prefer a towable option, then a travel trailer or fifth wheel might be better. Understanding these distinctions helps in selecting the right recreational vehicle for your lifestyle.

Exploring Trailer RVs: Types, Features, and Considerations

While motorhomes are a popular type of RV, trailers are also classified as RVs and offer many of the same comforts. The key difference is that trailers require a tow vehicle, such as a truck, SUV, or minivan, to transport them. If you’re considering a trailer RV, here are some common types and their unique features.

Travel Trailer

A travel trailer is one of the most versatile RV options. Designed to be towed by a pickup truck, SUV, or minivan, it typically includes:

  • A living area, kitchen, bedroom, and bathroom
  • Various floor plans and amenity packages
  • The ability to unhitch at the campsite, leaving your tow vehicle free for local travel

Most travel trailers cannot be occupied while being towed, though there are exceptions depending on local laws.

Teardrop Trailer

A teardrop trailer is an ultra-compact RV that can even be towed by a motorcycle. Key features include:

  • Room for one or two people
  • Minimal amenities, sometimes featuring an outdoor kitchen at the rear
  • Lightweight design, making it easy to tow and store

These small trailers are ideal for solo travelers or couples, but they lack the space for larger groups. Prices generally range from $8,000 to $15,000, depending on the model and features.

Hybrid Trailer

A hybrid trailer blends the comfort of a hard-sided RV with the camping experience of a tent. Features include:

  • Tent-style pop-outs that expand the sleeping space
  • Essential amenities like a fridge, sink, microwave, and storage
  • A lightweight structure, making it easier to tow than a full travel trailer

The downside? Noise insulation is minimal, meaning you’ll hear nearby campers, traffic, or nature sounds more than in a standard RV.

Fifth Wheel Trailer

A fifth wheel trailer is one of the most spacious and luxurious towable RV options. What sets it apart?

  • Hitches inside the truck bed (requires a special fifth-wheel coupling)
  • High-end amenities, including full kitchens, residential-style bathrooms, and even walk-in closets in some models
  • Multiple floor plans, offering a true home-on-wheels experience

Fifth wheels provide superior stability and space, making them a great choice for long-term travelers or full-time RVers.

Final Thoughts

Choosing the right RV comes down to your lifestyle, travel needs, and personal preferences. While motorhomes offer convenience with a built-in engine, trailers provide flexibility by allowing you to unhitch and use your tow vehicle separately.

Before purchasing any RV, research different models, compare floor plans and features, and test out options in person to find the perfect fit for you and your family. For more tips and in-depth RV reviews, explore the rest of our website!

Categories
Classes of RVs

Do Airstreams Have Washers and Dryers?

Airstreams are one of my favorite RV brands, and having an onboard washer and dryer would make them even more convenient. Curious about whether they come equipped with laundry facilities, I did some research—here’s what I found.

So, can Airstreams have washers and dryers? While Airstreams do not come with a built-in washer and dryer from the factory, you can install one yourself or have it professionally added through a customization service.

Although you won’t find an Airstream model that includes a washer and dryer straight off the production line, that doesn’t mean you’re stuck using laundromats on the road. There are ways to retrofit a washer into your Airstream, and for those who enjoy DIY projects, installing one yourself is also an option.

Airstreams and Laundry: Washers and Dryers Onboard

I’ve never been shy about my love for Airstreams. Their campers are some of the best in the industry, with a sleek, timeless design that turns heads at any RV park. While they come with a premium price tag, Airstreams are one of the best long-term value buys on the market.

But if only they came with a washer and dryer.

One common complaint about Airstreams is the lack of onboard laundry facilities. For weekend travelers, this may not be a big deal, but for full-time Airstream dwellers, the absence of a washer and dryer can be a real inconvenience.

Many larger RVs, like fifth wheels, often include washer and dryer hookups, but Airstreams simply don’t. So, what can you do instead? Fortunately, there are several alternatives. Let’s explore the options and weigh their pros and cons.

The Laundromat: A Convenient but Imperfect Solution

Laundromats might not be the most glamorous way to do laundry, but when you’re traveling in an Airstream without an onboard washer and dryer, they can be a lifesaver. They’re everywhere, relatively affordable, and—best of all—you can wash multiple loads at once and be done in a couple of hours.

Pros of Using a Laundromat

  • Widespread Availability – Even small towns tend to have at least one laundromat, making them a reliable option while on the road.
  • Fast and Efficient – With multiple machines available, you can wash and dry all your clothes simultaneously.
  • Budget-Friendly – Many laundromats charge as little as $5 per week for washing and drying. Some even provide free detergent.

Cons of Using a Laundromat

  • Cash or Coins Required – While many laundromats are moving toward card payments, some still only accept cash, and broken change machines can be a hassle.
  • Public Setting – Washing your clothes in a shared space means dealing with strangers, which isn’t always comfortable.
  • Waiting Around – If you leave your laundry unattended, someone might remove it to use the machine, forcing you to rewash or risk losing an item.

While laundromats aren’t perfect, they remain one of the most practical ways to do laundry while traveling in an Airstream. Just bring a book, some quarters (or a payment app), and a bit of patience!

Installing a Washer and Dryer in Your Airstream

If laundromats aren’t your style, installing a washer and dryer in your Airstream could be a game-changer. While this upgrade can be costly, it’s well worth it for those who prefer the convenience of doing laundry on the road.

Two Ways to Install a Washer and Dryer

  1. Hire a Professional – This is the safest and most reliable option. Airstream customization shops specialize in these kinds of upgrades, ensuring that your installation is both functional and aesthetically seamless. While not cheap, professional installation prevents costly mistakes and keeps your Airstream in pristine condition.
  2. DIY Installation – Unless you have experience in RV modifications, this can be a tricky and risky endeavor. Airstream interiors are uniquely designed, and improper installation could lead to structural or plumbing issues.

If you choose to go the professional route, specialty shops like Lithia.com offer high-quality installations, along with a range of other custom upgrades. You can also check with an Airstream dealership for recommendations on trusted customization services in your area.

Alternative Laundry Solutions for Airstream Owners

If traditional laundromats or built-in washer and dryer installations don’t suit your needs, there are still other ways to keep your clothes clean while on the road.

1. Portable Washing Machines

Small, plug-in washing machines are available and can handle light loads. While these units are convenient, they often receive mixed reviews due to limited capacity and lower cleaning efficiency. However, if you’re willing to run multiple small loads throughout the day, they can be a workable solution.

2. Hand-Washing

For those willing to put in the effort, washing clothes by hand in a basin or tub is an option. However, be prepared—it’s time-consuming and labor-intensive. Hand-washing large amounts of laundry can take hours and may lead to sore hands. While this method is practical in emergencies, it’s not the most efficient long-term solution.

3. Laundry Services

Another option is outsourcing your laundry to a professional service or a gig worker. Many local laundromats offer wash-and-fold services, and you can also find individuals willing to do your laundry through apps and websites that connect people with odd job workers. While this comes at a cost, it’s a hassle-free way to get your laundry done without lifting a finger.

Each of these options has its pros and cons, so choosing the right method depends on your budget, time, and convenience preferences.

Categories
Classes of RVs

Why Do RVs Have Generators?

If you’re new to RVing, one of the biggest adjustments is understanding how your vehicle gets power. Most of the time, that power comes from a generator.

RV generators serve two primary purposes:

  1. Charging the House Battery – The generator can replenish your RV’s house battery, ensuring you have stored power for later use.
  2. Providing Direct Power – The generator can supply 120V AC power directly to your RV’s outlets, allowing you to run appliances and electronics without relying on battery reserves.

These options give you flexibility—either use power freely while the generator is running or store energy for later use. However, charging the house battery with a generator takes time, as there is a limit to how much amperage it can provide.

To get the best performance, it’s essential to choose a generator that matches your RV’s power needs and to keep up with regular maintenance. A well-maintained generator ensures reliable power whether you’re camping off-grid or just need backup electricity.

Choosing the Right Generator for Your RV

Most RVs come equipped with built-in generators designed to match the vehicle’s power requirements. However, if you find yourself consuming more energy than your existing generator can handle—perhaps due to added appliances or extended off-grid use—you may need to invest in an additional or replacement generator.

When selecting a generator, consider both fuel type and size (power output). While fuel type affects convenience and efficiency, generator size is crucial to ensuring you have the right amperage to support your RV’s appliances without overloading the electrical system.

Determining the Right Generator Size

Generator size refers to its power output, measured in watts. Choosing the correct wattage is essential—too little power and your appliances won’t run, too much and you risk overloading your circuits.

To calculate the size you need:

  1. Identify power-hungry appliances – Add up the wattage of all 120V appliances in your RV.
  2. Factor in air conditioning – AC units require a significant surge of power when starting up. Include this startup wattage in your total.
  3. Find your minimum wattage – Your generator should be able to handle your total wattage needs at peak usage.

Most RVs require a generator in the 3,000 to 4,000-watt range, but this varies based on the number and type of appliances. If you’re unsure, check appliance labels or look up the model numbers online to find their power consumption.

Types of RV Generators

There are three primary types of RV generators, each with unique advantages and drawbacks:

Gas Generators
  • Pros: Readily available fuel, convenient to refill along with your RV’s gas tank.
  • Cons: Burns fuel quickly, runs hot, and is highly flammable—requiring careful handling. It is also the least eco-friendly option.
Diesel Generators
  • Pros: Ideal if your RV runs on diesel, as you can refuel both at once. More energy-efficient than gas, less flammable, and produces more power than propane.
  • Cons: Diesel fuel can be harder to find than gasoline. Diesel generators are also louder than gas or propane models.
Liquid Propane Generators
  • Pros: The most environmentally friendly option with excellent fuel storage capabilities. Propane does not degrade over time like gas or diesel.
  • Cons: Produces less power per gallon than gas or diesel, requiring frequent refueling. Propane refilling stations can also be harder to locate.

Choosing the Best Generator for Your Needs

If you’re replacing an existing generator, it’s usually best to stick with the same fuel type your RV was designed for. However, if you’re installing a new generator or upgrading, consider factors like fuel availability, efficiency, and environmental impact.

By selecting the right generator and maintaining it properly, you’ll ensure your RV has reliable power for all your adventures—whether you’re parked at a campsite or exploring off-grid destinations.

Generator Maintenance: Keeping Your Power Source Reliable

Whether your generator is brand new or has been running for years, proper maintenance is key to ensuring it stays in good working condition. One of the most important aspects of generator upkeep is regular use—otherwise, it can start to develop performance issues.

Why Regular Use Matters

Generators need to be “exercised” to maintain efficiency. If left idle for too long, fuel inside the system can begin to separate, leading to buildup that affects performance. This can cause the generator to run inconsistently, surging between high and low RPMs as it struggles to stabilize power output.

These issues can start after just a month of inactivity, so it’s important to schedule a maintenance run at least once a month. Running the generator for a few hours helps keep the internal components lubricated and prevents fuel-related problems.

Winter Maintenance Tips

Cold weather makes generators even more vulnerable to performance issues. During the winter, when generators are used less frequently, fuel separation and system strain become more common. To counteract this:

  • Run the generator monthly, even if you aren’t using the RV.
  • Turn on a few appliances in the RV while running the generator to ensure it’s producing stable power.
  • Check coolant levels, as extreme temperatures can affect performance.

When to Seek Professional Help

If your generator is making unusual noises, struggling to start, or failing to provide consistent power, it may need professional attention. In these cases, take it to an RV mechanic or dealership for a thorough inspection.

By keeping up with regular maintenance, you’ll extend the lifespan of your generator and ensure reliable power whenever you hit the road.

Categories
Classes of RVs

Are Safety Chains Required for Fifth Wheels?

If you’ve ever towed a traditional travel trailer, you know that safety chains are a must when using a ball hitch. But when it comes to fifth wheels, the rules are a little different.

So, do fifth wheels require safety chains? No, they don’t. Unlike ball hitch trailers, fifth wheels use a kingpin and fifth-wheel hitch, similar to the system used by semi-trucks. This locking mechanism provides a secure connection, eliminating the need for safety chains.

While fifth wheels are designed for stability and security, other types of trailers—such as bumper-pull travel trailers—do require safety chains. Understanding the differences between these towing setups can help ensure you’re following the correct safety guidelines for your RV.

Why Fifth Wheels Don’t Need Safety Chains

Fifth wheels use a specialized hitching system that sets them apart from traditional ball hitch trailers. Interestingly, the name “fifth wheel” has nothing to do with the number of tires on the vehicle—it’s actually a reference to the unique hitch design.

The fifth-wheel hitch consists of two main components:

  • The cargo attachment – This is mounted in the truck bed and features a large, U-shaped coupling mechanism.
  • The gooseneck hitch – Extending from underneath the front of the fifth wheel, this connects to the cargo attachment.

These two components are secured by a kingpin, which locks into place to hold everything together. Though it may seem like a small piece of metal, this kingpin system is the same one used in semi-trucks, making it incredibly strong and reliable.

Because of this secure locking system, safety chains are unnecessary for fifth wheels. In contrast, trailers with ball hitches require safety chains as an additional security measure to prevent detachment.

Another advantage of the fifth-wheel hitch design is its greater range of motion. Safety chains on ball hitches can restrict turning angles, sometimes limiting maneuverability. Since fifth wheels don’t use safety chains, they can pivot more freely, allowing for sharper turns, better weight distribution, and a smoother towing experience.

Understanding Safety Chains and Their Role in Towing

Safety chains are exactly what they sound like—durable metal chains designed to provide an extra layer of security when towing an RV. These thick, heavy-duty chains connect the RV to the towing vehicle, ensuring that the trailer remains attached in case the primary hitch fails.

Safety chains are most commonly used with ball hitches, which rely on a simple coupling mechanism. A ball hitch consists of a round metal ball mounted on the back bumper of a truck, which fits into a socket-like coupler on the RV’s hitch. While this setup allows for flexibility in movement, it also comes with a risk—if the coupler isn’t secured properly or if lubrication on the hitch ball causes slipping, the trailer could detach while driving.

This is where safety chains come in. They act as a fail-safe, preventing the trailer from completely separating from the tow vehicle if the hitch fails. Without safety chains, an unsecured trailer could swing wildly, posing a danger to both the driver and other motorists on the road.

Safety chains are attached from the trailer’s front end to designated points on the tow vehicle’s bumper or hitch. Some chains include an additional L-shaped metal bracket that hooks into the RV’s bumper before connecting to the hitch. The chains are then secured with hooks that lock them into place.

Understanding the function of safety chains also highlights a key difference between traditional travel trailers and fifth wheels. Unlike ball hitches, which rest on top of the tow vehicle’s hitch ball, fifth wheel hitches use a locking kingpin system similar to those found on semi-trucks. This secure connection eliminates the need for safety chains since the hitch components are designed to interlock firmly rather than simply rest together.

For anyone towing with a ball hitch, safety chains are a must-have. However, if you’re using a fifth wheel, you can rest easy knowing that your hitch setup is already designed for maximum security without the need for additional chains.

When Are Safety Chains Required?

Now that we’ve established that fifth wheels don’t require safety chains, let’s talk about when they are necessary.

Safety chains are required for any towed RV, trailer, or vehicle that doesn’t use a fifth wheel or big-rig-style hitch. This includes most conventional travel trailers, camping trailers, horse trailers, toy haulers, and even small utility trailers designed to carry ATVs or other equipment. If the trailer connects to the tow vehicle using a ball hitch (also known as a bumper hitch or trailer hitch), safety chains are a must.

It’s important to use safety chains every time you tow, regardless of distance. Whether you’re heading across the country or just driving a few blocks, properly securing your trailer with safety chains can prevent serious accidents. Even a short trip without them could result in a runaway trailer, risking damage to your vehicle, other drivers, or property.

In short, if your RV or trailer relies on a ball hitch, always use safety chains. It’s a simple step that provides crucial backup in case of an unexpected hitch failure.

Categories
Classes of RVs

Are Motorhomes Hard to Drive?

If you’re considering purchasing a motorhome, one of your biggest concerns is likely whether it will be difficult to drive. This is a common question, and after doing some research, I found some helpful insights.

The good news? Motorhomes aren’t as hard to drive as you might think. Their increasing popularity proves that many people feel comfortable behind the wheel with a little practice. While size does impact maneuverability, basic driving skills and common-sense techniques can make handling a motorhome much easier.

That said, different factors influence the driving experience. Newer drivers may feel more comfortable starting with a smaller model, while those with more experience might be confident driving larger motorhomes. With time and practice, anyone can learn to drive one smoothly!

Challenges of Driving a Motorhome

While motorhomes are generally easier to drive than many people expect—especially with modern features like backup and side-view cameras—certain factors can make them more challenging to handle.

1. Large Size and Turning Radius

Longer motorhomes require extra caution when making turns. If you’re not accustomed to driving large vehicles like buses or semi-trucks, you’ll need to practice making wide turns to avoid clipping curbs or other vehicles. Attempting a U-turn in a motorhome is usually a bad idea—most models simply don’t have the turning capability to make it safely.

2. Heavy Weight and Braking Distance

Motorhomes weigh significantly more than standard cars or SUVs, and their weight is distributed differently. This makes them harder to stop quickly, especially in emergencies. Always maintain extra following distance and anticipate braking sooner than you would in a smaller vehicle.

3. Bridge Clearance and Height Awareness

Unlike standard cars, motorhomes require you to be constantly aware of overhead clearance. Low bridges, drive-thrus, and parking structures can be serious hazards if you’re not paying attention to height restrictions.

4. Wind Resistance and Handling

Larger motorhomes are more affected by strong crosswinds on highways. Sudden gusts can make steering more difficult, so keeping both hands firmly on the wheel and reducing speed in high winds is essential.

5. Defensive Driving is Key

If you have a compact motorhome, handling will likely be easier. However, no matter the size, practicing defensive driving techniques—such as maintaining a safe following distance, using mirrors effectively, and staying aware of blind spots—will make your driving experience much smoother and safer.

Which Motorhomes Are the Easiest to Drive?

Choosing the right motorhome depends on your driving comfort level. While Class A and Class C motorhomes offer spacious living, they can be challenging to maneuver. If ease of driving is your top priority, Class B motorhomes are the best option.

Class B Motorhomes: The Easiest to Drive

Class B motorhomes, also known as camper vans, are compact and drive similarly to SUVs or trucks. They are incredibly easy to set up and are perfect for one or two travelers. Despite their smaller size, they include all essential amenities for short trips and quick getaways.

However, limited space makes Class B motorhomes less ideal for families or long-haul journeys. Storage is minimal, and fitting more than two passengers comfortably can be difficult.

Class C Motorhomes: A Balance of Space and Maneuverability

If you need more space but still want a manageable driving experience, a Class C motorhome might be the right fit. Ranging from 20 to 33 feet, Class C motorhomes offer enough room for families while being easier to drive and maintain than Class A models. They are fully self-contained with essential amenities, making them great for extended trips.

However, they can still be challenging to drive compared to smaller vehicles. They are also harder to use for everyday errands unless you tow a secondary vehicle.

Experience Matters

Ultimately, the easiest motorhome to drive depends on your level of experience. A Class B motorhome is the most beginner-friendly, but if you’re comfortable handling larger vehicles, a Class C might be a great choice. When choosing a motorhome, consider your travel needs, comfort level, and ability to maneuver different sizes to find the best fit.

Key Differences Between Driving a Car and a Motorhome

If you’re accustomed to driving a car, you might assume transitioning to a motorhome will be seamless. However, several crucial differences can impact your driving experience. To ensure your safety—and that of others on the road—here are the key distinctions to keep in mind before hitting the highway.

  • Limited Road View – Unlike a car, a motorhome has significant blind spots, and you won’t have a clear view of what’s immediately in front of you. Always stay vigilant and be mindful of your surroundings.
  • Wide Turning Radius – Motorhomes are significantly longer than cars, making cornering more challenging. Keep in mind that most motorhomes have a tail swing of about 2 to 2.5 feet, requiring extra space for turns.
  • Frequent Refueling – Motorhomes consume more fuel than standard vehicles, meaning you’ll need to stop for gas more often. Always refuel at stations designed for large vehicles to avoid clearance issues or damage.
  • Speed Restrictions – Many highways impose lower speed limits for larger vehicles. Pay attention to road signs and research local regulations to ensure compliance.
  • Road Width Challenges – Some highways, especially those under construction, narrow to the legal minimum width of 8 feet 6 inches. If your motorhome is near this width, be extra cautious and drive in the right lane when possible.
  • Basic On-the-Go Repairs – Unlike luxury vehicles, minor motorhome repairs often require DIY fixes, such as duct tape for temporary headlight patches or pop rivets for loose parts. For serious issues, consult a professional.
  • Right-of-Way Considerations – Legally, larger vehicles often have the right of way, but this doesn’t mean you should take unnecessary risks. Always drive defensively and respect other motorists.
  • Proper Stop Sign Positioning – When stopping at intersections, ensure the painted stop line is still visible in front of your vehicle. This allows other drivers to maneuver safely around you.
  • Steering Stability – Looking too close to the front of your motorhome while driving can make it feel unsteady. Instead, focus farther down the road to maintain smooth control of the steering wheel.
  • Frequent Rest Stops – While motorhome passengers can move around more freely, regular breaks are essential. Stopping for fresh air helps maintain driver alertness and overall road safety.

By understanding these differences, you can confidently navigate the roads in your motorhome and enjoy your journey with peace of mind.

Essential Motorhome Driving Tips

Even if you’re new to driving a motorhome, many of the fundamental skills you use in a car still apply. However, handling a large RV—especially in crowded city streets or winding mountain roads—requires extra caution and awareness. Here are some key motorhome driving tips to ensure a smooth and safe journey.

  • Stay Aware of Your Surroundings – According to the DMV, motorhomes are often easiest to handle on open highways. The real challenge comes when maneuvering through city streets or rugged terrain, where tight spaces and blind spots become more apparent. Always stay alert, especially in areas with limited visibility.
  • Avoid Backing Up Whenever Possible – Motorhomes have significant blind spots, making reversing a risky maneuver. To minimize the need for backing up, park in spots where you can pull forward when leaving.
  • Maintain a Safe Following Distance – Larger vehicles take longer to stop. To avoid rear-end collisions, always leave ample space between your motorhome and the vehicle ahead of you.
  • Be Prepared for Sudden Stops – Unlike passenger cars, motorhomes require extra time and distance to come to a complete stop. Stay vigilant, anticipate traffic flow, and be ready to brake if needed.
  • Consider Traveling in a Caravan – If you’re traveling with fellow RV owners, grouping together can enhance visibility and make other drivers more cautious. However, always remain attentive to surrounding traffic, as some drivers may still be aggressive.
  • Be Mindful of Wind Conditions – High winds can significantly impact a motorhome’s stability, especially at higher speeds. Drive cautiously, maintain a firm grip on the wheel, and reduce speed when necessary.
  • Know Your Motorhome’s Height Clearance – Bridges, overpasses, and tunnels that easily accommodate cars may be too low for your RV. Always check height restrictions before passing through unfamiliar areas.
  • Control Your Speed on Downhills – Motorhomes pick up speed faster on declines than smaller vehicles. Monitor your speed and use engine braking to maintain control.
  • Minimize Distractions – Passengers may be engaged in activities like watching TV, cooking, or playing games. While these may not seem distracting in a home setting, they can divert your attention on the road. Stay focused and prioritize safe driving.
  • Practice Courteous Driving – Not all motorists will be considerate toward larger vehicles, but you can set the example by driving responsibly and allowing faster traffic to pass when possible.

By following these essential tips, you’ll improve your confidence behind the wheel and ensure a safer, more enjoyable journey in your motorhome.

Categories
Classes of RVs

9 Great Campers You Can Tow With a Car

Camping is an incredible way to connect with nature and explore new places, but finding the right camper—especially one that can be towed with a car—can be a challenge. To make things easier, I’ve researched nine great campers that are lightweight and perfect for car towing.

Unlike larger RVs and trailers that require a truck for towing, these compact campers, often referred to as teardrop campers, are designed for ease and convenience. Their small size makes them lightweight, fuel-efficient, and easy to maneuver, while still offering great features for comfortable travel. With the tiny living trend on the rise, teardrop campers have become more popular than ever, offering a perfect blend of mobility, functionality, and adventure.

9 Campers You Can Tow with a Car

If you’re looking for a lightweight camper that doesn’t require a truck to tow, these models are perfect for you. Each of these compact, road-trip-ready campers can be easily towed by a car, making them ideal for spontaneous getaways and outdoor adventures.

1. Aluminum Teardrop Trailer

This retro-style teardrop camper is a favorite among travelers who love a classic aesthetic with modern functionality. Designed in Portland, Oregon, this model features:

  • A cozy sleeping cabin in the front
  • A compact rear kitchen equipped with drawers, a burner, and a cooler

Its sleek aluminum exterior not only looks stylish but also makes it lightweight and easy to tow.

Starting Price: $16,350

2. Luna Trailer

The Luna Trailer is a stylish and versatile teardrop camper, available in three different models:

  • Luna (standard model)
  • Luna Lite (lighter and more budget-friendly)
  • Luna Rova (built for off-road adventures)

Price: Starts at $16,537, with upgrades available up to $19,000

Features & Highlights:

  • Lightweight design (weighing between 1,400–1,800 lbs.) – easily towed by a large sedan or small SUV
  • Tempered glass panoramic window for stunning outdoor views
  • Convertible interior – transforms from a large bed for two into a futon sofa with built-in cupholders

The Luna Trailer is perfect for campers looking for comfort, style, and flexibility on the road!

3. Hutte Hut Trailer

The Hutte Hut Trailer is a high-end, beautifully crafted teardrop camper with a yacht-like aesthetic. First launched in 2015, this luxury camper is designed for those who appreciate sleek craftsmanship and natural light.

Price: $63,900 – one of the most expensive teardrop campers on the market

Features & Highlights:

  • Lightweight – weighing only 850 lbs., it can be towed by most vehicles
  • Elegant, open design – features double doors, expansive windows, bowed trusses, and a sun canopy for a bright, airy feel
  • Spacious sleeping area – comfortably accommodates two people

No built-in kitchen – unlike other teardrop campers, the Hütte Hut is purely designed for sleeping and relaxing, making it ideal for minimalists who prefer outdoor cooking.

4. Pika Trailer

The Pika Trailer is a compact yet functional teardrop camper designed for solo travelers or couples. With a starting price of $11,750, it falls on the higher end for its size but offers impressive features.

Price: Starts at $11,750
Length: 12 feet – smaller than a typical teardrop camper, yet well-designed for maximizing space

Features & Highlights:

  • Compact yet spacious – smart design makes the interior feel roomier than expected
  • Ideal for one or two travelers – a cozy space that doesn’t feel cramped
  • Comfortable sleeping area – includes thoughtful features for added convenience

Despite its small footprint, the Pika Trailer delivers a practical and comfortable camping experience, perfect for those who love adventure without the hassle of towing a large camper.

5. Little Guy Max Camper

The Little Guy Max is a modern take on the classic teardrop camper, offering spaciousness and comfort in a compact design.

Price: Starts at $33,000
Interior Height: 6 feet 7 inches – allows for comfortable standing space

Sleeping & Interior Features:

  • Two sleeping areas – accommodates up to three people in each space
  • Ideal for small families – perfect for two adults and a child
  • Choice of finishes – available in light maple or dark walnut

Kitchen & Storage:

Fully equipped kitchen – includes a microwave, two-burner stove, fridge, sink, and a floor-to-ceiling pantry
Extra storage – built-in cubbies help keep essentials organized

Additional Features:

Stereo system for entertainment
LED lighting for a modern touch

With its blend of style, functionality, and space efficiency, the Little Guy Max is a great option for travelers looking for comfort on the road without the bulk of a full-size RV.

6. Runaway Camper

If you’re looking for a budget-friendly camper that covers all the basics, the Runaway Camper is an excellent choice.

Price:

  • Base model: $2,495
  • Upgraded version: $3,495 (includes navigator, A/C, cargo rack, LED taillights, and a mounted spare tire)

Key Features:

  • No-frills, functional design – focuses on affordability and practicality rather than style
  • More interior space – Unlike traditional teardrop campers, it lacks a sloping roof, creating extra headroom
  • Lightweight – Similar in weight to a standard teardrop camper, making it easy to tow

While it may not have the sleek design or high-end features of some competitors, the Runaway Camper delivers on simplicity and value, making it a great option for budget-conscious travelers.

7. Extreme Tears

For off-road enthusiasts, the Extreme Tears XTR is one of the best rugged teardrop campers on the market today. Based in Michigan, this camper is built to withstand the toughest terrains while still offering functionality and comfort.

Price:

  • Base model starts at $7,995
  • Customizable upgrades available

Key Features:

  • Heavy-duty, off-road design – built for durability and adventure
  • Smooth ride & stability – Torflex axles help absorb bumps on rough terrain
  • Protective build:
    • EZ Lube hubs for easy maintenance
    • Black bed liner-coated frames for added toughness
    • Aluminum diamond-plated stone guard for front-end protection
  • Quality construction:
    • 7-ply birch floor and walls
    • Steel tube framing for enhanced durability
    • Aluminum siding and roof for a sleek yet strong finish
  • Comfortable interior:
    • Cabin insulation to regulate temperature
    • Option to add an entertainment system or a stereo setup

The Extreme Tears XTR is a perfect match for those who love adventure, durability, and customization, making it an ideal off-road camper for thrill-seekers.

8. Oregon Trail’R

The Oregon Trail’R is a popular teardrop camper known for its modern design and durability. This model comes in three variations, each catering to different needs and preferences:

Do-Drop – Compact & Budget-Friendly

  • The smallest and most affordable of the three models
  • Lightweight & compact – easy to tow with most cars
  • Ideal for hunters, fishermen, or solo travelers who need a simple, no-fuss camper

FronTear – Classic & Customizable

  • A sleek, stylish take on the traditional teardrop camper
  • Fully customizable to fit your personal camping style

Weight:

  • Basic model: 1,000 lbs (easily towable by most cars)
  • Advanced model: 1,300 lbs (may require a more powerful car)

TerraDrop – Rugged & Spacious

  • A sturdier, off-road-ready version of the FronTear
  • Built to handle rough terrains with ease
  • Same size as the FronTear, but offers more interior space

Whether you’re looking for a lightweight budget camper, a customizable classic, or a rugged off-road model, the Oregon Trail’R lineup offers something for everyone!

9. Retro Camper – Vintage Charm Meets Modern Convenience

If you love classic aesthetics, the Retro Camper is the perfect teardrop trailer for you! Weighing under 1,000 lbs, it’s lightweight and easy to tow with almost any car, making it a great companion for road trips and outdoor adventures.

Key Features:

  • Compact yet spacious – ideal for solo travelers or couples
  • Kitchen area for meal prep on the go
  • Queen-sized sleeping space for a comfortable night’s rest
  • Ample storage for your gear and essentials

Optional Upgrades:

  • Awning over the hatchback for extra shade
  • Portable water tank for added convenience

Base price: $13,000 (Upgrades available at an additional cost)

This retro-style camper combines nostalgia with practicality, making it a stylish and functional choice for your next adventure!

What Is a Teardrop Camper?

A teardrop camper is a compact, lightweight version of a traditional travel trailer. It gets its name from its distinctive teardrop shape, which enhances aerodynamics while maintaining a cozy, functional design.

Despite their small size, most teardrop campers feature:

  • A sleeping area for two adults
  • A small kitchen space, typically accessible from the rear

A Brief History

Teardrop campers became incredibly popular in the 1930s, thanks to magazine features highlighting their:

  1. Efficient use of space
  2. Lightweight design, making them easy to tow
  3. Compatibility with smaller, less powerful cars

Why Are Teardrop Campers Still Popular?

  • Fuel Efficiency – Lighter weight means less fuel consumption, making them a great eco-friendly option
  • Easy Towing – Most models weigh under 1,000 lbs, so a mid-sized family car can tow them effortlessly
  • Perfect for Nature Getaways – Great for quick trips, camping adventures, and off-grid travel

For those who want a minimalist, fuel-efficient, and easy-to-maneuver camper, a teardrop trailer is an excellent choice!

Why Choose a Teardrop Camper?

Teardrop campers continue to grow in popularity for several reasons. Here’s why they’re a great choice:

  • More Affordable Than an RV – A budget-friendly option without sacrificing comfort
  • Economical & Fuel-Efficient – Their lightweight design helps you save on gas
  • Sleek & Stylish – Their retro-modern look turns heads on the road
  • Encourages a Minimalist Lifestyle – Perfect for those who love simplicity and adventure
  • Compact & Convenient – Easy to tow, park, and store
  • Comfortable & Functional – Thoughtfully designed sleeping and kitchen spaces
  • Off-Road Capabilities – Some models are built for rugged terrain
  • Durable & Long-Lasting – Designed to withstand years of travel and adventure

If you’re looking for a versatile, stylish, and cost-effective way to explore the outdoors, a teardrop camper is a fantastic investment!

1. More Affordable Than an RV

Teardrop campers are a budget-friendly alternative to traditional RVs. Some models even come in DIY kits, allowing owners to assemble them, which is perfect for those who enjoy a hands-on approach.

With prices starting as low as $3,000, teardrop campers provide an affordable way to experience life on the road—whether for weekend getaways or long-term adventures.

2. Fuel-Efficient and Eco-Friendly

Teardrop campers are lightweight and don’t require a powerful vehicle to tow them—most cars can handle the job with ease.

Their compact size means they have minimal impact on fuel efficiency, making them a more environmentally friendly alternative to traditional RVs. If you’re mindful of your carbon footprint, a teardrop camper is a great choice for reducing fuel consumption while still enjoying the open road.

3. Stylish and Eye-Catching

Teardrop campers aren’t just practical—they’re also incredibly stylish. Their sleek, curved design gives them a unique, elegant appeal that stands out on the road or at the campsite.

Many models feature beautifully varnished wood or polished aluminum exteriors, adding a touch of vintage charm. If you love a camper that turns heads while being functional, a teardrop is the perfect choice.

4. Encourages a Minimalist Lifestyle

Teardrop campers are designed with simplicity in mind, featuring a cozy sleeping area inside the cabin and a compact kitchen space at the rear. This basic yet functional setup provides the essentials for comfort while keeping you connected to nature.

Their small size naturally encourages a minimalist lifestyle—packing light, staying organized, and embracing the freedom of a clutter-free adventure.

5. They Offer Unmatched Convenience

Teardrop campers strike the perfect balance between outdoor adventure and home-like comfort. For those who love nature but struggle with sleeping on the hard ground, these campers provide a cozy, elevated sleeping space while maintaining a close-to-nature experience.

Additionally, their compact size and customizable features make them incredibly versatile. Whether you’re adding personal touches or taking them off the beaten path, teardrop campers allow you to explore beyond traditional campgrounds with ease.

6. They Offer Unmatched Convenience

Teardrop campers strike the perfect balance between outdoor adventure and home-like comfort. For those who love nature but struggle with sleeping on the hard ground, these campers provide a cozy, elevated sleeping space while maintaining a close-to-nature experience.

Additionally, their compact size and customizable features make them incredibly versatile. Whether you’re adding personal touches or taking them off the beaten path, teardrop campers allow you to explore beyond traditional campgrounds with ease.

7. Some Models Are Built for Off-Roading

For adventure seekers who love off-roading, certain teardrop campers are designed to handle rugged terrain. Many models can be upgraded with increased ground clearance, reinforced frames, and heavy-duty tires to tackle rough trails with ease.

If you have an off-road-capable vehicle, pairing it with a durable teardrop camper means you can take your adventures to remote locations that larger RVs simply can’t reach.

8. Built for Longevity

Teardrop campers are crafted with durability in mind, often by small businesses with years of expertise in designing high-quality models. With proper care, these campers can last a lifetime, accompanying you on countless adventures.

Many models come with premium features, such as:

  • LED reading lights for nighttime comfort
  • Multi-speed fans to keep air circulating
  • Dual USB ports for convenient charging
  • Cargo-net storage for extra organization
  • Additional sliding windows for better ventilation
  • Dual access doors for easy entry and exit

Even with their compact design, teardrop campers are thoughtfully structured to maximize space, ensuring a cozy yet open feel inside.

Categories
Fifth Wheels

Is There an Airstream Fifth Wheel?

Imagine combining the iconic style and luxury of an Airstream with the size and spacious floor plan of a fifth wheel. Sounds like the ultimate RV, right? I had the same thought, so I did some digging to find out if Airstream manufactures a fifth-wheel model.

Does Airstream Make a Fifth Wheel?

No, Airstream does not produce a fifth-wheel model. While a few owners have attempted to convert their Airstreams into fifth wheels, these modifications are extremely rare. You’re unlikely to find a factory-made Airstream fifth wheel on the market.

That said, bigger doesn’t always mean better. Airstreams may not be as large as traditional fifth wheels, but their timeless design, smart layouts, and premium quality make them some of the best travel trailers available. If you’re looking for style, durability, and efficiency, an Airstream is still one of the top choices for RV enthusiasts.

Fifth Wheel vs. Airstream: What’s the Difference?

If you’ve spent any time researching travel trailers, you’ve probably come across two popular options: Airstreams and fifth wheels. While both are great for road-tripping and full-time RV living, they have key differences that set them apart.

What is an Airstream?

Airstream is both a brand name and the term used for their iconic aluminum travel trailers. Founded in the 1930s, Airstream has become an American classic, known for its sleek, aerodynamic design and high-quality craftsmanship.

Most Airstreams range from 16 to 30 feet in length, with the average model around 28 feet. Their polished aluminum exterior has earned them the nickname “silver bullets,” a look that reflects a vintage, almost futuristic design straight out of 1940s sci-fi dreams.

What is a Fifth Wheel?

Fifth wheels, in contrast, are produced by multiple manufacturers and come in a wide variety of layouts, styles, and finishes. Unlike Airstreams, which share a uniform aesthetic, fifth wheels can look vastly different from one another, offering more customization and diverse floor plans.

The most significant difference between the two is size. While Airstreams rarely exceed 30 feet, fifth wheels can be 45 feet or longer, making them closer to a home on wheels than a standard travel trailer.

Which One is the Better Option?

If you’re looking for maximum space, residential-style living, and slide-outs, a fifth wheel may be the better fit. However, if you want a durable, aerodynamic, and stylish travel trailer with timeless appeal, Airstreams remain the luxury kings of the highway.

Converted Airstreams: A Rare Sight

While it’s technically possible to convert an Airstream into a fifth wheel, it’s an extremely rare modification. In fact, there are likely fewer than a hundred of these conversions in existence.

The reason? The process is long, difficult, and often decreases the value of the Airstream rather than enhancing it.

What Does an Airstream-to-Fifth-Wheel Conversion Involve?

  1. Structural Modifications – The lower half of the Airstream must be cut and extended by about 15 feet to match the size of a typical fifth wheel.
  2. Utility Extensions – Water, electricity, heating, and air conditioning systems must be reconfigured to serve the newly expanded space.
  3. Interior Refinishing – Floors, furniture, and appliances need to be added strategically to maintain the Airstream’s signature aesthetic.

Is It Worth It?

Most Airstream enthusiasts agree that keeping the trailer in its original condition is the best approach. Airstreams hold their value and charm far better when they remain unmodified.

For those considering a conversion, be prepared for a long, expensive project—one that might not turn out as expected.

The Curious Case of the Argosy: A Forgotten Airstream Legacy

In the 1970s, Airstream launched a separate line of travel trailers under the name Argosy. These trailers shared many of the same features and craftsmanship as classic Airstream models but lacked the iconic polished aluminum exterior. Instead, they featured a painted finish, setting them apart visually.

Argosy: The “Everyman’s Airstream”

Marketed as a more affordable alternative to traditional Airstreams, Argosy trailers saw moderate success. Originally advertised as “almost an Airstream,” these trailers have since gained a unique identity of their own.

However, the fuel crisis of the late 1970s forced the Argosy line to shut down. A brief revival from 1986 to 1989 saw the introduction of a fifth-wheel model—but with a major design departure.

The “Squarestream” Fifth Wheel

Unlike Airstream’s signature rounded, aerodynamic shape, the Argosy fifth wheel featured a boxy, squared-off exterior. This unconventional design made it stand out, and while it wasn’t wildly popular at the time, it has since developed a cult following.

Nicknamed the “Squarestream,” this rare fifth wheel maintained Airstream’s high-quality construction but with a distinct look. Its beige exterior and bold red racing stripe gave it a sporty, almost California beach vibe, perfect for adventurers who wanted something different.

A Rare Find

Argosy fifth wheels are exceptionally rare, with some estimates suggesting that only 125 were ever made. Finding one today is a challenge, but for enthusiasts, Argosy remains a fascinating and often overlooked chapter in Airstream’s history.

Why Choose an Airstream?

There’s a common saying that bigger is better—so if fifth wheels offer more space, why would anyone opt for an Airstream instead?

No doubt, fifth wheels can be stunning, and if maximum living space is your priority, they may be the best option. However, their sheer size presents challenges. Navigating tight campgrounds, maneuvering through rough terrain, and finding affordable RV parking can all be major headaches.

In contrast, Airstreams are lighter, more agile, and easier to tow. While hauling any trailer up a steep incline is a challenge, an Airstream offers far more stability and control than a massive fifth wheel, reducing the risk of getting stuck or losing traction.

Beyond practicality, Airstreams set the gold standard for luxury in the travel trailer world. Their timeless design, high-quality craftsmanship, and smart layouts make them a favorite among travelers. I’ve rarely heard of anyone regretting their Airstream purchase—because they get it right.

And let’s be honest: they just look incredible. That sleek, polished aluminum exterior? Iconic. The legendary Silver Bullet design? Unmatched. In my opinion, Airstreams aren’t just trailers—they’re kings of the road.

Why Doesn’t Airstream Make a Fifth Wheel?

It’s hard to say exactly why Airstream has never ventured into the fifth wheel market, especially given the brand’s devoted following and reputation for exceptional craftsmanship. There’s little doubt that an Airstream fifth wheel would be a high-quality, in-demand product.

One major factor is Airstream’s commitment to its original design philosophy. Since its founding by Wally Byam, Airstream has remained loyal to its iconic aerodynamic shape, refining materials and craftsmanship while keeping the core design largely unchanged.

For many RV enthusiasts, the idea of an Airstream fifth wheel is a dream—a perfect combination of Airstream’s signature luxury with the spaciousness of a fifth wheel. While Airstream has yet to introduce such a model, that hasn’t stopped countless fans from holding out hope that one day, they just might.

Categories
Classes of RVs

Why Are They Called Fifth Wheels?

With so many different types of RVs—motorhomes, travel trailers, campers, and fifth wheels—you might wonder where all these names come from. As an RV enthusiast, I’ve done plenty of research on the topic, and here’s what I’ve found about fifth wheels.

So, why are they called fifth wheels? The term “fifth wheel” comes from the unique hitching system used to connect the trailer to a tow vehicle. This U-shaped coupling mechanism, mounted in the bed of a pickup truck, is a modern version of the fifth-wheel coupling that was originally used on horse-drawn carriages.

But there’s a lot more to fifth wheels and their hitching systems than just a name. Let’s dive deeper into what makes them unique and why they remain a popular choice for RVers.

The Origins of Fifth Wheels

Believe it or not, fifth wheel RVs have been around for quite a while—at least in concept. The name “fifth wheel” actually comes from the type of hitching system used to attach the trailer to a truck. But don’t confuse it with a gooseneck hitch—they aren’t the same thing (more on that in the next section).

The original fifth-wheel hitch dates back to horse-drawn carriages. Early versions featured a horizontal wheel or circular plate that allowed the front axle to pivot independently, making the carriage easier to steer. While horse-drawn carriages have faded into history (unless you’re in a Hallmark movie), the hitching system has stood the test of time.

How Fifth Wheel Hitches Work

Modern fifth wheel hitches work similarly, but instead of a circular wheel, they feature a U-shaped coupling mechanism. Unlike standard hitches that attach to the rear of a vehicle, a fifth wheel hitch is mounted inside the bed of a truck, with the RV hitch connecting from above.

This design offers key advantages:

  • Better Stability – Reduces swaying while towing
  • Easier Hookup – Simplifies the hitching process compared to bumper-pull trailers
  • Stronger Towing Capacity – Allows for larger, heavier RVs

Fifth Wheel Size & Luxury

Fifth wheels are some of the largest and most luxurious RVs available. These aren’t the kind of trailers you impulsively buy for a weekend getaway. They’re big, heavy, and built for comfort.

  • Average Length: ~30 feet (can range up to 40+ feet)
  • Interior Features: Full-size kitchen, armchairs, dressers, king-size beds, and more
  • Price Range: Starts around $50,000, with high-end models exceeding $150,000

For those willing to invest, fifth wheels offer the ultimate travel experience—but with size and luxury comes a higher price tag and greater towing responsibility.

Are Fifth Wheels Safe?

When towing a 10,000-pound RV (not including personal belongings, water, and supplies), safety is a top priority. Thankfully, fifth wheels are one of the safest RV types, thanks to their hitching system and weight distribution.

Why Fifth Wheels Are Safer Than Traditional Trailers

The gooseneck hitch plays a significant role in reducing trailer sway. Unlike a ball hitch, which connects at a low pivot point near the bumper, a gooseneck hitch attaches higher up in the truck bed, closer to the center of gravity of both the truck and the trailer. This higher connection provides better weight distribution and stability, making it easier to control your RV—especially when dealing with windy conditions, sharp turns, or sudden stops.

In contrast, ball hitches often require safety chains to help stabilize the trailer and prevent excessive swaying. However, these chains also limit the turning radius, making maneuvering more difficult. The gooseneck hitch, on the other hand, doesn’t need safety chains, allowing for smoother turns and better overall control. Additionally, since the gooseneck hitch is positioned higher, it resists wind gusts more effectively, making it less likely for the trailer to sway or lose stability.

Truck Strength Matters

While the hitch helps with stability, your truck’s towing capacity is just as important. Not every truck can handle a 10,000+ pound RV, especially when driving through mountainous terrain or high-wind areas.

If your truck is too small or underpowered, it will struggle to pull the heavy load, handle steep inclines, or brake efficiently. The most important factor is ensuring that the truck’s towing capacity matches or exceeds the weight of the fifth wheel. With a properly matched truck, towing a fifth wheel is both safe and efficient.

Final Verdict: Are Fifth Wheels Safe?

Yes! When properly hitched and towed with the right truck, fifth wheels are among the safest RVs on the road. Their superior stability, reduced sway, and balanced weight distribution make them much safer than standard travel trailers.

As long as you’ve secured the hitch correctly, chosen a truck with the right towing capacity, and drive with caution, you can confidently take your fifth wheel on the road with peace of mind.

Categories
Classes of RVs

Can You Use an Airstream in Winter?

Airstreams are so beloved that many owners want to use them year-round—including in winter. But is it practical to haul an Airstream when temperatures drop? After doing some research, here’s what I found.

Yes, Airstreams can absolutely be used in winter. With the right preparation, they perform well in cold conditions, allowing you to enjoy breathtaking winter landscapes. While towing on icy roads requires caution, Airstreams handle adverse weather better than many other travel trailers.

However, winter camping isn’t as simple as hitting the road. Harsh weather demands careful planning and preparation to ensure a safe and comfortable trip. Here’s what you need to know before taking your Airstream into a winter wonderland.

Using an Airstream in Winter: Is It Possible?

Winter camping offers a unique and exhilarating outdoor experience that many RVers miss out on. When the leaves start to fall, most people pack up their gear and store their RVs until summer. But what if you extended your camping season a little longer?

If you’re wondering whether your Airstream can handle winter conditions, the answer is yes! With proper preparation, your Airstream can be a fantastic cold-weather companion. However, winter camping requires a few extra precautions to ensure both safety and comfort.

To get your Airstream winter-ready, focus on these three essential steps:

  1. Protect Your Pipes – Prevent freezing and damage by insulating and heating your plumbing system.
  2. Keep the Heat In – Improve insulation and use efficient heating methods to maintain warmth inside.
  3. Keep the Cold Out – Seal drafts, use skirting, and take other measures to block chilly air.

Once you’ve tackled these steps, you’ll be all set to embrace the beauty of winter camping in your Airstream!

Protecting Your Airstream’s Pipes in Winter

If you’ve ever dealt with a frozen or burst pipe at home, you know how destructive and expensive it can be. In extreme cold, any water left in your Airstream’s plumbing system can freeze, expand, and rupture the pipes—leading to costly repairs and a major headache.

To prevent damage, you must winterize your Airstream’s pipes by ensuring no water is left in the system. Follow these steps:

  1. Remove and bypass any inline water filters before starting.
  2. Drain the fresh water holding tank completely.
  3. Empty the water heater by removing the drain plug and opening the pressure relief valve. (Warning: Never drain the water heater when it’s hot or under pressure!)
  4. Open all faucets (hot and cold), including the toilet.
  5. Find and open the low-point drain lines. Most Airstreams have separate drains for hot and cold water lines. Use the water pump to help push out excess water, but turn it off immediately once drained to avoid damaging the pump.
  6. Pour RV antifreeze into each drain and a few cups into the toilet.
  7. Turn off any electric elements in the water heater to prevent damage.
  8. Close all faucets once the system is drained.
  9. Check your owner’s manual for any additional winterization steps specific to your Airstream model.

For further guidance, RVservices.com is a great resource for winterizing tips and maintenance advice.

Some winter campers leave water in their pipes, believing that as long as the RV remains powered, the pipes won’t freeze. However, in below-freezing temperatures, this is risky, and I wouldn’t recommend it.

That said, if you’re just driving through a cold region without stopping overnight, you likely won’t need to go through the full winterization process. But for any extended stays in freezing weather, it’s best to prepare—your pipes (and wallet) will thank you!

Keeping the Heat Inside Your Airstream

One of the best parts of winter camping is experiencing the crisp, fresh air and snowy landscapes. But let’s be honest—after a long day of adventuring in the cold, nothing beats warming up inside your cozy Airstream.

Keeping heat trapped inside your RV is essential for comfort and safety, especially in frigid temperatures. Here are a few key strategies to make sure your Airstream stays warm and toasty:

Insulating Your Airstream for Maximum Heat Retention

  • Seal the Ceiling with Hatch Vent Cushions
    Since heat rises, a significant amount escapes through the ceiling vents. Adding insulated hatch vent cushions can make a noticeable difference in temperature retention.
  • Insulate Windows with Thermal Barriers
    • Wedge insulation between window panes and shades to reduce heat loss.
    • For a budget-friendly alternative, use bubble wrap—just make sure the kids don’t pop it all!
    • Hang thermal curtains, which are made from thick, insulating materials designed to block cold air and trap warmth inside.

Extra Tricks to Stay Warm Overnight

  • Pack Plenty of Blankets
    People often focus on coats, gloves, and hats but forget the importance of extra blankets. A thick wool comforter can make all the difference on a chilly night.
  • Bring a Portable Heater
    A small electric or propane heater can help maintain a comfortable temperature inside your Airstream. Just be sure to follow safety guidelines when using one.
  • Eat a Warm Meal
    A hot meal doesn’t just satisfy your hunger—it warms you up from the inside out. A hearty soup or a steaming cup of hot chocolate can work wonders after a day in the snow.
  • Dress in Layers
    When camping in freezing conditions, layering is key. This allows you to adjust your clothing as temperatures fluctuate throughout the day.

Now that you know how to keep the heat in, let’s talk about how to keep the cold out!

Keeping the Cold Out of Your Airstream

If you’ve ever done an art project with your kids that involved glitter, you know how impossible it is to contain. No matter how careful you are, it spreads everywhere. Cold air is just like that—sneaky, persistent, and incredibly difficult to keep out.

But unlike glitter, cold air can be stopped if you take the right precautions. So bundle up, grab your gear, and let’s go over the best ways to keep the cold out of your Airstream.

1. Skirt Your Airstream to Insulate the Floor

One of the most effective ways to prevent frigid air from creeping in is to install an RV skirt. This barrier wraps around the base of your Airstream, insulating the undercarriage and preventing the floor from becoming unbearably cold.

  • Purchase a custom-fit Airstream skirt online for the best insulation.
  • DIY options include using tarps, foam board, or plywood to block cold airflow.

2. Seal Any Gaps or Leaks in the Hull

Airstreams are known for their iconic aluminum bodies, but they can also be prone to dents and leaks. Small cracks or gaps can let cold air seep in, making your interior feel drafty and uncomfortable.

  • Check for leaks and seal them using silicone caulk or rubber coating.
  • If the damage is significant, professional repairs may be needed, but keep in mind that Airstream specialists can be costly.

3. Block Drafts Around Doors and Windows

Doors and windows are major weak points when it comes to heat loss. Even the smallest gaps can let in icy air, making it harder to stay warm.

  • Use draft stoppers to seal the bottom of your entry door.
  • Apply shrink wrap insulation to windows for an extra layer of protection against the wind.
  • Check and replace weather stripping around doors if needed.

By following these steps, you’ll dramatically reduce cold air infiltration, making your winter camping experience warmer, cozier, and much more enjoyable!

Winter RVing Pro Tips

Spending time in frigid conditions takes experience, and after many winter adventures, I’ve learned how to keep an RV trip safe, comfortable, and enjoyable. Whether you’re navigating snowy roads, choosing the perfect campsite, or preparing for unexpected challenges, these essential tips will help you make the most of your winter RVing experience.

Driving Your Airstream in Snow and Ice

If you’re not used to driving on ice, be prepared for a challenge. Snow-covered roads can be deceiving, often hiding invisible black ice that can send an unsuspecting driver into a spin.

Now imagine towing a 7,000-pound Airstream behind you. Things can get complicated fast. But with the right precautions, winter driving doesn’t have to be dangerous. Here’s how to stay in control on icy roads:

1. Slow Down

It might seem obvious, but many winter accidents happen because drivers go just a little too fast. Drive below the speed limit when conditions are bad, and don’t feel pressured by impatient drivers honking behind you. Your safety comes first.

2. Use Proper Snow Tires

Both your tow vehicle and your Airstream should be equipped with fresh snow tires before your trip. Even with the right tires, icy roads can be tricky. Without them? It’s a disaster waiting to happen.

3. Expect Some Sliding—Stay Calm

Even with the best precautions, you may slip and slide a little. The most important thing is to stay calm. If you start skidding, don’t panic or slam the brakes—instead, gently steer into the slide until you regain control. A level head makes all the difference.

Choosing the Perfect Winter Campsite

After battling icy roads, you’ve finally arrived at your winter campground. But now you face a new challenge: finding the best spot to park your Airstream for warmth and comfort.

1. Position Your RV for Maximum Sunlight

Sunlight is your best friend in winter. Choose a campsite where the sun can shine directly into your windows, naturally heating your Airstream. Avoid shady spots blocked by trees or hills.

2. Retract Your Awnings

Your Airstream’s awnings should stay up in winter. Strong winds and heavy snow can easily tear them down, and they’ll also block precious sunlight from warming your RV.

3. Have an Exit Plan

Heavy trailers like Airstreams are notorious for getting stuck in snow and mud. If snowfall is expected, park on solid ground and keep a shovel handy so you can dig yourself out if needed.

Preparing for the Unexpected

Winter weather is unpredictable. One day it’s clear and sunny; the next, you’re caught in a snowstorm. The key to winter RV survival is being prepared for anything.

1. Let Someone Know Your Plans

Before heading out, tell a friend or neighbor where you’re going and when you’ll be back. If you run into trouble and can’t call for help, someone will know where to look for you.

2. Pack Emergency Supplies

Here are essential winter camping items that can save the day:

  • Snow shovel – Dig out your tires if you get stuck
  • Jumper cables – Cold drains batteries fast
  • Spare tires – Flats are more common in extreme temperatures
  • Emergency radio – Stay updated if you lose cell service
  • Extra food and water – In case you get stranded
  • Ice scrapers & snowshoes – Be ready to clear and walk through snow

3. Bring a Backup Power Source

Cold weather can be hard on equipment. If your heater fails, a backup generator could be a lifesaver. Also, ensure your propane tanks are full before leaving—you don’t want to wake up freezing in the middle of the night.