Categories
Camper Van

Essential Tools for DIY Repairs: Your Complete Camper Toolkit

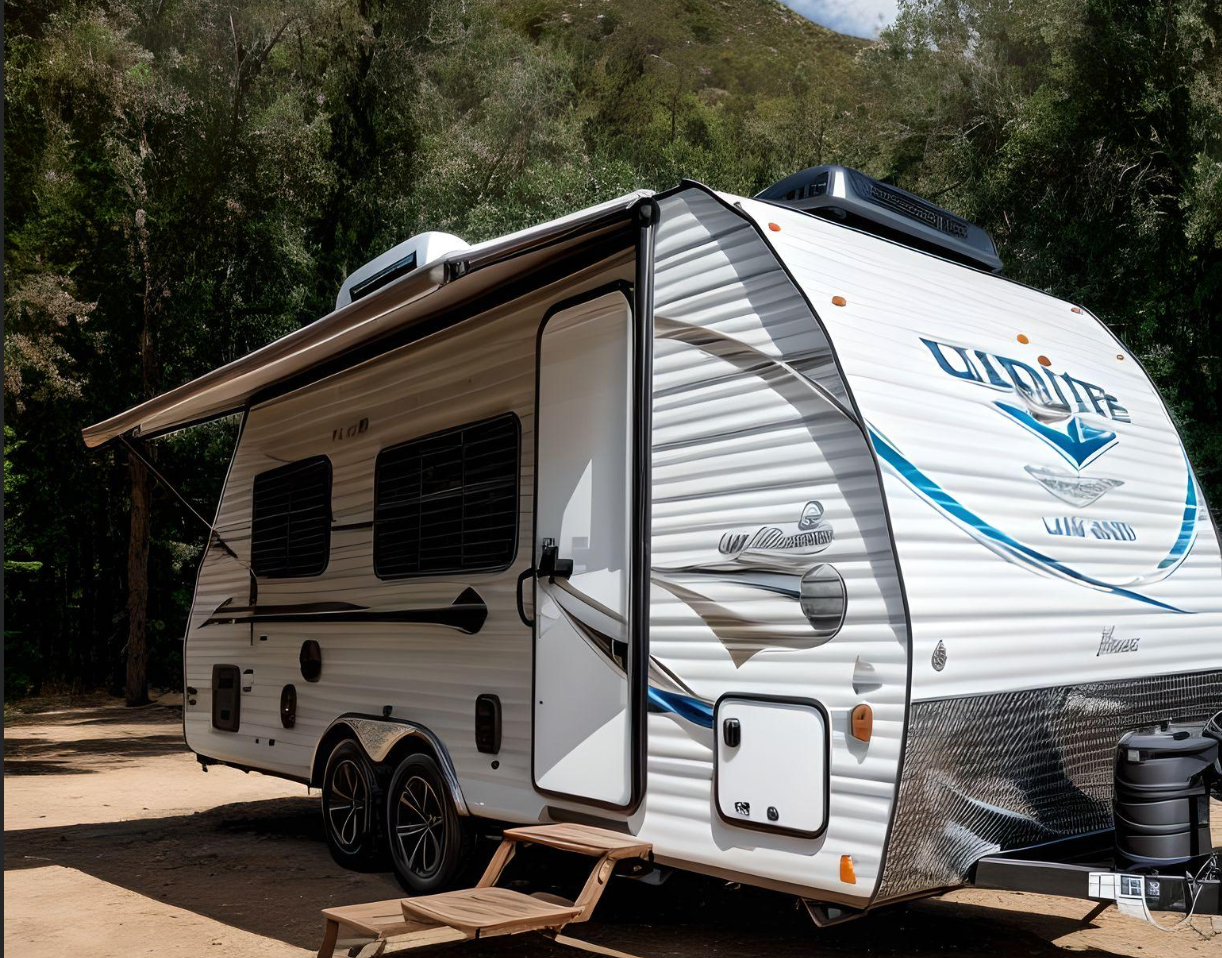
Every RV owner should have a comprehensive camper toolkit at their disposal. Routine maintenance and occasional repairs are par for the course when you’re on the road, and being prepared with the right tools can make all the difference.

Having a well-stocked toolkit not only ensures smoother RV trips but also makes maintenance tasks easier. While some tools are essential to keep in the camper, others are better suited for home use. While you may already own many of these tools, investing in a dedicated set for your camper ensures they’re always on hand when needed.

Before assembling your toolkit, take a walk around your camper to identify the types and sizes of fasteners it uses. Ensuring you have the appropriate tools for the job can prevent frustration down the road. After all, discovering you only have Phillips screwdrivers when your camper is held together with Torx screws can quickly put a damper on any repair efforts.

Camper Tools List for Roadside Emergency Repairs

  • 10-in-1 screwdriver
  • Socket set
  • Hammer
  • Level
  • Large flat-head screwdriver
  • Pliers
  • Multi-tool
  • Tire gauge
  • 12V tire inflator
  • 110V to 12V converter
  • Safety glasses
  • Silicone sealant
  • Hatchet
  • Saw
  • Drill
  • Drill bits
  • Duct tape
  • WD40
  • Wrenches
  • 1/2-inch impact wrench
  • Bottle jack
  • Lego leveling blocks
  • Multi-tester
  • Non-contact voltage tester
  • Zip ties

Tools to Keep at Home

  • Grease gun
  • Wash brush
  • Floor jack
  • Jack stands
  • Caulk gun
  • RV caulk tube

Essential Camper Tools for Your RV Adventures

Must-Have Socket Set and Wrenches

In my RV, a 275-piece mechanics tool kit is an indispensable companion, always stationed in my truck. This comprehensive set includes ¼, 3/8, and ½ inch ratchets, along with both standard and metric sockets and wrenches. To enhance its utility, I’ve augmented it with additional pliers and screwdrivers, ensuring I’m well-equipped for any unexpected repairs on the road.

While the kit surpasses my immediate needs and boasts an extensive range of sizes, it has proven its worth on numerous occasions. Whether it’s addressing a loose caliper bolt en route to work or resurrecting a dead battery in the Big R parking lot, having the right tools at hand has saved the day.

However, no toolkit is infallible. I’ve encountered instances where specialized sockets were lacking, prompting me to incorporate the necessary additions. Notably, the kit lacked the precise size for the water heater plug/anode rod, prompting me to include it separately. Nevertheless, it’s proficient in managing essentials like lug nuts on both the trailer and truck.

Compact and organized in a plastic case, toolkits like these offer convenience and peace of mind. For those opting for a more modest setup, a ½ inch ratchet or breaker bar, coupled with a small 3/8 inch ratchet and standard and metric sockets, suffices for most camper needs. Topped off with an adjustable wrench, you’ll be well-prepared to address any loose nuts or bolts encountered during your travels.

Essential Toolbox

A sturdy toolbox forms the cornerstone of your camping toolkit, providing a secure home for your gear. Opt for quality over extravagance, ensuring it features a reliable latch. In my experience, a modest 20-inch box accommodates all my essentials, especially since many tools reside in my truck already.

Versatile Screwdrivers

Invest in a 10-1 screwdriver to tackle the majority of sizes and types encountered during your camping adventures. Alternatively, a multibit screwdriver with an extensive bit selection offers versatility. The 10-1 variant covers various common sizes of Philips, flat blade, torx, square bits, and nut drivers, catering to most needs. Additionally, having a robust, large flat blade proves invaluable, doubling as a makeshift pry bar when necessary.
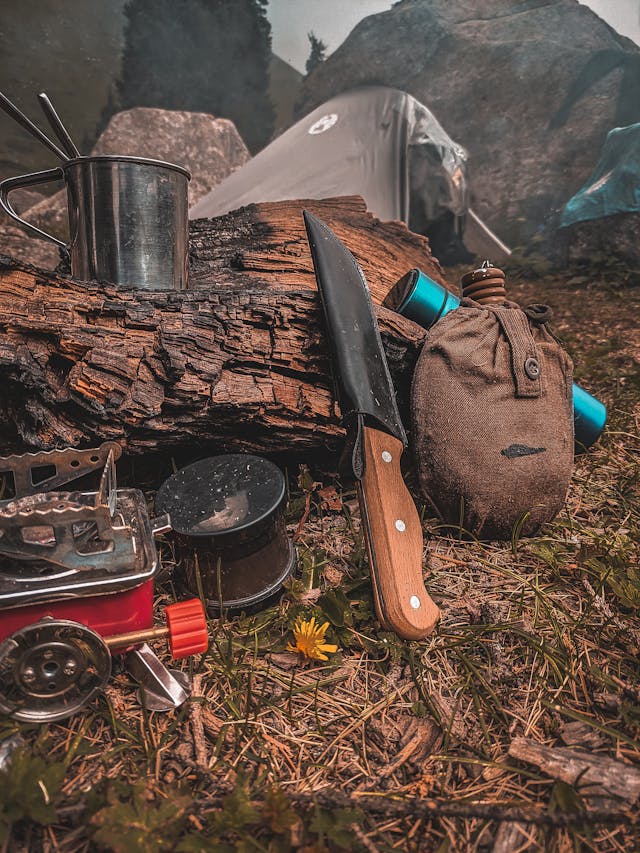
Handy Hammer

A hammer is indispensable for various tasks during your camping escapades. Whether it’s securing tent stakes or rectifying loose nails on picnic tables at your site, a hammer proves its worth. Additionally, consider keeping a hatchet in your camper for kindling purposes, ensuring you’re well-prepared for any outdoor challenges.

Pliers and Multi-Tools

Include needle-nose pliers, channel locks, and a multi-tool in your arsenal. Needle-nose pliers often feature a built-in wire cutter, handy for any unexpected electrical repairs. Channel locks come in handy for pipe repairs or gripping nuts and bolts larger than your sockets or wrenches can manage. A multi-tool is a versatile addition, typically featuring a knife, file, and various extras that prove invaluable in diverse situations.

Essential Level

A level is crucial for ensuring your camper is properly leveled upon reaching your site. While there are levels that attach directly to the camper, I prefer the simplicity of an inexpensive 2-foot level stored inside the camper. Alternatively, a compact 9-inch torpedo level fits neatly into a toolbox and gets the job done efficiently.

Electrical Testers

Two indispensable electrical testers for your camper are the multi-tester and the non-contact tester. These tools are vital for diagnosing and troubleshooting electrical issues, ensuring a safe and functional camping experience.

Other Essential DIY RV Repair Supplies

In addition to your basic toolkit, stocking up on a few extra items can greatly aid in DIY repairs while on the road. Here are some essentials to keep in your toolbox:

  • Silicone Sealant: A small tube of silicone is invaluable for sealing up any leaks in seams or joints, ensuring your camper stays dry and secure.
  • Duct Tape: As proven by the folks at Mythbusters, duct tape is a versatile fix-all solution for a wide range of repairs. From patching up tears to securing loose parts, duct tape is a camper’s best friend.
  • Zip Ties: Zip ties are incredibly handy for making temporary or creative repairs on the fly. Whether it’s securing loose wires or temporarily holding parts together, zip ties can save the day.
  • WD-40 or Liquid Wrench: Keep a can of WD-40 or Liquid Wrench handy for lubricating squeaky hinges, loosening stubborn bolts, and tackling any other rust or corrosion issues that may arise.

By having these additional supplies on hand, you’ll be well-equipped to handle a variety of repair situations and keep your RV in top condition during your adventures.

Hand Saws

For your camping toolkit, include a compact hack saw suitable for cutting through metal or plastic. Additionally, a folding pruning saw is indispensable for trimming tree branches or cutting firewood during your outdoor excursions.

Tire Inflator

Ensuring proper tire inflation for both the tow vehicle and the trailer is crucial. Keep a tire gauge and inflator handy in your camper for on-the-go adjustments. Opt for inflators that conveniently plug into the 12-volt power outlet, enabling usage even in remote locations without electricity. These inflators can be connected to either the truck’s or camper’s 12-volt power supply. Consider investing in a 110v to 12v converter, allowing you to utilize the inflator with standard outlets if power is accessible. Besides inflating tires, these versatile tools can also be utilized for bikes and beach toys. While the inflator typically includes a built-in gauge, it’s prudent to also carry a separate digital tire gauge in your truck for comprehensive tire checks. This setup ensures you’re prepared to address any tire issues efficiently, without the need to deploy the inflator unless necessary.

Ensuring Roadside Preparedness

Discovering that your car jack is inadequate on the side of a highway is a situation best avoided. Prior to embarking on your journey, test your jack to ensure it can lift your camper. If it falls short, consider investing in a compact bottle jack tailored for your trailer. Alternatively, Lego-style leveling blocks offer a practical solution for lifting your trailer to change a tire. Construct a sturdy ramp using these blocks, allowing you to elevate the good tire while the flat one remains suspended. It’s worth noting that this method is suitable only for tandem axle trailers.

Prioritizing Safety Gear

Prioritize safety at all times. Safety glasses are indispensable, particularly when performing repairs beneath the camper, shielding your eyes from falling debris. Mechanic’s gloves serve a dual purpose, safeguarding your hands against sharp surfaces and heat while preserving dexterity. Additionally, they provide insulation, ensuring your hands stay warm during chilly tasks.

Essential Power Tools for Camper Maintenance

A cordless drill equipped with drill bits is indispensable for various repairs, such as drilling pilot holes or extracting broken bolts. Failing to pack this tool could leave you unable to perform necessary fixes on the go. Moreover, bringing along the drill offers added convenience, as you can acquire a bit specifically designed to raise and lower stabilizing jacks, enhancing efficiency. Opting for a compact 12-volt drill ensures suitability for camper tasks.

While a cordless impact gun may not be a must-have due to its singular purpose and potentially high cost, it proves invaluable if you already own one or are contemplating a purchase. A ½ inch cordless impact gun facilitates swift tire changes, albeit caution should be exercised to avoid using it on stabilizers, as its strength can damage threads.

Remember to pack chargers to ensure uninterrupted usage, particularly for drilling additional holes or tackling stubborn lug nuts. Preparedness is key to resolving unexpected challenges while on the road.

Essential Tools for Larger RV Repairs at Home

In addition to the tools mentioned previously, maintaining a few additional items at home can greatly aid in the upkeep of your camper. Consider expanding your screwdriver collection, acquiring more varieties of pliers, and adding a broader range of sockets to your toolkit. While not essential, an air compressor for tire inflation can prove superior to smaller inflators, although it’s not deemed a necessity.

The following tools are recommended for home use but are not required to be taken on the road with you. They serve as supplementary resources for more extensive repairs or maintenance tasks conducted in a controlled environment.

Upgrading Your Lifting Equipment

While bottle jacks serve their purpose, floor jacks offer superior performance. These jacks, equipped with rolling mechanisms and extended handles, boast impressive lifting heights, making tire changes, bearing greasing, and brake inspections a breeze. However, due to their bulkiness and weight, they are not ideal for packing in the camper. Additionally, investing in a pair of jack stands is advisable; I personally use a 3-ton model, but the appropriate size depends on the dimensions of your truck and trailer.

Essential Maintenance with a Grease Gun

To ensure your trailer glides smoothly along the highway, regular greasing of the wheel bearings is essential. Each hub features a grease fitting compatible with a grease gun. Although grease guns can become messy, they are indispensable unless you’re embarking on an extended road trip. For compactness, consider opting for smaller models that can be neatly stored in a container. Consult your owner’s manual to determine the most suitable grease for your trailer’s needs.

Ensuring Seal Integrity with a Caulk Gun

Similar to maintaining your home bathroom, periodically re-caulking the seams in your camper is crucial. Invest in RV-specific caulk to ensure optimal performance and longevity of seals.

Preserving Appearance with a Wash Brush

Protect your investment by maintaining the appearance of your camper. Regularly washing it once or twice a season not only preserves its aesthetic appeal but also prolongs its lifespan. A dedicated wash brush can help you efficiently clean your camper and keep it looking its best.

Concluding Thoughts on Essential Camper Tools

Equipping yourself with the appropriate camper tools, whether at home or on the road, is instrumental in ensuring smoother journeys and minimizing frustration when issues arise. If there are any tools I may have overlooked in this list that you’ve found indispensable or wished you had during unexpected mishaps, I encourage you to share your insights in the comments below. After all, it’s often the tools we didn’t realize we needed until we’re faced with a repair situation that truly make a difference. Your feedback and experiences are invaluable in refining our understanding of what constitutes the ideal camper toolkit.

Categories
Camper Van

4 Innovative Approaches to Warming Your Camper That Might Not Have Crossed Your Mind

During the scorching midsummer heat, who has the time or inclination to ponder firing up a heater? Chances are, you’re likely overworking your air conditioner, maybe even contemplating installing a second unit.

Just as you meticulously plan your road trip routes, it’s essential to prepare for the impending cold season. Summer seems to fly by in the blink of an eye. Before you know it, the back-to-school rush will be upon us, and it’ll be time to winterize your RV.

Running your air conditioner or heater for extended periods in your trailer can quickly become a costly affair. These units consume energy or fuel, and frequent usage depletes their resources, necessitating costly refills.

Most RV and camper heaters rely on two primary fuel sources: gas or electricity, with some units utilizing both. Propane is also a commonly used fuel source, all of which can drain your wallet.

If you’re tired of constantly shelling out cash to keep your vehicle warm, there are alternatives worth considering. Perhaps you’re contemplating a switch from your current electric or gas setup to something more economical.

All it takes is a bit of ingenuity. In this article, we’ll explore four unconventional methods for heating your camper. As the warm days of July give way to cooler temperatures in August, why not give these alternative heat sources a try? If they suit your needs, you can rely on them throughout the autumn months.

1. Enhanced Insulation

The initial suggestion for warming your camper originates from an RV enthusiast determined to eliminate reliance on propane. Their solution? Augmenting the insulation within their trailer to maximize heat retention.

While investing in DIY insulation (or hiring a professional) can yield substantial long-term savings, it does necessitate an upfront financial commitment. Moreover, it’s a moderately time-intensive endeavor and requires periodic inspection every few months.

Should you opt for insulating or re-insulating your camper independently, directing attention to two primary areas is imperative: windows and vents. These spots are notorious for allowing cold air infiltration. Even the tiniest fissures or gaps in the sealant, glass, or vents can result in persistent chilliness.

Additionally, doors are susceptible to ushering in cold drafts. Once more, any minute perforations in the sealant or weatherstripping can translate to discomfort during colder days and nights.

Here’s a breakdown of how to insulate these critical zones.

Windows

Invest in reflective insulation specifically designed for windows. This material typically appears as a silvery metallic sheet and is available for purchase at prices ranging from $45 to $70 per roll. It boasts an R-value ranging from R-3.7 to R-21, indicating its effectiveness in trapping heat within a space. As a quick reminder, the R-value indicates how well insulation can retain heat, with higher R-values indicating better performance.

To insulate your windows, thoroughly cover them with the reflective insulation, ensuring complete coverage of all glass surfaces. While this approach may not be the most aesthetically pleasing, the resulting warmth is undeniable, particularly beneficial for areas like bedroom nooks with windows.

Vents

Whether it’s hatch vents, roof vents, or wall vents, it’s crucial to cover them all. Opt for vents with thinner plastic material, as they are easier to work with.

There are two primary options for insulating vents. The first option is to invest in a vent insulator, such as the one offered by Camco, available for $15 on Amazon. This insulator typically consists of a sizable piece of insulated foam, sometimes featuring a reflective surface. It effectively maintains the warmth inside your camper during colder seasons and helps trap cool air during the summer. However, ensure that you select the appropriate size for your vents; for instance, the Camco insulator is designed for 14-inch vents. If your vents are larger or smaller, you’ll need to explore other options.

Alternatively, you can use Styrofoam as insulation for your vents. Place it underneath the vent covers to block cold air from entering your vehicle. It’s essential to cut the Styrofoam to fit precisely and may require securing with tape or another adhesive for proper insulation.

Doors

Chances are, you already have plastic wrap lying around at home, right? If so, grab it, because you’ll need it for insulating your camper doors. This DIY project also requires cleaning solution or alcohol, a hairdryer, double-sided tape, and a razor blade (handle with care!).

Start by thoroughly wiping down your door to ensure it’s clean. Next, apply double-sided tape along the edges of the door. Then, cut a piece of plastic wrap large enough to cover the entire door and adhere it to the tape. Don’t worry if there are wrinkles or air pockets; those can be smoothed out later.

Now, plug in your hairdryer and set it to medium or high heat. Begin by applying heat to the edges of the door to secure the plastic wrap in place. Once the edges are secured, gradually move the hairdryer over the rest of the door, but be sure to do so in short intervals to avoid damaging the plastic wrap. By the time you’re finished, there should be no visible wrinkles or air pockets.

Surprisingly, once heated and applied to the door, this insulation method looks better than you might expect. The plastic wrap will stay firmly in place but can be removed if necessary.

2. Solar Heating

While solar panels might not be the most visually appealing feature on rooftops, they serve a practical purpose by harnessing renewable energy from the sun. Solar panels generate photons when exposed to sunlight for extended periods, which can then be converted into electricity, providing warmth for your camper.

For those seeking a rewarding DIY project, Mother Earth News offers a solution: building your own solar heating window box, perfect for smaller-scale applications like camper usage.

According to Mother Earth News, assembling your own window box, known as a Heat Grabber, can cost as little as $35. This budget-friendly solution promises significant long-term benefits for your camper.

For this project, it’s recommended to acquire Celeotex Thermax TF-160 insulation board, specifically designed for the Heat Grabber. This thin board, ranging from 3/8 inches to 1 7/8 inches in thickness, is constructed with aluminum foil and glass fibers. You’ll also need:

  • Black paint (Rustoleum preferred)
  • All-metal aluminum foil duct tape
  • Three pieces of single-strength glass
  • 16 No. 8 finishing nails
  • Panel adhesive

So, how does the Heat Grabber function to warm up your camper? Essentially, it’s a weather-tight box insulated on the bottom and sides, topped with glass and featuring a lipped insulated divider. Positioned over a windowsill at a 45-degree angle, it captures sunlight. The aluminum foil and black-painted divider absorb sunlight, heating up the air around the Heat Grabber, which then circulates throughout your vehicle.

With an open section for drawing in cold air, the warm air rises, passes through the divider, and can be reheated by sunlight, creating a continuous cycle of warmth.

While the Heat Grabber offers an economical heating solution, it’s worth noting that the area closest to the Heat Grabber will likely be the warmest. Additionally, its effectiveness relies on frequent sunny weather, making it less practical for continuous heating while driving. For optimal results, it’s advisable to keep your camper stationary when utilizing the Heat Grabber.

3. Wood Stove

While a Class A RV might have space for a full-sized fireplace, fitting one into your camper is likely out of the question due to limited space. However, that doesn’t mean you have to abandon the idea of a wood-burning heating source altogether. You just need to explore alternative options, quite literally thinking outside the box.

A wood stove offers a compact solution suitable for your camper. If space is a concern, consider exploring the offerings from Canadian manufacturer Cubic Mini Stoves, known for their mini wood stoves designed specifically for vehicles like yours.

There are several models available, ranging from those that can sit on a shelf to those mounted on the floor or wall. Here are the specifications for a couple of these stove models:

  • The Cubic “Cub” CB-1008 measures 11 inches wide, 12 inches tall, weighs 27 pounds, and can burn pressed fire logs, charcoal, and wood. It features a door opening measuring 6×4 inches.
  • The Cubic “Grizzly” CB-1210-BR is 13 inches wide, 15 inches tall, weighs 34 pounds, and shares the same fuel compatibility as the Cub. Its door opening is slightly larger at 7×5 inches.

Both the Cub and the Grizzly are available in wall-mount and floor-mount versions. According to Cubic Mini Stoves, their wood stoves can help reduce camper humidity and are considered safer than propane and diesel heaters.

Despite concerns about emissions, Cubic Mini Stoves are designed to be environmentally conscious and eco-friendly. With heat output ranging from 6,000 to 14,000 BTUs, you’ll experience a noticeable increase in temperature almost immediately. While installation is required, the manufacturer assures that it’s straightforward. Constructed with laser-cut steel plates, these stoves are built to last, promising years of warmth and comfort in your camper.

4. Electric Heater

The final recommendation for innovative ways to warm up your camper involves using an electric heater. Similar to a space heater commonly found in households, electric heaters are designed to heat small rooms or specific areas within your vehicle. Placing an electric heater in a central location, especially in smaller campers, can effectively warm up the entire space.

One of the key advantages of electric heaters is their portability. If a passenger feels particularly cold, they can easily relocate the heater closer to them for temporary warmth.

Electric heaters typically contain a resistor, which serves as the heating element. When activated, the resistor generates heat, which in turn produces warm air that circulates within the heater and throughout the camper.

A popular choice among camper trailer owners is Lasko’s ceramic heater. This compact heater can be conveniently placed under a desk, on a shelf, or atop a tabletop. Available in silver or black, it’s priced around $32 on Amazon.

Equipped with a carrying handle, the Lasko ceramic heater offers easy transportation from one area to another. Its automatic overheat protection feature ensures safety by preventing the heater from becoming too hot.

Featuring a fan-only setting for mild warmth, the heater operates at 900 watts on low and 1,500 watts on high. The built-in thermostat allows users to adjust settings according to their comfort preferences.

What sets Lasko’s ceramic electric heater apart is its quiet operation. This feature is particularly appreciated by camper and RV owners, as it ensures peaceful rest without disruptive noise during overnight stays at campsites.

Categories
Camper Van RV

The Ultimate Guide to Living in an RV and Loving It

A comprehensive handbook for embracing the RV lifestyle and finding joy in it: The Definitive Manual to Embrace the RV Lifestyle and Discovering Its Charms.

Living in an RV presents a distinctive and exciting way of life that enables individuals or families to fully embrace the liberating spirit of the open road. Whether you choose to be a full-time RVer or simply enjoy occasional road trips, maximizing your RV living experience necessitates the application of practical advice and clever strategies. This all-encompassing guide will delve into crucial aspects of RV living, encompassing topics such as celebrating Christmas while on the move, ensuring warmth during chilly winters, effectively managing laundry, sustaining a healthy lifestyle, and even earning a livelihood while residing in an RV.

The Joy of Celebrating Christmas in an RV:
Experiencing the holiday season in the cozy confines of an RV can be truly enchanting. To ensure your Christmas on the road is a memorable one, consider the following suggestions:

  • Adorn your RV with compact yet festive decorations to save space.
  • Utilize your RV’s kitchen facilities to prepare a special holiday feast.
  • Engage with fellow RVers at holiday-themed campgrounds to foster a sense of community.
  • Embrace the simplicity of gift-giving by opting for thoughtful and compact presents.
  • Establish new traditions that perfectly complement the mobile lifestyle.

Enduring the Chills of Winter while Residing in an RV:

Don’t let cold weather ruin your RV adventure. To ensure a cozy and enjoyable experience, there are several steps you can take. Firstly, consider purchasing a high-quality, four-season RV that is specifically designed to withstand extreme temperatures. This will provide you with the necessary insulation and protection against the cold. Additionally, it is important to insulate your RV properly to retain heat. This can be done by adding insulation to the walls, floor, and ceiling. Hang thermal curtains on the windows to minimize heat loss and keep the warmth inside. When it comes to clothing, dressing in layers is key. This allows you to adjust your clothing according to the temperature. Make sure to have warm bedding readily available, such as thick blankets and cozy comforters. To add an extra layer of warmth, you can use electric blankets or space heaters sparingly. However, it is important to use them with caution and follow all safety guidelines. Lastly, don’t forget to inspect and insulate your water lines to prevent freezing. This can be done by using heat tape or foam insulation to protect the pipes from the cold. By following these tips, you can ensure that your RV adventure remains comfortable and enjoyable, no matter the weather.

Keeping Up with Laundry When Traveling in an RV

Dealing with laundry while traveling can present difficulties, but with proper preparation, it can be made much easier. One option to simplify the process is to stay at an RV park that offers laundry facilities. This way, you can conveniently wash your clothes without having to search for a laundromat. Another solution for those who are constantly on the move is to invest in a portable washing machine. This handy device allows you to do your laundry whenever and wherever you need to. Additionally, you can also take advantage of laundry services available in the areas you visit. By planning your laundry schedule to align with restocking supplies, you can effectively manage this task on the go.

A Daily Exercise Routine is Crucial to Living in an RV:

Maintaining an active lifestyle is essential in a limited environment. To prioritize your mental and physical well-being, it is important to include regular exercise in your daily routine. Despite being on the move, make an effort to engage in outdoor activities like hiking and biking. Establishing a consistent exercise schedule will help you stay fit while traveling. Compact exercise equipment like resistance bands can be used effectively, and practicing stretching exercises and yoga within the confines of your RV is also beneficial. Additionally, consider exploring nearby gyms or fitness classes in the places you visit for added convenience.

Earning Money While Living in an RV:

To transform RV living into a sustainable lifestyle, one must think outside the box and explore various avenues to generate income. One option is to investigate remote work opportunities or freelancing gigs that can be done from the comfort of your RV. This allows you to have the flexibility to work from anywhere while still earning an income. Another idea is to establish a mobile business, such as selling handmade crafts or offering services like mobile pet grooming. You can also consider providing online services, such as consulting or virtual assistance, which can be easily managed from your RV. Another way to generate revenue is by monetizing a blog or YouTube channel that chronicles your RV journeys. By sharing your experiences and insights, you can attract an audience and potentially earn money through advertisements or sponsorships. Additionally, when you visit different places, you can explore seasonal or temporary employment opportunities. This allows you to immerse yourself in the local community while earning some extra income. Embracing the gig economy is another option, where you can engage in jobs like ridesharing or delivery services to supplement your income. By diversifying your income streams and being open to different opportunities, you can turn RV living into a sustainable lifestyle that supports your financial needs.

With the correct mindset and practical approaches, residing in an RV can offer a satisfying and enriching experience. By adhering to these guidelines for holiday festivities, winter coziness, managing laundry, daily physical activity, and sustaining a livelihood, you will embark on a gratifying life on the open road. During holiday festivities, you can decorate your RV with festive lights and ornaments, creating a warm and cheerful atmosphere. To ensure winter coziness, insulate your RV properly, use space heaters, and cozy blankets to keep warm during the colder months. Managing laundry in an RV can be challenging, but by utilizing laundromats or portable washing machines, you can maintain cleanliness and convenience. Engaging in daily physical activity is essential for your well-being while living in an RV. You can go for hikes, bike rides, or even practice yoga outdoors to stay active. Lastly, sustaining a livelihood while on the road is possible through remote work, freelance opportunities, or starting a mobile business. Embrace the liberty, adaptability, and thrilling spirit that RV living grants, and seize every moment of your expedition.
In addition to these tips, it’s important to prioritize safety while living in an RV. Regularly inspect your vehicle for any maintenance issues, invest in a reliable GPS system, and familiarize yourself with emergency protocols. By taking these precautions, you can ensure a smooth and secure journey as you embrace the nomadic lifestyle.

Categories
Camper Van Travel Trailer

Expert Tips: A Comprehensive 100-Point Checklist for Buying a Used RV

Concerned about purchasing a pre-owned RV? By conducting our comprehensive 100-point used RV inspection, you can alleviate fears before committing.

Why inspect? RV makers often cut corners with low-quality components to save costs. Falling for an RV’s layout could lead to post-purchase surprises, discovering crucial missing features like power awnings or automatic stabilizing jacks.

In-Depth 100-Point Used RV Inspection: A Complete Buyer’s Checklist

Undercarriage InspectionBuying a used RV involves juggling countless details. This 100-point inspection checklist is my personal guide as I hunt for a class A motorhome. It’s my safety net to ensure no important aspect slips through the cracks.

Interior Smells

  • What’s the interior smell like? Any traces of smoke? Cigarette odors tend to linger in RVs. Yet, consider that stored RVs may gather musty scents that could dissipate. Air it out for 20 minutes, examine, then check for any lingering odors.
  • Inspect the toilet to ensure the seal closes properly. Pour a small amount of water and check if it pools without draining. After 5 minutes, confirm if the water remains in place.

Bathroom Inspection

  • Is the shower spacious enough to offer comfort?
  • Check the showerhead quality; it’s often a primary upgrade. The standard plastic fixture can be bothersome.
  • Does the shower provide a seat, especially useful for shaving?
  • Is there a sufficient lip to contain shower water?
  • Any mold or mildew signs in the shower?
  • Determine if the toilet bowl is porcelain or plastic.
  • Consider the toilet size and comfort, especially for men.
  • Assess if the toilet space feels too cramped or uncomfortable in tight corners.

Windows Inspection Checklist

  • Verify the windows open and shut smoothly, ensuring they align correctly and securely latch. Also, check for any stickiness in their operation.
  • Assess whether the windows feature day/night shades or utilize curtains.

RV Length Considerations

  • First-time buyers often choose smaller RVs due to intimidation by larger ones.
  • Subsequent purchases might exceed campground size limits.
  • Ensure the chosen length fits your desired camping spots effectively.

Examining Awnings: Key Considerations

  • Check for a motorized awning.
  • Note the awning’s endpoint. Some RVs might have it over the front door, causing rain to drench those stepping out.
  • Differentiate between full awnings and slide toppers. Slide toppers cover the slide to prevent debris.
  • Test the awnings’ extension to ensure proper functioning, as a faulty one can cost up to $1,500 to replace.
  • Inspect the fabric when the awning is extended. Look for fading, rips, or signs of separation.

Furniture Essentials for Your Comfort

Ensure Comfortable Seating: Consider the comfort of your seating arrangements. While some trailers lack couches, relying on flat-backed u-dinettes might not be the coziest for movie nights.

Accessorize for Relaxation: Think about adding a footstool to prop your feet up comfortably during movie sessions. Creating that relaxed atmosphere matters.

Capacity and Space: Assess if your seating can accommodate your family or friends when they join in. Ensure everyone has a comfortable spot to enjoy movies together.

Check for Quality: Inspect the cushions thoroughly, looking beyond the surface for any hidden stains that might need attention. Your comfort starts with a clean and inviting space.

Electrical Connectivity

Phone Charging Convenience: In today’s world, a smartphone is essential. Check for accessible power ports that allow phone charging without relying on a running generator or being plugged into a service.

Outlet Accessibility: Evaluate the availability of outlets throughout the RV, ensuring they’re conveniently located. Kitchens often have limited outlets, which might be manageable for a camping trip but could be restrictive for longer stays in your RV home.

Outdoor Lighting Assessment

Checking Exterior Lights: Connect the trailer to the tow vehicle’s power or switch on the motorhome headlights to assess all exterior lights, including running lights, headlights, accessory lights, and brake lights, ensuring they’re operational.

Awning LED Strips: Explore if there’s an LED light strip installed beneath the awning. Although often missed during the purchase, these lights can substantially improve the nighttime atmosphere and convenience.

Slide-Out Inspection

Observing Slide Mechanics: Extend the slides and examine their movement along the floor. Look for any floor scratches, bent vents, or signs indicating potential issues with the slide’s operation.

Inquire About Slide History: Gather information from the previous owner regarding any past incidents of the slide getting stuck or encountering operational difficulties.

Verify Seal Condition: Inspect the seals encircling the slide to ensure they are intact and in good condition.

Test Seal Tightness: Close the slide and use a flashlight along its edges to ensure no light penetrates from the outside, confirming a proper and secure seal.

Water System Evaluation

Tank Testing and Assessment: Fill the fresh water tank to evaluate the functionality of the gray and black tanks. Utilize hookups during your inspection to fill the gray tank via the shower, providing an opportunity to check for leaks in the shower head. Monitor the status indicators to ensure accurate measurement of the gray tank’s water level while the shower is running.

Hot Water Heater Check: Inspect the hot water heater to confirm its proper functioning in heating water to the desired temperature.

Safety Inspection

Verify Fire Extinguisher Condition: Inspect the presence and label of the fire extinguisher, ensuring it’s within its usable period as they have a limited lifespan.

Test Carbon Monoxide Detector: Use a small can of gas to check the functionality of the carbon monoxide detector. Emphasizing the critical significance of this detector for safety concerns.

Electrical System Assessment

Check GFCI Outlets: Identify all GFCI outlets, typically found in the bathroom and kitchen with a test button. Press the test button to ensure it triggers the reset button correctly.

Verify Shore Power Connection: Connect the RV to shore power to confirm its functionality.

Assess Generator Size: Determine the size of the generator, if present, to understand its capacity and capabilities.

Quality Inspection

Inspect Loose Screws: Look for screws both inside and outside that haven’t been properly tightened. Manufacturers sometimes miss the stud and rely on silicone, leading to screws that don’t fasten securely.

Assess Trim Installation: Examine any trim that has been screwed but not glued, potentially causing it to protrude between the screws.

Water Damage Inspection

Exterior Examination: During a used RV inspection, conduct a thorough walk around the trailer. Carefully scrutinize the sides and roof for even the slightest bubble or depression, which often indicates water damage or delamination. If bubbles are present, refrain from purchasing the RV.

Roof Assessment: Get on the roof and inspect it closely, preferably on your hands and knees, to identify cracks in the sealant around pipes and openings. Small cracks, repairable with inexpensive sealant, might signify neglect in maintenance.

Interior Inspection: Check the RV’s interior ceiling for any bubbles or soft spots, especially near exhaust vents. Firmly step around the edges of the kitchen floor touching the cabinets to ensure no soft spots exist.

Plumbing Examination: Inspect under the kitchen and bathroom sinks to ensure no water leakage has occurred from the pipes.

Gutter Assessment: Check if gutters are present along the sides of the RV, as they serve to prevent potential water damage in the future.

Basement Compartment Check: Open basement compartments and examine their bottoms for any signs of dampness or soft spots, indicating possible wood rot.

Black/Gray Tank System

Check for the presence of a black tank flush. This feature is immensely beneficial, and personally, I wouldn’t consider purchasing a trailer or motorhome without it.

Entertainment Features

USB Outlet Check: Inspect the RV for USB outlets during your used RV inspection. Assess the technology upgrades that might be necessary based on the available features.

TV Remote Verification: Ensure the presence of the TV remote during your inspection.

Bumper Capacity

Ascertain the actual weight rating of the bumper and avoid relying on estimations provided by the salesman. Request documented proof of its capacity. This detail significantly influences decisions about attaching bikes, a generator, kayaks, and more. Overloading the bumper has led to failures for many RVers on the road, but post-purchase reinforcements can be considered if necessary.

Tire Inspection

Detailed Tire Examination: Closely inspect the tires from ground level on both sides of the tread. Look for significant uneven wear that might indicate a lack of rotation. Keep in mind, replacing truck tires on a motorhome can cost up to $1,200 for just two tires, so check each tire carefully.

Brand and Quality Assessment: Identify the tire brand. Determine whether they are lower-cost options or if the RV is equipped with higher-quality tires such as Michelin or Goodyear.

Sleeping Arrangements

Bed Setup Consideration: Consider whether you prefer setting up beds nightly or having pre-set sleeping spots for each family member, especially for kids. Assess whether investing in a bunkhouse model might avoid future regrets.

Master Bed Measurement: Use a tape measure to verify the dimensions of the master bed. Some RVs feel spacious in the living area but might compromise on space in the master bedroom. Ensure the manufacturer hasn’t used an RV Queen mattress instead of a true queen size—60×80″ for a standard queen and 60×75″ for a “short queen.”

Undercarriage Inspection

Underneath Examination: Lie down and inspect the underside, checking for any noticeable issues or signs of damage that might be visible.

Underbelly Protection Assessment: Determine if the underbelly is fully enclosed or if the tanks are exposed at the bottom, lacking proper protection.

All-Season Camping Features

Assessing Drain Pipe Protection: Confirm if the drain pipes are completely enclosed for weather protection.

Insulation and Heating in Basement Storage: Check if the basement storage area is insulated and heated to withstand various weather conditions.

Tank Heating Options: Verify the availability of electric and propane heaters dedicated to the tanks for all-season camping comfort.

Solar Setup

Preparation for Solar Panel Installation: Check if the unit is pre-wired to accommodate a solar panel system.

Adjustable Solar Panels: Inspect the rooftop solar panels to determine if they are tiltable, allowing you to orient them towards the sun for optimized efficiency during extended boondocking stays.

Cooling System Assessment

Air Conditioning Check: During your used RV inspection, switch on the air conditioning for 3 minutes. The air that flows out should be notably cold.

Consideration for Multiple Units: Verify if there’s only one air conditioning unit. For RVs exceeding 30 feet, one unit might struggle on excessively hot days, unless ample shade is available around the vehicle.

Assessing Noise Levels: Evaluate the noise emitted by the air conditioning units to gauge their sound levels.

Ventilation Fan Inspection: Inspect the ceiling vent fans to determine their size and efficiency. Differentiate between smaller fans that occupy a fraction of the vent opening and larger, more efficient Maxx Air fans, known for their superior airflow capacity.

Noise Evaluation

Fan Inspection: Ensure the fans operate smoothly without any rattling or disruptive sounds.

Consideration for Hybrid or Tent Trailers: When buying a hybrid or tent trailer, factor in external noise. Canvas materials won’t provide sound insulation, potentially allowing noise from neighboring sources like generators to penetrate easily.

Connectivity Features

Antenna Assessment: Check if the RV is equipped with a larger, powered antenna that can be raised and lowered, as opposed to a small radio antenna.

Cell Phone Booster Verification: Determine if the RV already has a cell phone booster installed. Although rare in new RVs, used ones might have been fitted with one by the previous owner.

Wifi Repeater Examination: Look for a wifi repeater. Installing one can significantly enhance the chances of accessing wifi in RV parks.

Kitchen Appliance Evaluation

Microwave Function Test: Place a cup of water in the microwave and ensure it heats up. Sometimes microwaves might appear operational but fail to generate heat.

Convection Microwave Consideration: Determine if the RV is equipped with a convection microwave. Consider if this meets your needs as a substitute for a conventional oven. Note that some owners appreciate convection microwaves, while others find limitations in using both microwave and baking functions simultaneously.

Sink Cover Inspection: Check if the countertop covers for the sink are missing.

Refrigerator Size and Power Source: Assess if the fridge’s size accommodates your family’s requirements. Additionally, ascertain if the fridge operates solely on electricity or if it runs on both propane and electric power sources.

Height Considerations

Garage Storage Verification: Measure the exact height of the motorhome, including air conditioning units, vents, etc., for compatibility with your garage space if you plan on storing it there.

Ceiling Height Evaluation: For taller individuals, verify the ceiling height throughout the RV. Ensure there are no areas where you might feel uncomfortably cramped due to lower ceiling clearance.

Consideration for Wind Conditions: Keep in mind that while a taller RV provides a spacious feel, it might necessitate stopping and waiting out windstorms due to increased susceptibility to wind effects.

Motorhome Inspection Checklist

Tow Hitch Capacity: Verify the tow rating specified for the hitch.

Oil Change Records: Check the windshield sticker for details on the previous owner’s last oil change.

Engine Health Check: Inspect for any signs of oil leaks as they can indicate potential engine issues.

Interior Accessibility Test: Close the slide and assess if access to essential areas like the bathroom or kitchen remains convenient.

Safety Considerations: Remember the safety concerns associated with Class A motorhomes. Consider exploring the advantages of a Class C before finalizing your purchase decision.

Generator Capacity Assessment: Determine the size of the generator and assess if its capacity suffices to power both air conditioning units, lights, the water pump, and other necessary appliances.

Class C Motorhome Inspection

Front Cap Examination: Climb a ladder and meticulously inspect every inch of the front cap of the cab-over area. This spot is notorious for water penetration in Class C motorhomes. Any signs of water damage should be a red flag.

Consideration for Class A: Consider if you are absolutely certain about choosing a Class C. Some sales professionals note a substantial number of Class C buyers eventually opting for Class A motorhomes. While exploring the benefits of a Class A, remember that there are also merits to owning a Class C.

Travel Trailer Precautions

Towing Capacity Verification: Ensure you accurately determine your tow vehicle’s towing capacity. Avoid solely relying on online searches, as various vehicle options can influence the actual towing rating. Consult your VIN number and refer to the owner’s manual for precise details. Avoid purchasing a trailer that would push you to operate within 80% of your maximum towing capacity.

Brake Controller Requirement: If you’re towing with a vehicle other than a truck, confirm the presence of an integrated brake controller. Otherwise, factor in an additional $400 for purchasing one. A brake controller is an essential necessity, not an optional accessory!

Fifth Wheel Recommendations

Cab Clearance Confirmation: Ensure ample clearance exists between the fifth wheel and the rear of your cab. Merely seeing space when connected isn’t sufficient. Perform sharp right and left turns to verify there won’t be contact between the fifth wheel and your truck cab.

Weight Capacity Consideration: Evaluate both the payload capacity on the bed and the towing weight. It’s advisable not to select anything that exceeds 80% of your maximum capacity.

“Half Ton Towable” Caution: Exercise caution with the term “Half Ton Towable” in the fifth wheel industry. While some units might be suitable for half-ton trucks, always double-check your numbers. Account for additional weight from people, gear, and water, and aim to stay below 80% of your maximum capacity.

Concluding Remarks

Commendations on conducting a thorough used RV inspection. Your efforts could have potentially saved you significant expenses and hassle. However, before finalizing any deal, exercise caution! Refrain from signing any paperwork at the dealership on delivery day that confirms your approval of the RV’s condition until you’ve completed a comprehensive inspection. Avoid signing based solely on verbal promises of repairs. Ensure that any noted issues are documented in the contract and explicitly specify that they need addressing before your approval of the entire deal.

Categories
Camper Van

The Revolution of Ultra Lightweight Campers: Exploring Freedom in Minimalist Travel

In recent years, there has been a paradigm shift in the world of camping and travel enthusiasts. Traditional bulky RVs and trailers are making way for a new trend – ultra lightweight campers. These compact, agile, and efficient vehicles are redefining the way people experience the great outdoors. In this article, we will delve into the fascinating world of ultra lightweight campers, exploring their design innovations, advantages, and the freedom they bring to modern-day nomads.

Evolution of Camping Vehicles

Camping has been a beloved pastime for generations, with families and adventurers taking to the open road to explore nature. However, traditional camping vehicles, like massive motorhomes and trailers, posed challenges in terms of fuel efficiency, maneuverability, and accessibility to remote locations.

The Birth of Ultra Lightweight Campers:

The demand for a more nimble and fuel-efficient alternative gave rise to the development of ultra lightweight campers. These campers, often weighing less than 3,000 pounds, were designed to address the limitations of their heavier counterparts while maintaining the comfort and convenience of a home on wheels.

Camper Design Innovations

Compact Footprint: One of the defining features of ultra lightweight campers is their compact size. Manufacturers have embraced innovative designs to maximize interior space without compromising on the overall dimensions of the camper. Foldable furniture, clever storage solutions, and multi-functional spaces have become staples of these ingenious designs.

Materials and Construction: To achieve the goal of reduced weight, manufacturers have turned to advanced materials and construction techniques. Lightweight yet durable materials, such as aluminum and fiberglass, are used to build the camper’s structure without sacrificing strength. This not only contributes to fuel efficiency but also makes the camper more durable and resistant to the elements.

Aerodynamics: Aerodynamics play a crucial role in the fuel efficiency of any vehicle, and ultra lightweight campers are no exception. Streamlined shapes and thoughtful placement of features like windows and vents contribute to reduced wind resistance, ensuring that these campers cut through the air with minimal drag.

Advantages of Ultra Lightweight Campers

  1. Fuel Efficiency:
    Perhaps the most significant advantage of ultra lightweight campers is their improved fuel efficiency. With a reduced weight, these campers require less power to tow, leading to lower fuel consumption. This not only benefits the environment but also saves travelers money on fuel costs, making the road trip experience more economical.
  2. Maneuverability:
    Traditional RVs and trailers often struggle with maneuverability, especially in tight spaces or on narrow roads. Ultra lightweight campers, on the other hand, are designed with agility in mind. Their compact size and lighter weight make them easier to navigate, allowing adventurers to access remote campsites and explore winding roads with confidence.
  3. Cost Savings:
    Beyond fuel efficiency, the reduced weight of ultra lightweight campers translates into cost savings in various aspects. Towing a lighter load puts less strain on the towing vehicle, leading to decreased wear and tear on the engine and braking system. Additionally, the initial cost of purchasing an ultra lightweight camper is often lower than that of larger, more complex alternatives.

Eco-Friendly Travel

As the world becomes increasingly conscious of environmental impact, the eco-friendliness of ultra lightweight campers becomes a significant selling point. The reduced fuel consumption and materials used in their construction contribute to a smaller carbon footprint, aligning with the growing trend of sustainable and responsible travel.

Freedom of Exploration

One of the most liberating aspects of ultra lightweight campers is their ability to access remote and off-the-beaten-path locations. Traditional RVs may be restricted by size and weight, limiting the choice of campsites to more accessible areas. Ultra lightweight campers open up a world of possibilities, allowing travelers to immerse themselves in the serenity of untouched nature.

Spontaneity:

The freedom to travel without the burden of excessive weight allows for a more spontaneous and flexible travel experience. Ultra lightweight campers empower adventurers to change their plans on a whim, explore unplanned detours, and embrace the unpredictability of the journey. This spontaneity adds an element of excitement and discovery to the camping experience.

Extended Travel Durations:

With the cost savings associated with fuel efficiency and reduced wear on the towing vehicle, travelers can afford to extend their trips without breaking the bank. Ultra lightweight campers enable longer journeys, encouraging individuals and families to embark on extended road trips and savor the beauty of diverse landscapes and cultures.

Challenges and Considerations

  1. Limited Living Space: While the compact design of ultra lightweight campers maximizes space efficiency, there is still a limit to the living space available. Travelers must carefully consider their comfort needs and prioritize essential items, embracing a minimalist lifestyle to make the most of the limited square footage.
  2. Weather Limitations: The lightweight construction that makes these campers efficient for travel may also pose challenges in extreme weather conditions. While many ultra lightweight campers are well-insulated for three-season use, winter camping or exposure to severe weather may require additional preparation and equipment.
  3. Towing Vehicle Compatibility: Choosing the right towing vehicle is crucial for a safe and enjoyable towing experience. Travelers must ensure that their vehicle is compatible with the weight and towing capacity of the camper they choose. Additionally, investing in towing accessories, such as sway bars and weight distribution hitches, can enhance stability on the road.

Popular Ultra Lightweight Camper Models

Airstream Basecamp:

Known for its iconic silver bullet design, Airstream has embraced the trend of ultra lightweight campers with the Basecamp model. Weighing in at just over 2,500 pounds, the Airstream Basecamp offers a sleek and modern interior with amenities that cater to both seasoned campers and newcomers alike.

Forest River R-Pod:

The Forest River R-Pod series is a collection of ultra lightweight campers that combine style and functionality. With a variety of floor plans and features, the R-Pod offers versatility to suit different preferences. Its compact size and eye-catching design make it a popular choice for those seeking a lightweight and visually appealing camper.

Scamp 13′:

The Scamp 13′ camper is a fiberglass lightweight option that has gained a loyal following for its simplicity and durability. Despite its small size, the Scamp 13′ boasts a well-designed interior with customizable layouts to accommodate the needs of individual travelers or couples.

Happier Camper HC1:

The Happier Camper HC1 stands out for its modular interior, allowing users to customize the layout based on their preferences. With a weight of around 1,100 pounds, this ultra lightweight camper offers a lightweight and stylish option for those who prioritize flexibility and personalization.

Tips for Choosing and Using Ultra Lightweight Campers

  1. Define Your Travel Needs: Before selecting an ultra lightweight camper, it’s essential to define your travel needs. Consider factors such as the number of travelers, desired amenities, and the types of destinations you plan to visit. This information will guide you in choosing a camper that aligns with your lifestyle and preferences.
  2. Check Towing Capacity: Understanding your towing vehicle’s capacity is crucial in ensuring a safe and enjoyable travel experience. Consult your vehicle’s manufacturer specifications and consider factors like payload capacity, engine power, and towing accessories to determine the compatibility with your chosen ultra lightweight camper.
  3. Prioritize Essential Amenities: Given the limited space in ultra lightweight campers, it’s important to prioritize essential amenities. Focus on features that enhance your comfort and convenience, such as a well-equipped kitchen, bathroom facilities, and adequate storage. Avoid unnecessary additions that may add weight without significant benefits.
  4. Embrace Minimalism: Living in a compact space requires a mindset shift toward minimalism. Embrace the opportunity to declutter and prioritize only the items that bring joy and functionality. This not only enhances the camper’s livability but also contributes to a more enjoyable and stress-free travel experience.
  5. Plan for Weather Variations: While many ultra lightweight campers are designed for three-season use, it’s important to plan for weather variations. Invest in appropriate gear for colder temperatures or unexpected rain. Additionally, familiarize yourself with the camper’s insulation and ventilation features to ensure a comfortable interior environment.

The rise of ultra lightweight campers marks a transformative era in the world of travel and camping. These compact and efficient vehicles offer a blend of freedom, flexibility, and eco-consciousness that resonates with modern adventurers. As manufacturers continue to push the boundaries of design and technology, the future holds exciting possibilities for those who seek to explore the world in a minimalist and sustainable manner. Whether you’re a seasoned traveler or a newcomer to the camping scene, the allure of ultra lightweight campers invites you to hit the open road and embrace the journey with a newfound sense of freedom.

Categories
Camper Van

Roadside Assistance: Save Your Money Smartly

Money-Saving Strategies for Your Roadside Assistance Plan

Owning a roadside assistance plan is a wise move for any RVer. If you ever find yourself stranded on the side of the road, one phone call is all it takes to have help on the way. But how can you save money on these plans?

While roadside assistance plans aren’t exorbitant, they can still set you back over $100 per year. If you’re a thrifty individual, you’ve probably pondered how to secure top-notch roadside service without breaking the bank.

Good news! In this article, we’ll explore clever ways to cut costs on your roadside assistance plan.

Leverage Your Insurance

One of the best ways to save on your roadside assistance plan is by tapping into your auto insurance.

Numerous auto insurance providers offer roadside assistance as a budget-friendly add-on to your policy. For example, Geico provides roadside assistance starting at just $14 a month. In some cases, roadside assistance might even be included as a complimentary perk with your auto insurance policy.

Check if your RV insurance provider offers the option to bundle roadside assistance with your package for cost savings.

Seize Special Discounts

Various special discounts can help you reduce the cost of your roadside assistance plan. In 2019, AAA introduced a military membership that includes discounts and additional benefits.

If you’re a teacher, you may be eligible for discounted roadside assistance plans. These discounts can be accessible directly from the roadside assistance provider or through your school district or union.

Senior RVers can enjoy savings through AARP, which offers up to a 20% discount on Allstate roadside assistance. This means you can secure a year of roadside assistance for as little as $66!

You don’t necessarily need to belong to a specific group to enjoy special discounts. Many roadside assistance plans offer year-round discounts that are open to anyone. For instance, AAA often presents discounts like 50% off membership or buy one, get one free offers.

Acquire Roadside Assistance by Enrolling in a Membership Plan or Choosing a Package Deal

Another fantastic way to save on your roadside assistance plan is by acquiring it through a membership or as part of a package deal.

Memberships from wholesale retailers like Sam’s Club frequently offer discounted roadside assistance, depending on your membership level. You may need a retailer-specific credit card or fulfill other requirements. For example, Sam’s Club members who get their tires installed there receive three years of emergency roadside assistance.

Additionally, some credit cards, such as those from Chase, come with roadside assistance as a complimentary perk. Typically, this plan is included with your annual fee, but you may need to activate it yourself.

Don’t forget to check with your cellphone provider as well. AT&T offers roadside assistance for just a few dollars per month to its customers, and T-Mobile provides a free year of AAA with certain contracts.

Check Whether Your RV Warranty Includes Roadside Assistance

In certain cases, you might not need to pay extra for a roadside assistance plan because it’s included with your RV’s warranty.

Many vehicles, including RVs, come with roadside assistance at no additional cost for a specified number of years after your purchase. If you’ve bought a new RV within the past few years, there’s a good chance you’re already covered.

However, in some instances, you may need to opt for an extended RV warranty to secure the roadside assistance plan. When buying your RV, it’s a good idea to inquire about how to obtain a discounted assistance plan. If you’ve already made the purchase and are unsure, check your vehicle’s warranty information for details.

Be Your Own Roadside Assistance

If you’re a hands-on individual with the right tools and supplies, you can save a substantial amount of money by becoming your own roadside assistance.

While RVs might not be the easiest vehicles to fix on the side of the road, they do offer ample space for storing tools and supplies you might need. By keeping these supplies on hand and gaining the knowledge to address various RV issues, you can effectively replace an assistance plan and take care of your needs yourself.

Of course, some issues may be beyond your capabilities to fix on the road. In such cases, have a friend you can call for assistance or keep the number of a local tow company. You can also combine this cost-saving tip with the next one on our list.

On-Demand Roadside Assistance

While many assistance plans operate as subscriptions with monthly or annual fees, you may not be aware that there are on-demand roadside assistance plans available as well, such as Allstate’s pay-per-use plan.

These plans offer low upfront costs and have no subscription. Instead, they charge you a fee whenever you require roadside assistance. This approach allows you to lower your overall roadside assistance costs, particularly if you’re handy and don’t anticipate needing assistance frequently.

However, there’s a caveat to this money-saving tip: if you use the plan frequently, your expenses will quickly surpass a subscription. So, if you opt for an on-demand plan, bear in mind that it’s best reserved for emergencies.

In Conclusion

There are numerous ways to save on a roadside assistance plan:

  • Leverage Your Insurance: Many auto insurance providers offer roadside assistance as an add-on.
  • Seize Special Discounts: Look for discounts available to teachers, seniors, and other groups.
  • Membership Programs and Package Deals: Retailers, credit cards, and cellphone providers often offer roadside assistance as part of a package.
  • RV Warranty Coverage: Check if your RV warranty includes roadside assistance.
  • Be Your Own Roadside Assistance: If you’re handy, you can handle some issues yourself.
  • On-Demand Roadside Assistance: Explore pay-per-use plans that charge you only when you need assistance.

Whatever route you choose, rest assured that if you encounter any issues on the road, you’re covered without breaking the bank.

Categories
Camper Van

2023 Lightweight Truck Campers: Exploring Options, Prices, and Why They’re Worth It

Are you in the market for a truck camper for your Ford F250 or other pickups? If so, you’re in for a treat in 2023. This article takes a deep dive into the world of lightweight truck campers, providing insights into their prices, the best options for your Ford F250, and a closer look at why these campers can be relatively expensive.

Truck campers have long been a preferred choice for adventurers who love hitting the open road but don’t want to commit to a full-size RV. In 2023, the market is teeming with a new generation of lightweight truck campers that offer the perfect balance of convenience and comfort. Let’s explore the latest options, their price ranges, and discover why investing in one is often considered a smart move.

2023 Lightweight Truck Campers: A Brief Overview

2023 brings a host of new features and innovations to the world of truck campers. These compact, yet versatile units are designed to be mounted on the bed of your pickup truck, transforming your vehicle into a comfortable and self-contained living space for your travels. Key highlights of the 2023 lightweight truck campers include:

  • Weight Reduction: Manufacturers are increasingly focusing on lightweight construction materials, making it easier for a broader range of trucks to handle these campers. Reduced weight not only expands the selection of suitable pickup trucks but also contributes to better fuel efficiency.
  • Enhanced Comfort: Despite their compact size, modern truck campers are equipped with a wide range of amenities, from kitchens and bathrooms to comfortable sleeping quarters. Manufacturers are utilizing innovative interior layouts to maximize the use of space.
  • Off-Grid Features: Many 2023 truck campers are designed with off-grid adventurers in mind. Solar panels, advanced battery systems, and water management solutions make it easier to venture into remote areas without sacrificing essential comforts.
  • Durability and Quality: Manufacturers are raising the bar when it comes to build quality and materials. This ensures that your investment in a truck camper is a long-term one.

Truck Camper Prices in 2023

Truck camper prices can vary widely depending on factors such as size, features, brand, and build quality. Here’s a general breakdown of what you can expect:

1. Entry-Level Models: In 2023, entry-level lightweight truck campers typically start at around $10,000 to $20,000. These campers are usually smaller in size and offer basic amenities but are perfect for those who want to get started with truck camping without breaking the bank.

2. Mid-Range Campers: Mid-range options, offering more space and additional features, tend to fall within the $20,000 to $40,000 range. These campers strike a good balance between affordability and comfort, making them a popular choice among truck camping enthusiasts.

3. High-End Models: For those seeking the ultimate truck camping experience, there are high-end models that can cost $40,000 or more. These campers are often equipped with luxury amenities, top-notch materials, and the latest technology.

4. Custom Builds: Some enthusiasts opt for custom-built truck campers, which can significantly vary in price depending on the specifications. Customization allows you to have a camper designed to your exact needs and preferences, but it can come at a premium.

Choosing the Right Camper for Your Ford F250

The Ford F250 is a popular choice among truck camper enthusiasts due to its robust towing capacity. When selecting a camper for your F250, you’ll want to consider factors like payload capacity, bed length, and your personal camping requirements.

1. Payload Capacity: Ensure that the weight of the camper, along with any gear and supplies, doesn’t exceed your truck’s payload capacity. An overloaded truck can affect safety and performance.

2. Bed Length: The bed length of your F250 will determine which campers are suitable. Short-bed trucks require a camper designed for that bed length, while long-bed trucks offer more flexibility.

3. Amenities: Consider the amenities that matter most to you. Do you need a full kitchen, bathroom, or slide-outs for additional space? Match your camper’s features to your camping style.

Why Are Truck Campers So Expensive?

Truck campers can seem expensive, especially when compared to other types of camping solutions. Several factors contribute to their relatively high price points:

1. Compact Design: Designing and building a functional living space within the confines of a truck bed is a complex engineering challenge. Every square inch of space must be carefully utilized, leading to increased manufacturing costs.

2. High-Quality Materials: Many truck camper manufacturers use high-quality materials to ensure durability, longevity, and structural integrity. These materials can be more costly than those used in standard RVs.

3. Innovative Features: Many truck campers come equipped with innovative features like off-grid systems, modern appliances, and advanced technology. These features, while enhancing the camping experience, can increase the overall cost.

4. Handcrafted or Custom Builds: Some truck campers are handcrafted or custom-built to meet specific customer requirements. This level of craftsmanship and customization can drive up the cost.

5. Lightweight Construction: Lightweight construction materials, while making the camper easier to tow, can be more expensive than traditional materials.

In summary, truck campers are considered a premium choice due to their compact design, high-quality materials, innovative features, and customization options. While the initial investment can be higher, many campers find that the convenience and freedom they offer make them well worth the price.

In 2023, lightweight truck campers continue to redefine the world of outdoor adventures. With a diverse range of models and price points, there’s a truck camper for every budget and preference. Whether you’re a seasoned truck camper or considering your first purchase, the options available in 2023 make it an exciting time to explore the world of truck camping. So, pack your bags, hitch your camper to your Ford F250 or pickup of choice, and hit the open road in style and comfort.

Categories
Camper Van

Rating the Open Range RV: Highland Ridge’s Open Range Campers and Lightest Travel Trailers

Are you on the hunt for the perfect recreational vehicle (RV) to elevate your outdoor adventures? The Open Range RV series, crafted by Highland Ridge RV, offers a range of impressive options for outdoor enthusiasts. This article takes an in-depth look at the Open Range RV, rating it for its features, quality, and functionality. Additionally, we’ll delve into why Open Range Campers are often considered some of the lightest travel trailers in the market.

The Open Range RV lineup by Highland Ridge RV is a standout choice for those who seek the perfect blend of comfort, innovation, and versatility during their travel adventures. With a range of models to choose from, there’s an Open Range for every type of traveler.

Rating the Open Range RV

When rating an RV, several key factors come into play. Highland Ridge’s Open Range RVs consistently score well in these categories:

  • Quality and Durability: One of the standout features of the Open Range series is the exceptional build quality. These RVs are constructed to withstand the rigors of the road and the great outdoors. The use of high-quality materials ensures that your investment will last for years to come.
  • Interior Comfort: Open Range RVs offer spacious and well-designed interiors. Whether you choose a travel trailer or fifth wheel, you’ll find ample room for relaxation and entertainment. The clever utilization of space, high-end furnishings, and thoughtful layouts make them a home away from home.
  • Innovative Features: Highland Ridge is known for incorporating innovative features into their RVs. From advanced climate control systems to state-of-the-art entertainment options, you can expect modern amenities that enhance your overall travel experience.
  • Towing Convenience: The Open Range series is famous for being one of the lightest travel trailer options on the market. Their design makes towing easier and more fuel-efficient while still offering all the comforts of a traditional RV. This is a significant advantage, especially for those with smaller tow vehicles.
  • Affordability: Despite the high-quality construction and features, Open Range RVs are competitively priced. This affordability makes them accessible to a broader range of travelers who want a premium RV experience without breaking the bank.

Exploring the Open Range RV Lineup and Towing Compatibility

Highland Ridge’s Open Range RV lineup offers various models with different towing requirements, ensuring that there’s an option for a wide range of vehicles and travel preferences. Here’s a breakdown of the towing compatibility for each model:

1. Open Range Light Travel Trailers:

These models are designed to be exceptionally lightweight and aerodynamic, making them suitable for smaller tow vehicles. Typically, a mid-sized SUV or a half-ton pickup truck is more than capable of towing an Open Range Light Travel Trailer. With a gross vehicle weight rating (GVWR) ranging from 6,500 to 8,000 pounds, these trailers are an excellent choice for those who want the comfort of an RV without the need for a heavy-duty truck.

2. Open Range Roamer Fifth Wheels:

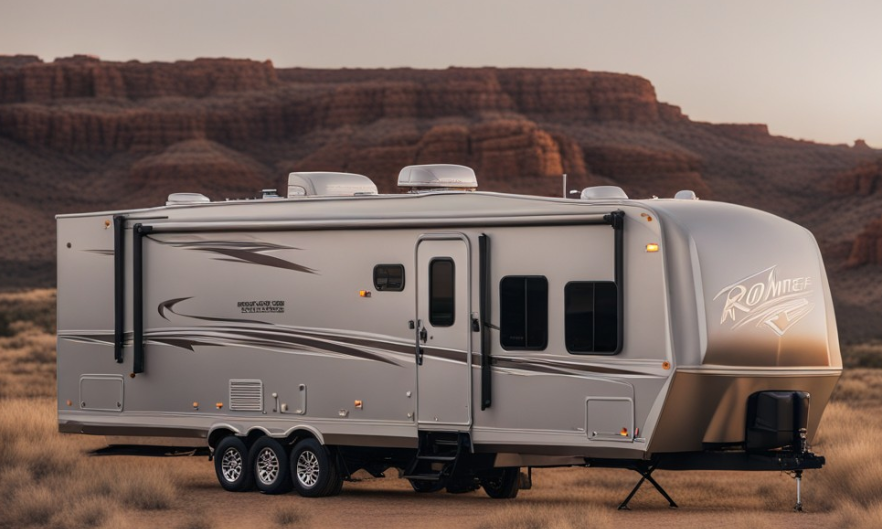
The Roamer series offers a more spacious and luxurious RV experience, but they do require a more substantial tow vehicle due to their size and weight. A three-quarter-ton pickup truck or heavier-duty truck is recommended for towing Roamer Fifth Wheels. The GVWR of Roamer Fifth Wheels ranges from 12,000 to 15,000 pounds, and it’s important to ensure your tow vehicle has the appropriate towing capacity to handle these larger models.

3. Open Range Ultra Lite Travel Trailers:

The Ultra Lite series combines a lightweight advantage with spacious interiors, making them an ideal choice for family vacations and weekend getaways. Similar to the Open Range Light Travel Trailers, a mid-sized SUV or a half-ton pickup truck is typically sufficient for towing an Open Range Ultra Lite Travel Trailer. The GVWR for these models ranges from 5,000 to 7,000 pounds, ensuring a broad range of tow vehicle compatibility.

When selecting an Open Range RV, it’s essential to consider the towing capacity of your vehicle. This ensures a safe and comfortable towing experience. Always consult your vehicle’s owner’s manual and the RV’s specifications to confirm that your tow vehicle can safely handle the weight of the trailer. Additionally, factors such as payload capacity, towing equipment, and towing setup (including weight distribution hitches and brake controllers) should be considered to ensure a smooth and secure towing experience.

By offering a variety of models with different towing requirements, Highland Ridge’s Open Range RV lineup caters to travelers with various tow vehicles, making it easier for individuals to find the perfect match for their specific needs and preferences.

The Open Range RV Experience

Owning an Open Range RV is not just about hitting the road; it’s about embracing a lifestyle of adventure and comfort. Whether you’re seeking solitude in the mountains or exploring coastal highways, an Open Range RV can be your perfect companion.

Highland Ridge RV’s Open Range series has earned its reputation for quality, innovation, and value. With a wide range of models to choose from, including the incredibly lightweight travel trailers, there’s an Open Range RV to suit every traveler’s needs.

If you’re searching for an RV that balances luxury, durability, and affordability, the Open Range series deserves your serious consideration. Its versatility and variety make it a top contender in the world of recreational vehicles. So, whether you’re a seasoned RV enthusiast or a novice traveler, an Open Range RV might be the key to unlocking your next great adventure. Choose Highland Ridge’s Open Range, and make your journey unforgettable.

Categories
Camper Van

Ensuring a Safe RV Trip with Apple CarPlay

Utilizing CarPlay-Compatible Apps for RV Safety

Apple CarPlay has become a valuable addition to the most popular ½-ton, ¾-ton, and 1-ton tow vehicles, as well as chassis suitable for Class B, B+, and smaller C RVs. With this integration, it’s more crucial than ever for RV aftermarket providers to ensure that their products are compatible with Apple CarPlay, enhancing the safety of RV trips.

Apple CarPlay has outpaced its Android Auto counterpart due to fragmented adoption and Android security concerns. This dominance positions Apple CarPlay as the go-to choice for RVers.

Apple CarPlay in Motorhomes

While it’s expected that eventually, all motorized RVs will offer Apple CarPlay options, the adoption process is gradual. This is partly due to fewer units sold and the varying inclusion of functionality within the chassis. However, even this unique market has witnessed a surge in CarPlay adoption, largely driven by customer demand.

For instance, Newmar’s entry-level Baystar Class A motorhome and the Entegra Odyssey Class C RV now feature Apple CarPlay in their 2024 models. This trend is likely to continue across product lines and price points, reflecting customers’ expectations of having this amenity in every vehicle.

For manufacturers, this is a win as it eliminates the need for costly navigation systems and concerns about proprietary functionality.

Advantages of Apple CarPlay for RV Safety

Apple CarPlay offers numerous advantages that contribute to safer RV trips. Here are some key points highlighting its benefits:

Hands-free Operation

CarPlay supports voice commands through Siri, enabling drivers to perform tasks like making calls, sending messages, and setting reminders without taking their hands off the steering wheel.

Simplified Interface

Apple CarPlay provides a user-friendly, in-vehicle display optimized interface, minimizing distractions and enhancing drivers’ ability to quickly grasp information.

Smart Navigation

CarPlay allows access to third-party navigation apps, such as RV LIFE Pro, which offers RV-safe navigation with turn-by-turn directions read aloud, reducing the need to frequently glance at the screen.

Reduced Phone Distraction

By integrating essential phone features into the vehicle’s infotainment system, Apple CarPlay reduces the temptation to pick up and interact with phones directly, addressing a significant source of distraction and promoting a safe RV trip.

Seamless Integration with Car Controls

Apple CarPlay seamlessly integrates with a vehicle’s existing controls, allowing drivers to use familiar buttons, knobs, touchscreens, or voice control without needing to adapt to a new system.

Prioritization of Important Apps

CarPlay gives priority to apps that are both pertinent and safe for use while driving, such as navigation and tire pressure monitoring tools. Apps that have the potential to be more distracting, like games or social media, are not accessible within the CarPlay environment.

Consistent Experience

For those who drive different vehicles, CarPlay maintains a consistent interface, reducing the need to adapt to unfamiliar systems and, thus, minimizing distractions.

Furthermore, Apple CarPlay incorporates several features ideal for promoting safe RV trips, including Readable Texts, Safe Music and Podcast Controls, and a Do Not Disturb Mode. By integrating these functions, Apple CarPlay’s goal is to mitigate distractions and enhance the driver’s focus on the road.

These CarPlay Applications Contribute to a Secure RV Journey.

RVing, particularly while driving or towing an RV, demands a high level of concentration. With Apple CarPlay, navigation and essential RV safety features can be seamlessly integrated into the dashboard, minimizing distractions.

TireMinder for Apple CarPlay

Tire pressure monitoring is critical for RVers to ensure a safe trip. TireMinder, a trusted TPMS solution provider for over a decade, has introduced Apple CarPlay integration. This innovative step simplifies the RV dashboard, eliminating the need for an additional screen and power cable.

The TireMinder Lite mobile app integrates with Apple CarPlay, allowing RVers to monitor real-time tire pressure and temperature directly from their head unit equipped with Apple CarPlay. The app ensures user data privacy and offers USA-based support.

Using TireMinder Sensors on Your Truck

Some RVers, like popular content creators RV Plus 3, enhance their monitoring experience by adding TireMinder sensors to their truck tires, in addition to their RV tires. This approach provides comprehensive tire pressure and temperature monitoring, integrating seamlessly into the dash head unit using Apple CarPlay and the TireMinder app.

RV LIFE Pro: Trip Planning and Navigation

RV LIFE Pro, a comprehensive suite of tools for RV trip planning, navigation, maintenance, and education, now includes an Apple CarPlay component. RV LIFE Pro’s mobile app offers RV-safe navigation for seamless integration with Apple CarPlay.

RVers can use RV LIFE Pro to navigate and follow RV-safe GPS routes, enhancing the ease of trip planning and ensuring a safer RV journey.

Start Planning Your Next RV Trip

By combining TireMinder for tire management and RV LIFE Pro for navigation and trip planning, RVers can ensure a safe and stress-free journey. These tools monitor tire pressure, temperature, and route details, offering a worry-free and memorable vacation experience.

Categories
Camper Van

Airstream Introduces the All-New Trade Wind Travel Trailer

Exploring the Features of the 2024 Trade Wind Travel Trailer

For generations, Airstream has been synonymous with the RV lifestyle, known for its sleek and stylish travel trailers that have evolved over the years. In 2024, Airstream continues to push the boundaries of innovation with the launch of the Trade Wind Travel Trailer.

These iconic aluminum trailers have always been associated with on-road adventures, but now, they’re stepping into the world of off-grid travel with powerful solar capabilities and water-saving technology. With the Trade Wind, you can embark on camping journeys that take you far off the beaten path, allowing you to immerse yourself in the great outdoors for longer stretches.

The Unique Trade Wind Floor Plan

The Trade Wind Travel Trailer marks a fresh chapter in Airstream’s storied history. While it retains the classic charm, it introduces some exciting differences. At present, the 25FB model is the sole floor plan, and it’s a case of quality over quantity. Compact yet cleverly designed, this 25-foot trailer has all the essentials neatly packed without relying on slide-outs, making setup at your campsite a breeze.

The front section houses the primary bedroom, featuring a spacious wardrobe and a queen-size bed (with potential future options for twin beds). Wraparound windows bathe the space in natural light. Adjacent to the bedroom, a split bathroom arrangement ensures that multiple individuals can prepare for the day simultaneously.

At the rear, you’ll find the kitchen, a comfortable living and dining area, an L-shaped kitchenette with ample storage, and a curved, spacious couch. An adjustable dinette table and a convertible chair provide additional sleeping space, offering unparalleled flexibility that caters to solo travelers, couples, or even groups of up to five people.

Enhanced Boondocking Features

While most Airstream trailers are traditionally designed for paved roads and established campgrounds, the Trade Wind Travel Trailer is geared for adventurers seeking to blaze their own trails. It’s equipped with a range of upgraded boondocking features.

Off-Grid Design

These new Airstream campers are built to tackle rugged terrain. While they can handle conventional roads, they’re also equipped for off-roading with front rock guards, a solar window shield for debris protection, off-road-capable tires, and a three-inch lift kit for increased ground clearance.

Robust Battery and Solar Setup

Off-grid adventures require reliable power sources. The Trade Wind trailers boast an impressive 810Ah heated lithium battery bank, which is charged by the 600W solar panels on the roof. With a 3000W inverter, you’ll have ample power for a range of tasks, big or small.

Water-Saving Technology

Efficient water usage is vital when boondocking. The campers offer an optional composting toilet that conserves water. Additionally, they come standard with a recirculating water heater, improving overall water efficiency.

Cozy Interior Design

Comfort is key during your travels, and the Trade Wind Travel Trailer combines the classic Airstream exterior with a cozy and inviting interior. The design is a masterful blend of function and style.

Outside, you’ll recognize the iconic rounded ends and gleaming aluminum exterior. Step inside, and you’ll find a warm and welcoming atmosphere. Wood paneling and cabinets add a natural touch to the space, and numerous windows provide views of your surroundings.

You have a choice between two interior design styles: Fieldstone and Terracotta.

Fieldstone offers a neutral color scheme that complements the wood elements. Textured gray cushions adorn the sofa and convertible dinette, matching the gray floors and walls, creating a harmonious look.

Terracotta introduces warm reddish-orange hues that blend beautifully with oak accents and contrast the concrete-patterned flooring. Accent pillows are available for both styles, adding visual interest and variety to the interior.

Versatile Options and Upgrades

Tailor your Trade Wind to suit your needs with various optional features and upgrades. You can choose between a composting toilet and a traditional flush toilet. For those who require extra cargo space, the rear hatch upgrade allows for easier loading and unloading, even serving as a miniature awning when open.

Consider upgrading to the rear and roadside awning package for larger and more versatile awnings that provide shade wherever you roam. To take your culinary experience to the next level, opt for the convection oven and air fryer, ensuring a versatile cooking experience during your travels.

In Conclusion

The Trade Wind Travel Trailer marks an exciting new chapter in Airstream’s history. With its off-grid capabilities, comfortable interior, and a range of options and upgrades, it’s a dream come true for Airstream enthusiasts who have been longing for the ability to explore off the beaten path.

These trailers are slated for release in 2024, with the possibility of additional floor plans and options in the future. The MSRP for the Trade Wind Travel Trailer is $129,400, making it a compelling choice for those seeking adventure and comfort on the road.