Categories
RV

Storing Your Recreational Vehicle (RV) at Home: A Comprehensive Guide

The Ultimate Guide to Storing Your RV at Home

As summer swiftly fades into autumn and winter approaches, it’s time to consider what to do with your RV. Will you be storing it for the winter, renting it out, or fortunate enough to enjoy year-round RVing in favorable climates? For many, storing the RV becomes a necessity until the warmer months return.

While some opt for campground or storage facility storage, you may be considering keeping your RV at home for the winter. But is this the best choice for you? What preparations are necessary for both your home and RV? These are important questions to address.

In this comprehensive guide, I’ll explore every aspect of storing your RV at home, covering topics such as space requirements, maintenance, and more, to help you make informed decisions and ensure a smooth storage experience.

Advantages of Storing Your RV at Home

Why opt for storing your RV at home instead of a dedicated facility? There are several compelling reasons.

Firstly, let’s talk finances. Cost often dictates our choices, and RV storage fees can add up significantly. Outdoor facilities typically charge between $30 to $100+ per month, depending on size. Indoor storage, especially heated spaces, can run anywhere from $50 to $500 monthly.

Moreover, considering the long-term care of your RV is crucial. Not everyone can afford expensive indoor storage. Leaving your RV exposed to the elements can lead to wear and tear over time. Snow, rain, and cold temperatures can damage its exterior. Storing it at home allows you to maintain it regularly, ensuring its longevity.

Key Considerations before Storing Your RV at Home

So, you’re considering storing your RV at home for the off-season. Before you proceed, it’s essential to ponder the following questions:

1. Assessing Space: Can I Accommodate RV Storage at Home?

Determining whether you have adequate space to store your RV at home is paramount. Consider the dimensions of your property and the size of your RV carefully. Here are some factors to contemplate:

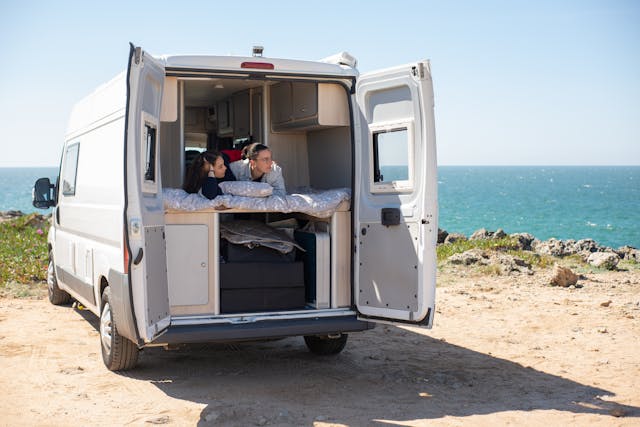
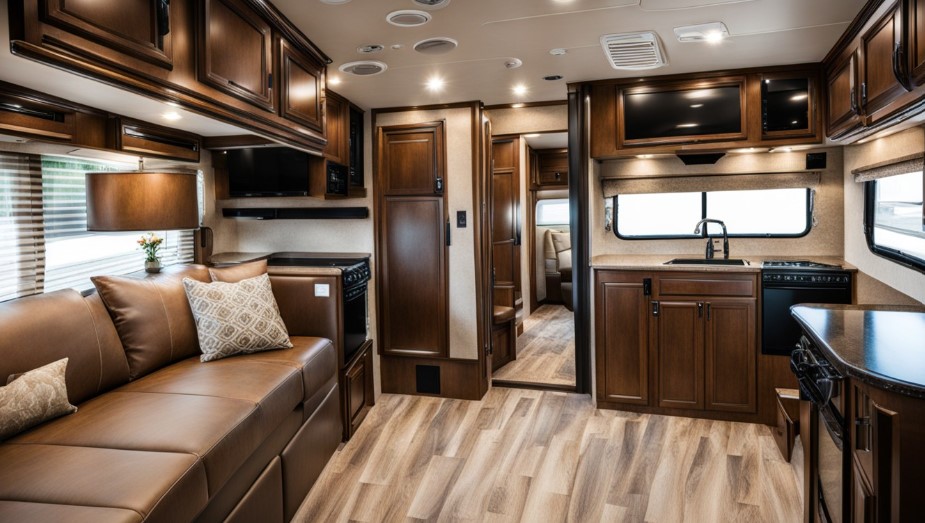
  • Size of your RV: Class A motorhomes are typically larger and may require more space, especially if your home is single-story. Class B or Class C RVs are generally more manageable in terms of space requirements.
  • Dimensions: Class C RVs range from 21 to 35 feet long, while Class Bs typically measure between 16 to 22 feet. If your RV exceeds 40 feet, accommodating it at home might not be feasible.

Evaluate your available space against the dimensions of your RV to determine if storing it at home is a viable option.

2. Choosing the Right Spot for RV Storage on Your Property

Deciding where to store your RV on your property is a crucial step. Consider these options:

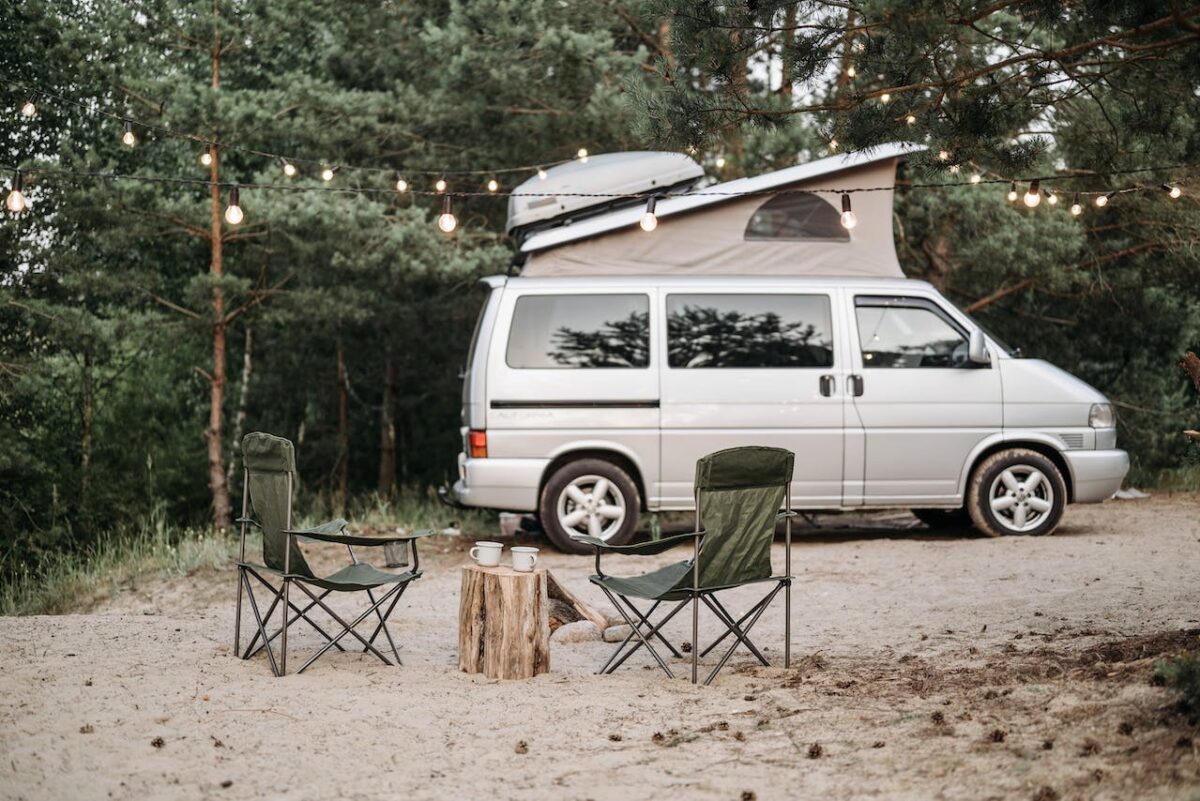
  • Driveway: Many opt for the driveway, but be mindful of space limitations, especially if you have multiple vehicles. Even smaller Class B or C RVs can occupy significant room.
  • Garage: Storing your RV in the garage is an ideal solution, but it requires sufficient space and clearance. Prepare to clear out the garage to accommodate larger Class A or Class C RVs.

Evaluate your property layout and available space to determine the most suitable storage location for your RV.

3. Legal Considerations for Storing Your RV at Home

Before deciding to store your RV on your property, it’s crucial to consider the legal aspects:

  • Homeowner’s Association (HOA) Rules: Many HOAs have restrictions on RV parking. Review your HOA guidelines to ensure compliance before storing your RV at home.
  • Local Municipality Regulations: Check with your local government to understand any zoning or parking regulations that may apply to storing RVs on residential properties.
  • Potential Consequences: Ignoring regulations could result in fines, tickets, or even having your RV towed. It’s advisable to clarify the legalities beforehand to avoid any penalties.

Ensure you’re aware of and adhere to all relevant laws and regulations to prevent any legal issues associated with storing your RV at home.

4. Ensuring Security and Protection for Your RV

Ensuring your RV’s safety and protection is paramount, especially when storing it at home:

  • Protection from Elements: Storing your RV in a driveway without adequate shelter exposes it to the elements, negating the purpose of storing it at home. Ensure your storage spot provides protection against weather conditions.
  • Safe Environment: Choose a spot that offers security for your RV. While a garage is ideal, any form of shelter that shields your vehicle from potential damage is beneficial.

Prioritize finding a secure and sheltered location on your property to safeguard your RV from environmental hazards and potential risks.

5. Assessing Long-Term Financial Savings

Consider the financial implications of storing your RV at home:

  • Initial Renovation Costs: Converting your garage or preparing a storage spot at home may incur significant upfront expenses.
  • Ongoing Expenses: Additional costs, such as maintenance, security measures, and potential HOA fees, can accumulate over time.

Evaluate these expenses against the cost of renting a storage spot at a facility. While storing your RV at home may seem cost-effective initially, consider the long-term financial implications to ensure you’re genuinely saving money in the end.

6. Considering Family and Neighbor Relations

Before storing your RV at home, consider the potential impact on your family and neighbors:

  • Family Dynamics: Assess how storing the RV at home may affect your family members. Consider their feelings about seeing the RV parked on the property throughout the winter months.
  • Neighbor Relations: Communicate with your neighbors to ensure they are comfortable with the presence of the RV. Address any concerns they may have regarding aesthetics or regulations.

Maintaining open communication with your family and neighbors can help prevent potential conflicts and ensure a harmonious living environment for everyone involved.

Mastering RV Parking: Tips for Driveways and Garages

When it comes to parking your RV, considerations extend beyond choosing between your driveway or garage. Factors like slope and layout can pose challenges:

  • Driveway Slope: If your driveway is sloped, parking your RV may present difficulties. Uneven terrain can affect stability and maneuverability.
  • Garage Angle: Similarly, if your garage is situated at an angle, maneuvering your RV into the space may require additional care and skill.

Navigating these challenges requires careful planning and execution. Consider employing leveling blocks or ramps to address slope issues, and practice parking maneuvers to ensure a smooth process.

Addressing Weight Distribution for RV Storage

Weight distribution is a critical consideration when storing your RV, especially if it’s parked at an angle. Here’s why:

  • Potential Damage: Storing your RV on an incline can cause items inside to shift, leading to uneven weight distribution. This imbalance can strain axles and other components, potentially causing damage.
  • Refrigerator Concerns: An uneven angle can impact the functioning of your RV refrigerator. Incorrect positioning may lead to the development of ammonia sediment within the cooling unit, hindering its performance. Excessive sediment can render the fridge inoperable, resulting in food spoilage.

To mitigate these risks, ensure your RV is parked on level ground to maintain proper weight distribution and fridge functionality. Regularly check and adjust the positioning of your refrigerator to prevent sediment buildup and ensure optimal performance.

Managing Wheel Blocks, Rooflines, and Neighbor Considerations

  • Wheel Blocks: Use wheel blocks to prevent your RV from rolling on sloped driveways. Avoid parking on steep inclines or angles whenever possible to minimize this concern.
  • Roofline Awareness: Be mindful of your home’s roofline, especially if your garage is adjacent to the house or located in a side yard. Ensure your RV is parked clear of any overhanging structures to prevent damage.
  • Tree Clearance: Trim trees and foliage that may obstruct access to your driveway or garage. Clearing these obstacles before parking your RV will make maneuvering easier.
  • Considerate Parking: Park your RV in a way that allows your neighbors to maintain visibility and access. Avoid obstructing views or parking near sidewalks to prevent potential hazards or legal issues.

By addressing these considerations, you can ensure safe and hassle-free RV parking while minimizing potential inconveniences for yourself and your neighbors.

Preparing Your RV for Winter Storage

As your RV settles in for the winter, it’s crucial to undertake proper winterization to ensure it remains in optimal condition for the spring. Here’s a comprehensive checklist to guide you through the process:

Taking Care of Faucets, Drains, and Pumps During Winterization

  • Pressurize the Water Pump: Start by ensuring the water pump is on. Then, systematically open each faucet, one at a time, including both hot and cold water valves, to pressurize the system with antifreeze. Confirm antifreeze flow at each faucet.
  • Change Water Inlet Screen: Power down the water pump and open a faucet to release pressure. Remove the water inlet screen and replace it with a new one to maintain optimal flow.
  • Seal Off Faucets: Close off all faucets throughout the RV, including those in the bathroom, kitchen, and any others to prevent freezing.
  • Treat Drains with Antifreeze: Pour approximately one cup of antifreeze into each drain to prevent freezing in colder temperatures.
  • Address Holding Tanks and Toilet: Add a larger quantity of antifreeze (about two to three cups) to black water and gray water tanks, as well as the toilet. Flush the toilet until antifreeze is visible in the water to ensure thorough treatment.
  • Install a Water Heater Bypass Kit: Consider installing a water heater bypass kit to prevent antifreeze from entering the water heater, which could lead to unnecessary waste.
  • Manage Low Point Drain Lines: Do not use low point drain lines once the water pump is turned off for the season, as they may interfere with efficient antifreeze distribution.

Caring for Heaters and Seals During Winterization

  • Disable Electric Heating Elements: Power down any electric heating elements in your water heater. While you don’t necessarily need to unplug them, ensure they are not in use. Consider removing the electric heating element and storing it outside the RV for the winter to prevent accidental activation.
  • Empty the Water Heater: Turn off the water heater and allow it to cool for several hours before proceeding. Once cooled, release all water from the heater through the pressure relief valve accessed via the drain plug. This process ensures the water heater is fully emptied and ready for winter storage.
  • Inspect Seals: Thoroughly examine all seals both inside and outside the RV, paying particular attention to those around windows and doors. Look for any signs of damage such as holes or cracks. If any problem areas are identified, apply new caulk to seal them properly. Failing to do so can lead to infestations by insects, rodents, and other pests during the winter months.
  • Check Roof Vents: Ensure that all roof vents are properly sealed to prevent water infiltration. Inspect the seals around roof vents and reseal them if necessary to maintain a watertight seal.

Preparing Plumbing, Interior, and Electrical Systems for Winter Storage

  • Inspect Air Conditioner Plumbing Vents: Check air conditioner plumbing vents for leaks or signs of damage. Address any issues before storing your RV for the winter to prevent further damage.
  • Remove Furniture and Linens: Take out all removable furniture and strip beds of linens. Ensure no clothing, blankets, or other garments are left inside the RV.
  • Empty Cabinets and Food Storage Areas: Clear out all cabinets, drawers, and shelves of food items, including bottled, canned, or processed food. Remove all trash from the RV.
  • Clean Interior Surfaces: Wipe down cabinets, refrigerator, freezer, stovetop, microwave, and oven to remove any crumbs or food residue that could attract pests.
  • Prepare Refrigerator and Freezer: Unplug the refrigerator and freezer and allow them to dry out. Place baking soda in the fridge to absorb odors.
  • Manage Propane Tanks: Remove propane tanks from the RV and store them in a safe location, such as a garage, to prevent potential hazards.
  • Disconnect Electrical Systems: Turn off the circuit breaker and disconnect from shore power. Remove batteries from external electrical devices, including alarm clocks, smoke detectors, radios, and clocks.
  • Remove Expensive Electronics: Take gaming systems, TV, and other valuable electronics indoors for safekeeping.
  • Disconnect and Store Battery: Unplug the battery and take it with you for storage in a safe location.

Preparing Engine, Tires, and Exterior Parts for Winter Storage

  • Use Fuel Stabilizer: Add fuel stabilizer to the engine to reduce the risk of excessive condensation and fuel degradation during storage. Run the engine while adding the stabilizer to ensure it disperses throughout the system effectively.
  • Antifreeze for Windshield Washer: Add antifreeze to the windshield washer solution to prevent freezing and damage to the system.
  • Use Leveling Jacks: Consider using leveling jacks to elevate the RV’s tires off the ground slightly. This prevents flat spots from forming on the tires during extended periods of inactivity. Ensure the RV is securely stabilized if using leveling jacks to prevent accidents or damage.

Important Considerations for Off-Season RV Storage

As you contemplate where to store your RV during the off-season, it’s essential to carefully consider the following points. I’m sharing these not to dissuade you from parking your vehicle at home but to ensure you have all the necessary information to make an informed decision. By weighing these factors, you can determine the best course of action for both your RV’s well-being and your financial interests.

Dealing with Bugs, Insects, and Critters

No location is immune to the presence of bugs and insects, especially when your RV is parked outdoors. Whether you opt for an outdoor storage facility or your garage, vigilance against these pests is essential. They can infiltrate your RV through even the smallest openings.

Sealing off all entry points, as previously discussed, is crucial. Additionally, ensure your RV is completely free of food remnants, including wrappers and packaging, as these can attract bugs and insects.

But insects aren’t the only concern; there are also critters seeking shelter in your RV during the colder months. Rats, mice, bats, and raccoons are among the common intruders. These animals are drawn to the warmth and protection your RV offers, making it an enticing refuge.

Rats and mice, in particular, can wreak havoc on your RV’s interior, causing damage to furniture, upholstery, wiring, and other surfaces, while leaving behind droppings and messes.

If pests find their way into your home, they can easily make their way into your RV as well. Regular inspections for insects and critters are necessary, regardless of whether your RV is parked in your garage or driveway, to prevent infestations during the winter months.

Enhancing Security for Your RV

When your RV is parked in your driveway, exposure to the elements isn’t your only concern. There’s also the risk of vandalism, destruction, and theft.

You might think, “I live in a safe neighborhood, so I don’t need to worry about vandalism or theft, right?” However, RVs are valuable assets, and unfortunately, they can attract unwanted attention from individuals looking to make a profit.

Considering the significant investment an RV represents, it’s prudent to explore security measures for your vehicle. This could involve installing security systems in and around your RV. While this can entail some expense, ranging from several hundred to several thousand dollars depending on the technology used, it’s a worthwhile investment in safeguarding your asset.

The need for security measures is particularly relevant when your RV is exposed in your driveway. If you can store it in your garage, it’s less vulnerable to theft or vandalism, although not entirely immune.

By taking proactive steps to enhance security, you can better protect your RV from potential threats and enjoy greater peace of mind.

Considering Gating Your Property for RV Security

If your RV can’t fit into your garage, gating your property is another security option to consider. While it’s not a budget-friendly choice, it can significantly reduce the risk of vandalism and theft.

A gated property acts as a deterrent to potential criminals, making it less appealing for them to target your RV. While it’s not a foolproof security measure, it adds an extra layer of protection that’s worth considering.

Proper Storage for Your RV Battery

I’ve emphasized the importance of caring for your RV battery before, but it’s worth repeating. Proper maintenance includes removing the battery during the winter months. Leaving it in your RV risks freezing, resulting in a lack of electricity when you return to your vehicle.

Even when removed, the battery’s storage conditions are critical. Extreme temperatures, whether overly cold or hot, can render the battery useless. To avoid this, store the battery in a location with moderate temperatures, shielded from direct sunlight. Place it on plywood or another surface, rather than directly on the ground, to prevent damage.

Additionally, ensure the battery is regularly charged, aiming for around 80 percent capacity to maintain its health during storage. Following these steps will help preserve your RV battery’s functionality and longevity.

Protecting Your RV with a Cover

If your only option is to park your RV in the driveway, investing in a cover is a wise choice. A quality cover provides protection against various elements such as rain, wind, snow, and sun exposure, helping to prevent external damage and sun fading. Additionally, it offers insulation, aiding in temperature control and keeping the RV relatively warm during winter.

However, it’s essential to note that RV covers may not be entirely insect or critter-proof. Determined pests like mice or rats can potentially chew through fabric covers. To mitigate this risk, consider applying critter repellant to the cover to deter unwanted visitors. This extra step can help safeguard your RV from potential damage caused by pests.

Another Alternative—Rent Out Your RV

Instead of storing your RV during the off-season, consider renting it out to others. Platforms like RVShare offer a straightforward process for listing your RV or camper for rent in your local area, similar to Airbnb but tailored for recreational vehicles. This option allows you to maximize the use of your RV while generating additional income.

Categories
RV

Essential RV Equipment Every Beginner Should Have

Although RVing is a new adventure for us, we’ve compiled a list of must-have gear that beginners shouldn’t go without. These essentials are crucial for any first camping trip, and we’re sure you’ll feel the same way once you see this list.

Embark on Your Camping Adventure: Essential RV Gear for Beginners

Whether you’re embarking on your first journey into the world of mobile living or you’re a seasoned traveler upgrading to your fifth trailer, our list of must-have RV gear is sure to pique your interest. Join us as we delve into the essentials that make RV living a comfortable and enjoyable experience for beginners and veterans alike.

Essential Items for Your Mobile Motel Room: Must-Have RV Gear

For us, the RV isn’t just a ‘camper’ or even a ‘glamper’—it’s our very own rolling motel room. After shelling out $1,800 for a week in a studio apartment, we realized the convenience of carrying our accommodations wherever we roam. So, we invested in a new 26-foot travel trailer, eagerly anticipating our maiden voyage (or perhaps, ‘shakedown cruise’ as some might call it, or even the ‘trip of terror’). As part of our preparations, we’ve stocked up on essential RV gear. Here, we delve into the must-have items you’ll want before embarking on your first adventure.

Beginner’s Guide to Fun and Comfort: Must-Have RV Gear

When outfitting your new RV, you might be surprised at how much you already have on hand from your own home. While you won’t be packing furniture, almost everything else finds its place in your mobile abode. Here’s a peek at the essentials you’ll want to ensure a comfortable and enjoyable journey ahead.

RV Drinking Water Hose

Ensure your water tastes fresh with an RV drinking water hose, distinctively white, and a garden hose for RV tasks like sewage system maintenance. Opting for the specialized hose eliminates plastic taste and harmful chemicals. Our choice? The white hose from Local Wal-Mart and the garden hose from Amazon.

RV Leveling Blocks

Contrary to popular belief, those jacks are stabilizers, not levelers. Level your travel trailer with wheel placement atop stacking leveling blocks. Our preference? The ones with a convenient handle, sourced from Wal-Mart. These blocks also serve as protective bases for stability jacks on hot asphalt or concrete pads.

Corn Hole Game

Indulge in outdoor fun with the classic Corn Hole game, a must-have for any RV trip. Our set, ordered from Amazon, includes bean bags and a portable carry bag for easy storage.

Portable Camping Grill

For outdoor cooking convenience, opt for a portable camping grill like the Blackstone brand. We chose the compact version featuring a flat top griddle surface and flip side with grill ridges. Pamela, our resident chef, is considering upgrading to the 17-inch Blackstone flat top grill after testing this one.

Collapsible RV Ladder

Tackle maintenance tasks with ease using a collapsible ladder extending up to 12.5 feet but folding flat for compact storage. Available on Amazon, this essential tool takes up minimal space, ideal for the tall travel trailer. Pair it with a telescoping broom to ensure no debris hinders your adventures.

RV Sewer Hose Dump Tube

When we bought our trailer, this crucial item was missing. As the salesperson mentioned, many buyers upgrade from the stock waste tubes, retaining the better ones. We opted for the Camco branded heavy-duty hose from Wal-Mart, complemented by a clear elbow for monitoring flow. Remember this tip: always start with the grey water tube when dumping, as leaks are more manageable with grey water.

Cordless Drill

After our Dewalt drill’s batteries gave out, replacing them was pricier than a new drill. We chose the Porter-Cable 20-volt from Lowe’s, equipped with two batteries—a significant advantage. Opting for the model with two settings, we prioritize low-speed and high torque for operating stabilizing jacks efficiently.

Lightweight Kitchen Dishes

Invest in lightweight dishes to avoid hauling heavy glass or ceramic. Pamela’s delight led to the discovery of Pink Flamingo Pattern Dinnerware, made of unbreakable melamine. Our shopping spree extended to plastic drinking vessels, stainless steel utensils, microwaveable bowls, and more—a complete kitchen that fits snugly in the Glamper.

Flamingos

They add a pop of color to the trailer’s interior, brightening up the space.

Portable Ice Maker

Upon discovering its existence, we couldn’t resist. Compact and convenient, it’s a must-have for on-the-go ice needs.

Rain-X Window Cleaner

We’re experimenting with Rain-X on the inside of shower doors to prevent fogging. While typically used for windshields, its water-repellent properties might prove effective. Additionally, we’ve acquired a shower squeegee to keep glass clear.

Basic Set of Household Tools

Given the trailer’s mobility, having basic tools on hand is essential. Our kit includes a Leatherman tool, pliers, an adjustable wrench, a rubber mallet, and a collection of tools from Dave’s guitar-making endeavors, suitable for trailer maintenance.

Throw Rugs and Floor Mats

To minimize tracking dirt and debris into our vacation home, we’ve gathered throw rugs and floor mats—a small but effective measure against messes from humans and our two mini schnauzers.

RV Linens:

Avoid the hassle of constantly ferrying items from your house by investing in dedicated RV linens. We acquired a set of sheets that conveniently pack into its own bag (though folding proficiency may vary). Additionally, we added a quilt set, featuring—you guessed it—flamingos. We’ve reserved our old linens for bath and kitchen towels only.

Coffee Maker

A coffee maker ranks high among life’s necessities. We opted for a Keurig machine for its familiarity and the convenience of purchasing coffee pods by the case.

Paper Maps

Despite the digital age, a good old-fashioned paper atlas remains invaluable for getting a sense of the route. While GPS systems and online maps are handy, there’s a certain charm and reliability to a tangible map.

Camping Clothing

Ensuring you have appropriate clothing is non-negotiable. For the ladies, essentials include shorts, T-shirts, undergarments, Capri pants, athletic shoes, flip-flops, and perhaps hiking boots for outdoor adventures. In colder months, don’t forget a jacket and jeans. As for the gentlemen, a few T-shirts and a trusty pair of jeans should suffice.

RV Travel Toiletries

Pack the essentials for personal hygiene, including soap, shampoo, toothbrushes, floss, toothpaste, combs, brushes, and a hairdryer. Keep it simple and streamlined to avoid clutter in your RV living space.

Cleaning Products

Utilize a range of cleaning products for optimal cleanliness, including Clorox wipes, a vinegar and dawn cleaning mixture, and multi-use surgical towels. Additionally, bear in mind that the redhead is both a nurse and a germaphobe.

RV Floor Cleaner

For RV beginners, a Swiffer Wet Jet proves indispensable. Consider storage solutions, such as the shower stall, to prevent clutter and maintain a carefree atmosphere without constant reminders of cleaning chores.

First Aid Kit

A comprehensive first aid kit is essential Include supplies for pets as well, such as various bandages, vet wrap or coban, antibiotic ointment, Benadryl, anti-itch cream, aspirin, paper tape, and Tylenol. Remember to store local emergency numbers for both humans and pets, including Poison Control. And don’t forget the EpiPen, crucial for individuals with serious seafood allergies.

Four-bar Lug Wrench

A four-bar lug wrench is indispensable for handling flat tires and can be acquired for around twenty dollars at O’Reilly’s.

Roll of Reflectix Insulation

Enhance comfort during hot summers by investing in a roll of Reflectix insulation material for your RV’s windows and skylights, a highly recommended solution for temperature control.

Categories
RV

Winter Camping Advice: Staying Cozy During RV Adventures

If you haven’t felt the chill yet, it’s time to gear up for colder days ahead! Embrace the winter RV camping experience with these effective tips to stay warm and cozy despite the dropping temperatures.

Tips for Insulating RV Windows and Floors in Winter

Beneath the floor of your RV lies either earth or concrete, allowing cold air to creep in with even the slightest breeze. Combat this by adding rugs and thermal curtains to your interior. Placing thick rugs over hard flooring acts as a barrier against cold air while retaining warmth inside, offering a more comfortable surface for walking barefoot.

Windows can be notorious for stealing heat, depleting your warmth supply if left unsealed. Prevent heat loss by covering windows with materials like Reflectix, bubble wrap, or foam insulation boards. Enhance insulation by hanging heavy thermal curtains or blankets over the already covered windows, ensuring even higher temperatures indoors.

During sunny days, leave windows uncovered to harness natural warmth from sunlight. However, remember to re-cover them once the sun sets to maintain insulation.

Although covering RV windows in winter has benefits, it may result in reduced natural light, trapped condensation on window interiors, and obstructed views of the surroundings. Evaluate these factors to make an informed decision.

Managing Humidity in Your RV

To maintain comfort and prevent issues like mildew in your RV, it’s essential to control humidity levels effectively. Here’s how:

Invest in an Exterior Vent Cover: Enhance air circulation by installing an exterior vent cover. This simple addition promotes airflow, reducing condensation buildup caused by activities like showering and cooking. By minimizing excess moisture inside your camper, you’ll stay warmer and preserve the integrity of your mobile home.

Utilize a Small Space Dehumidifier: Combat humidity further by utilizing a compact space dehumidifier. This device effectively lowers humidity levels within the RV, ensuring a dry environment and preventing mildew formation. Additionally, it helps maintain fresh, clean-smelling air inside your RV, contributing to a comfortable living space.

Enhance Warmth with a Sleeping Bag

Harness the warmth of a sleeping bag to elevate your comfort level during chilly nights in your camper. Here’s how to make the most of it:

Choose Wisely: Opt for a sleeping bag with a lower temperature rating than the expected weather conditions. For instance, if you anticipate temperatures around 35 degrees Fahrenheit, select a bag rated for 25 degrees Fahrenheit. This ensures adequate insulation against the cold. If you feel too warm during the night, adjust ventilation by unzipping the bag slightly or removing layers of clothing.

Mind the Head: To prevent heat loss, consider a sleeping bag with a hood feature. This helps trap heat around your head, maintaining overall warmth throughout the night. By selecting a suitable sleeping bag tailored to the weather conditions, you can enjoy a cozy and restful night’s sleep in your camper.

Harness the Heat: Cooking in Your RV Oven

Make the most of your RV oven not only for delicious meals but also as a secondary heat source. Follow these tips to maximize its warmth:

Bake and Warm: Utilize your RV oven to prepare tasty dishes while simultaneously generating heat. As the oven operates, heat naturally disperses, contributing to a cozy ambiance inside your camper. After cooking, capitalize on the residual warmth by leaving the oven door open, allowing it to fill your RV with comforting heat. However, refrain from using an empty oven solely for heating your RV’s interior.

Seal the Heat: While cooking, minimize heat loss by keeping the oven door closed as much as possible. Occasional checks on your culinary creations are acceptable, but aim to maintain the oven’s sealed environment to optimize warmth distribution.

Keep Warm by Staying Active

When the snow is falling outside and temperatures plummet indoors, the temptation to snuggle under blankets is strong. However, before giving in to the chill, consider staying active to maintain warmth. Here’s why it helps:

Boost Internal Heat: Engaging in physical activity raises your internal body temperature, helping you stay warm for longer periods. Even a brief session of jumping jacks can make a difference in combating the cold. If the weather conditions are harsh, perform exercises indoors within the confines of your RV to stay active and warm.

Enhance Winter Comfort with RV Skirting

Installing cold-weather RV skirting is a practical solution to protect your RV’s underbelly from freezing temperatures. Here’s why it’s beneficial:

Insulation and Protection: RV skirting acts as insulation, shielding the underside of your RV from freezing temperatures. It also helps seal off excess cold and wind, maintaining warmth inside your RV. Additionally, it reduces the impact of strong winter winds blowing underneath, enhancing overall comfort.

Versatile Material Options: RV skirting is available in various materials designed to withstand different weather conditions. These skirts can be easily attached to your RV using heavy-duty Velcro, allowing for hassle-free removal and reattachment between winter seasons.

Customizable and Worthwhile Investment: With a wide selection of RV skirting materials tailored to different RV sizes, you can find an option that suits your needs. Investing in RV skirting is particularly beneficial for extended winter camping stays in one location, providing long-term comfort and protection.

Safeguard Your RV Plumbing in Winter

Protecting your RV plumbing from freezing temperatures is crucial during extreme cold to ensure continuous water flow and prevent damage. Here’s how to winterize your RV plumbing system effectively:

  1. Keep Freshwater Tank Empty: To eliminate the risk of freshwater freezing in the tank, leave it empty and use bottled water for drinking, dishes, and brushing your teeth.
  2. Insulate Water Hose and Exposed Plumbing: If using fresh water or hooking up to water sources, insulate the RV water hose and any exposed plumbing to prevent freezing.
  3. Use Antifreeze in Gray and Black Tanks: Pour antifreeze down the drains and toilet to prevent freezing in the gray and black tanks. Adjust the amount according to the tank contents to ensure effective protection.

Experienced RV winter camping expert Dave Hegelson advises, “To prevent freezing of holding tanks and valves, add RV antifreeze to each tank, adjusting the amount based on their contents. Additionally, be cautious of ice buildup on dump valves and termination cap during winter travels, as this can complicate tank dumping.”

By implementing these measures, you can ensure the safety and longevity of your RV plumbing system during the winter months.

Adopting a Resilient Mindset for Cold Weather Camping

Mentally preparing yourself to embrace the cold and discomfort can shift your perspective and enhance your enjoyment of winter camping. Here’s how to maintain a “cold” mindset effectively:

  1. Embrace the Chill: By mentally accepting the cold and discomfort, you can alter your perception to find beauty in the winter camping experience rather than resenting it.
  2. Relax and Unwind: Instead of tensing up and feeling perpetually cold, consciously relax your muscles. Tension exacerbates the feeling of coldness, while relaxation can help your mind perceive greater comfort.
  3. Visualize Warmth: Engage in positive visualization by picturing yourself in warm, pleasant environments such as basking on a sunny beach. Through practice, you can train your mind to adopt a warmer state, akin to meditation techniques.

By adopting these strategies, you can cultivate a resilient mindset that allows you to enjoy the serenity and beauty of winter camping, despite the cold temperatures.

Embrace the Winter Magic: Tips for Cozy RV Adventures

Winter presents a unique opportunity for camping and exploration, with fewer crowds braving the colder temperatures. By incorporating these straightforward winter camping tips, you can unlock the true beauty of the season that many may never experience. Stay warm and embrace the enchantment of winter camping!

Categories
RV

13 Expert Tips to Guide Your Class C Motorhome or RV Purchase

Selecting a Class C motorhome is a big step, but your journey isn’t over yet. Before heading to the dealership, arm yourself with these essential tips to make the most out of your RV purchase and upcoming adventures.

1. New vs. Used RV: Making the Right Choice

When deciding between purchasing a new or used RV, buyers often find themselves grappling with a common dilemma. Each option presents its own set of advantages and disadvantages, leaving no definitive answer to this frequently pondered question.

Opting for a brand-new Class C RV offers the allure of pristine condition and the latest amenities. However, the significant drawback lies in the financial aspect, as new purchases typically come with a hefty price tag.

Pros of Buying New:

  • You acquire a completely fresh RV with all components untouched.
  • Access to the latest technological features.
  • Modern aesthetic appeal both inside and out.
  • Manufacturer warranty from day one.

Cons of Buying New:

  • High initial cost.
  • Potential for unforeseen issues due to lack of break-in period.
  • Substantial depreciation.
  • Elevated insurance premiums.

On the other hand, choosing a used Class C RV might be a more budget-friendly option. Even when purchasing from a dealership, conducting a thorough inspection beforehand is crucial to avoid any hidden surprises.

Pros of Buying Used:

  • Cost-effective solution.
  • Previously encountered issues are likely resolved.
  • Reduced depreciation.
  • Lower expenses for licensing, registration, and insurance.

Cons of Buying Used:

  • Higher likelihood of undisclosed problems from the seller.
  • Older models may not be as fuel-efficient.
  • Limited selection of options and floor plans.
  • Typically, no manufacturer warranty available.

2. Consider Renting Before Buying

With numerous Class C manufacturers offering a wide array of models, it’s wise to explore your options before committing to a purchase. Renting provides an invaluable opportunity to test out specific brands and models before making a substantial investment.

Gazing at a sleek Thor Motor Coach Chateau in the dealership’s lot might inspire dreams, but the reality of driving, parking, and living in a Class C can be vastly different. Renting allows for firsthand experience, revealing aspects you may not have considered. Perhaps maneuvering a 30-foot vehicle isn’t as effortless as imagined, or the abundance of entertainment features proves unnecessary. Moreover, the expenses associated with RV ownership, from gas to maintenance, can be eye-opening.

While renting isn’t cheap, it can potentially save thousands of dollars in the long run. Consider the math: a new Class C typically costs around $50,000, with ongoing expenses averaging at $4,200 annually. In contrast, renting for a week might amount to $750. If your family vacations three times a year, renting could save you nearly $2,000 annually.

The decision to rent or buy depends on your usage and preferences. If you envision frequent adventures and view the RV as a worthwhile investment, purchasing might be the right choice. However, for those unsure about long-term commitment, renting offers flexibility without the financial burden of ownership.

Ultimately, conducting thorough research and testing the waters through renting can provide clarity and confidence in your decision-making process. Whether renting or buying, ensuring that your choice aligns with your lifestyle and goals is paramount.

3. Optimizing Cab Over Space: What to Store

The cab over area in your RV offers valuable space that can be utilized for various purposes, whether it’s storage or providing additional sleeping arrangements. However, it’s essential to consider the weight distribution to ensure stability and efficiency.

Depending on the size of your caravan, you’ll need to assess the cab over’s capacity to support the intended weight. Typically, the average weight capacity is around 350 pounds, sufficient for accommodating two adults weighing approximately 175 pounds each.

If you’re planning to use the RV as a full-time vehicle, prioritizing storage capacity becomes crucial. It’s surprising how quickly material items can accumulate and contribute to weight.

For optimal weight distribution, it’s advisable to place heavier items closer to the engine. This strategy mimics the principle of packing a wheelbarrow—placing the weight over the wheel enhances maneuverability and efficiency. Similarly, by positioning heavier belongings near the cab, you can improve gas mileage, as the weight is centered over the engine rather than being distributed toward the rear, which can adversely affect fuel efficiency.

By strategically organizing and distributing weight in the cab over area, you can enhance both stability and performance while making the most of the available space in your RV.

4. Crucial Inspection: Check for Leaks

When considering a used camper, one of the most critical aspects to assess is its resistance to leaks, especially during rain. A leaky roof can quickly turn a cozy camping trip into a soggy nightmare, leaving you scrambling for dry shelter.

Imagine being caught in a downpour only to discover that the roof is leaking, soaking the bed in the cab over area. Such an unfortunate scenario underscores the importance of inspecting the vehicle thoroughly, preferably during heavy rainfall, to detect any potential leaks before making a purchase.

Water and moisture are insidious intruders, capable of wreaking havoc on the interior of your camper. Even minor leaks can lead to mold growth on walls, furniture, carpets, and personal belongings, posing health risks, particularly to vulnerable groups like children and the elderly.

Prevention is key to avoiding the formation of mold and maintaining a safe living environment. Investing in a dehumidifier helps to remove excess moisture from the air, preserving freshness and inhibiting mold growth. Additionally, wiping down walls in moisture-prone areas such as the shower and bathroom after use can prevent the initial stages of mold buildup.

In the kitchen, where steam from cooking can contribute to moisture accumulation, it’s essential to dry the walls near the stove and underneath cabinets regularly. By staying vigilant against leaks and implementing preventive measures, you can safeguard your camper from the detrimental effects of moisture and mold.

5. Considering Mileage on an Older RV: Proceed with Caution

When contemplating the purchase of a used camper, the mileage can provide valuable insights, but it’s essential to interpret it cautiously.

If you’re buying directly from the previous owner, don’t hesitate to inquire about the RV’s history. Low mileage may raise questions such as, “Why wasn’t it driven more often?” A common response might reveal that the vehicle has been parked for extended periods, which can lead to rust, deterioration, and other unforeseen issues.

For instance, my grandparents own a 1969 Dodge Class C Camper Trailer with a seemingly low mileage of 43,541 miles. However, the reality paints a less appealing picture. Despite its nostalgic charm, the camper’s prolonged periods of inactivity have resulted in unpleasant surprises, ranging from mold growth to unwelcome critter inhabitants.

Similarly, when considering a relatively young vehicle with low mileage, it’s crucial to delve deeper into the reasons behind its sale. Questions like, “Why are you parting with a nearly new camper?” may reveal underlying issues such as poor driving performance or subpar gas mileage.

Avoiding the pitfalls of inheriting someone else’s headache requires diligence, thorough research, and asking probing questions. While low mileage may initially seem desirable, it’s essential to look beyond the numbers and assess the overall condition and history of the RV before making a decision.

6. Selecting the Right Tires for Your Motorhome

Choosing the appropriate tires for your RV is crucial for ensuring a safe and smooth journey on the road. The tire’s carrying capacity, indicated on the sidewall, provides vital information to guide your selection process. While most Class C RVs utilize Load Range E tires, it’s essential to refer to the tire placard located on the inside of the driver’s door for precise specifications. Paying attention to pounds per square inch (PSI) is also pivotal in tire selection.

To estimate the load capacity for each tire, calculate the dry weight of your Class C RV, then add the weight of passengers, along with material items and fluids such as water, propane, and gas. Once you have the total weight, divide it by four to determine the load requirement for each tire.

For instance, if your Class C RV weighs 11,000 pounds and carries an additional 1,500 pounds in miscellaneous items, the total weight becomes 12,500 pounds. Dividing this by four yields 3,125 pounds per tire. Therefore, each tire must have a load capacity of at least 3,125 pounds to support the vehicle adequately.

It’s essential to prioritize tire maintenance and inspection to avoid potential hazards such as blowouts, which can result in dangerous situations while driving. Overloading tires can lead to premature damage and costly issues, emphasizing the importance of diligent care.

Tire-related problems often occur unexpectedly while on the road, underscoring the necessity of proactive measures to ensure tire health. By investing time and attention in tire selection, inspection, and maintenance, you prioritize safety for yourself, your passengers, and fellow travelers on the road.

7. Consider Investing in Roadside Assistance

Securing an insurance plan tailored for RVs can be a wise investment in the long term. Good Sam Club stands out as a reputable insurance agency specializing in RV coverage. Whether you’re a first-time RV owner or a full-timer, they offer tailored options to suit your needs. Additionally, they provide the flexibility to deactivate coverage during periods of non-use for your Class C vehicle.

By opting for a comprehensive insurance plan, you grant yourself an added layer of assurance, enhancing your overall RV experience.

Following our previous discussion on tire maintenance, you’re already aware of the importance of keeping your tires in top condition. However, despite diligent upkeep, unforeseen accidents can still occur. With roadside assistance, you can rely on trained professionals to promptly address tire-related issues, ensuring your safety on the roadside.

Prioritize checking the towing distance offered by your roadside assistance provider to avoid being stranded in inconvenient situations.

Imagine being locked out of your RV during a camping trip, potentially disrupting your plans and causing unnecessary delays, especially when hunger strikes. Fortunately, with lockout assistance, you can swiftly regain access and resume your camping activities, satisfying those hungry stomachs in no time.

Accidents and emergencies are inevitable occurrences, underscoring the importance of being adequately prepared with insurance coverage.

8. Choosing Between Diesel and Gasoline Options

When it comes to Class C RVs, one important decision is whether to opt for a diesel or gasoline engine. Diesel models typically come with a higher price tag compared to their gasoline counterparts, primarily due to their superior quality and specialized engine construction designed to accommodate diesel fuel.

Diesel fuel boasts a higher energy content than gasoline, resulting in a notable increase in miles per gallon (MPG) by approximately 10% or more. Moreover, diesel engines offer enhanced towing capabilities, superior uphill acceleration, and greater torque. However, it’s crucial to note that diesel models can cost around 30% more than their gasoline counterparts, potentially translating to a significant price discrepancy, such as $190,000 versus $133,000, representing a staggering $57,000 difference.

For traversing steep terrains like the Rocky Mountains, diesel engines excel due to their robust torque capacity, facilitating smoother ascents while conserving fuel and minimizing driver strain.

On the other hand, gasoline models are notably more budget-friendly compared to diesel options. They offer the convenience of refueling at any gas station and generally incur lower maintenance costs. However, gasoline engines may struggle more when ascending inclines, resulting in increased fuel consumption and requiring more frequent maintenance.

The ultimate factor in choosing between diesel and gasoline depends largely on your RV usage and driving preferences. For occasional family vacations a few times a year, a gasoline model presents a cost-effective solution. Conversely, if you’re planning full-time RV living, a diesel engine may prove advantageous, requiring less maintenance and ensuring more time on the road.

9. Taking the Driver’s Seat

One of the remarkable aspects of Class C RVs is their resemblance to van or truck chassis, offering a familiar driving experience. Before making a decision, take a seat in the driver’s position to ensure not only comfort but also familiarity with the pedals and gear shift.

For first-time RV owners, opting for a model with a driving style akin to what you’re accustomed to can significantly reduce initial driving stress or apprehension.

Many modern Class C models come equipped with backup cameras and side mirror cameras, a notable advantage of newer models. These features can provide reassurance, particularly for inexperienced RV drivers. The side mirror cameras automatically activate when you signal, enhancing visibility and safety. Take a moment to ensure that the camera screens are positioned for optimal viewing while seated in the driver’s seat.

10. Choosing the Right RV Length

Class C RVs are available in various lengths, ranging from compact 20-foot models to spacious 40-foot versions. The length of your Class C RV will play a crucial role in determining parking options while not in use and the types of campsites accessible to you.

For those intending to visit National Parks, it’s essential to research length requirements in advance to ensure compliance. While longer vehicles offer more amenities and living space, they may pose limitations on accessing certain National Parks with restricted vehicle lengths.

Before making a purchase, consider where you’ll be parking your RV when it’s not in use. While a 35-foot Class C might seem appealing in the dealership lot, it’s vital to assess whether it will fit in your designated 20-foot driveway. Planning ahead for RV storage is crucial to avoid potential logistical challenges down the road.

11. Creating a Storage Plan for Your RV

Storage facilities catering specifically to RVs offer both covered and non-covered options. The cost of these storage units varies depending on the length of your RV—another crucial factor to consider—and whether you opt for covered storage, which may come at an additional expense.

Recognize that your RV is a significant investment. Allowing it to remain exposed to the elements in your front yard subjects it to potential damage from sunlight, rain, and other environmental factors. Moreover, storing your RV off-site not only preserves space on your property but also prevents accidents that could result from passing vehicles or pedestrians.

Transferring your Class C RV to a storage unit provides a secure environment until you’re ready to embark on your next adventure. Many storage facilities offer convenient amenities such as dumping stations and washing services to facilitate maintenance.

When selecting a storage unit, prioritize those with a concrete floor. Parking on grass or dirt surfaces retains moisture, leading to potential damage to the vehicle’s undercarriage and premature rusting.

By opting for covered storage, you actively safeguard your RV from the elements, thereby prolonging its lifespan and mitigating the need for costly repairs. Investing in proper storage ultimately saves you money in the long run while preserving the integrity of your vehicle.

12. Opt for an RV Cover

For those seeking a more budget-friendly alternative to traditional storage solutions, an RV cover presents a practical option. Available in various shapes, lengths, and sizes to accommodate Class C RV profiles, these covers can be conveniently sourced online or at stores like Camping World. While higher-quality covers may come with a higher price tag, they offer superior protection for your RV.

When selecting an RV cover, it’s essential to consider the environmental conditions your Class C will encounter. Factors such as humidity, rainfall, and overall climate—whether moderate or severe—should inform your choice to ensure optimal protection and preservation of your camper.

Key specifications to look for in an RV cover include:

  • Vents to promote airflow and prevent the growth of mold and mildew
  • Zippered panels for easy access to storage areas
  • Elastic inserts and adjustable straps for a snug, secure fit
  • Heavy-duty fabric with UV protection

When measuring for your Class C cover, start from the front bumper and extend to the furthest point of the RV, ensuring to include any protruding features like bumpers, ladders, and spare tires. If your measurements fall between sizes, it’s advisable to opt for the larger size, as the elastic inserts and adjustable straps allow for a customized fit.

13. Exploring the Benefits and Considerations of Slide-Outs

When it comes to maximizing indoor space in your RV, slide-outs offer a compelling solution. Adding an extra 3 feet in width can drastically transform your living environment from cramped to spacious, making your RV feel more open and breathable.

Slide-outs are truly game-changers, elevating your RV experience by providing additional livable space. No longer will you need to awkwardly maneuver around family members or struggle to access certain areas. With the extra room, you can move freely through your home without worrying about bumping into furniture or squeezing past obstacles.

However, it’s important to acknowledge the potential downsides of slide-outs. One major concern arises when slide-outs encounter mechanical issues, such as failing to open or close properly. While most RVs are equipped with a manual crank to address these issues, dealing with malfunctioning slide-outs can be inconvenient and frustrating, particularly when you’re on the road.

Furthermore, slide-outs may pose challenges in terms of maintenance and durability. Over time, the rubber strips that seal the slide-outs can deteriorate, potentially leading to water leaks and subsequent damage. Additionally, RVs with slide-outs that incorporate the kitchen as a moving part may experience heightened wear and tear on mechanical components, such as hoses and electrical lines, increasing the risk of premature failure.

When considering RVs with slide-outs, it’s advisable to avoid models where the kitchen is a moving part to minimize potential mechanical issues. Being mindful of these considerations can help you make an informed decision about whether slide-outs are the right choice for your RV lifestyle.


Categories
RV

Essential Tips Before Purchasing a Pop-up Tent Trailer

The pop-up tent trailer is a cherished option for many. It’s not just about storage—it offers versatility. Its awnings can easily unfold for a quick camp setup or shade. Fold them away when it’s time to travel for minimal space usage.

Considering a pop-up tent trailer? Prior research is key. Renting one from RVShare for a trial run might clarify your decision. Here, explore 21 crucial aspects—pros, cons, and realities—to guide your buying process.

1. Heat Challenges in Pop-up Tent Trailers

Shaded by the awning, sure, but what about inside? Pop-up trailers protect from sunburn but not the heat. These campers, smaller than RVs, tend to heat up fast in spring or summer due to their thin metal or wood structure.

Even in shade, the heat persists. Stay tuned for solutions ahead

2. After Rain, Trailer Maintenance is Key

Rainfall poses a challenge for pop-up trailer owners beyond just dampening outdoor plans. The awnings and the trailer itself may get soaked.

Avoid using the awning during rain or compress it to minimize water exposure. If wet, leave the awning open to air dry.

Rainwater might seep into the trailer through windows, warranting thorough airing out to prevent mold growth. Park under cover during downpours or open windows to air out the trailer promptly, preventing mold and permanent damage.

3. Immerse Yourself in Authentic Camping

Despite shelter, hard-sided camper trailers beckon you outside. Their compact design encourages outdoor living—unfold the awnings on warm afternoons, relish starlit skies at dusk.

Prepare for a genuine camping experience: gather firewood, s’mores fixings, and tales for storytelling. Remember spare flashlight batteries for an unforgettable adventure under the stars!

4. The Generator Can Be Really Noisy

Remember what I said before about thin walls? That was no joke. Pop-up trailers, for all their glory, often have simple construction. With their thin metal or wooden walls and ceilings, you’re going to hear your generator running all day or night.

Yeah sure, eventually you’ll get used to that constant hum. It’s still a nuisance, though.

Some people might find this endearing, while others will think it’s annoying. If you’re thinking about getting a pop-up trailer, though, it’s a reality you’re going to have to deal with.

5. Lightweight Advantage of Pop-Up Trailers

While thin walls may seem like a drawback, let’s flip the narrative and view it as an advantage. Especially for RV beginners, the lightweight nature of pop-up tent trailers offers a positive perspective.

For those entering the world of RVing and camping, the prospect of handling large motorhomes can be intimidating. Maneuvering such vehicles requires a different skill set than even driving a sizable commercial truck.

The bulkiness comes with added responsibilities—adjusting turns to accommodate the extended rear, initiating braking well in advance to ensure a timely stop, and more.

Choosing a pop-up tent trailer eliminates these concerns. While some adjustments in driving technique may be necessary, it won’t entail a complete overhaul.

The lightweight design of pop-up trailers enhances maneuverability, providing a glimpse into handling larger vehicles without the added weight and complexity of behemoth RVs.

6. Versatile Sizes and Garage Storage Potential

In addition to their lightweight construction, pop-up trailers come in various sizes. Opting for a smaller trailer that fits into your garage when not in use offers multiple advantages.

Firstly, the convenience of easily accessing your trailer, hitching it to your truck or SUV, and hitting the road simplifies your getaway plans. It serves as a hassle-free option for spontaneous weekend trips.

Secondly, choosing a compact trailer allows you to save on storage costs. Unlike larger RVs that often require rental storage during winter, your smaller trailer can find shelter in your garage without the need for additional expenses.

Explore the potential of creating dedicated garage space for your trailer, providing a practical and cost-effective storage solution.

7. Limited Living Space, but Functional

While planning extended road trips with a pop-up trailer is feasible, don’t anticipate abundant space. Even the largest pop-up trailers offer a compact living environment. This inherent limitation leads many owners to opt for campsites and utilize tents for more spacious accommodations during evenings.

Despite the confined space, pop-up trailers can surprisingly accommodate essential amenities such as a kitchen, a mini-fridge, and a bed. While it may not provide luxurious living, individuals inclined towards rustic outdoor experiences find these functional arrangements more than sufficient.

8. Compact Bathrooms: A Necessity

Addressing nature’s call becomes a vital consideration on your road journeys. While campgrounds and parks may offer facilities, the scenario changes when you venture off the beaten path with just your companions and your pop-up trailer.

Resourceful pop-up tent trailer owners have managed to incorporate bathrooms within these compact spaces. However, it’s crucial to set realistic expectations—the bathroom nook won’t be overly spacious. To maximize space, some owners install fold-down storage shelves over the toilet lids, known as cassette toilets, to optimize room when not in use.

Creating a functional bathroom setup in your pop-up trailer requires planning for a running toilet, shower, and sink. While the possibility of having a shower in your pop-up trailer exists, it may come at the expense of space for a toilet. In some cases, the toilet may be reduced to a small, portable plastic unit requiring manual disposal.

Consider your preferences and priorities when making these choices. The versatility of options allows you to tailor your pop-up trailer experience according to your needs.

9. Tow Ratings Matter: A Must-Check

Hitching any pop-up trailer to your vehicle isn’t a casual affair. The weight of the trailer dictates the need for a powerful truck or SUV for towing. This is where understanding your vehicle’s tow rating becomes crucial.

Unsure of your vehicle’s tow rating? Refer to your owner’s manual for precise information. In case the manual is unavailable, visit the manufacturer’s website, where you can typically find the required tow rating.

Relying on friends’ advice, while well-intentioned, might not account for your specific vehicle details. Accurate information from the manufacturer prevents potential issues, ensuring your trailer aligns perfectly with your vehicle’s towing capacity.

10. Cautionary Tip: Avoid Pushing Your Tow Rating Limits

Now that you’re armed with your tow rating knowledge, it’s crucial to use it wisely. Your tow rating sets a boundary on the pop-up trailers you can consider, but here’s the catch—you shouldn’t aim to approach this limit, let alone reach it.

Why, you ask?

Your tow rating must account for additional weight factors like passengers, gear, and amenities such as toilets, showers, refrigerators, and beds. To ensure a smoot

11. Temperature Control Options for Pop-Up Trailers

As mentioned earlier, pop-up trailers can experience temperature extremes. Whether you’re driving through scorching heat or chilly weather, the thin walls of these trailers don’t offer much insulation.

Fortunately, you can enhance your trailer with heating and air conditioning systems. Opt for compact units that won’t compromise your limited space and add unnecessary weight.

For a more budget-friendly approach to maintaining a comfortable interior, consider alternatives. A portable space heater proves beneficial for fall and early winter travels, while a small plug-in oscillating fan can provide relief during spring and summer, ensuring a more pleasant experience in your compact trailer.

h towing experience, it’s advisable to choose a trailer comfortably below your tow rating limit. This precaution guarantees trouble-free towing, preventing strain on your vehicle.

12. Achieving Warm Water Comfort in Your Pop-Up Tent Trailer

For a cozy shower or convenient cooking in your pop-up trailer, a hot water heater is essential. However, due to limited space, you may need to make choices. Consider sacrificing a dedicated heating or air conditioning system unless your trailer can accommodate both. Compact alternatives like portable space heaters and oscillating fans offer temperature control while optimizing available space.

13. Optimize Space with Collapsible Essentials in Your Pop-Up Trailer

In the realm of pop-up trailer living, prioritizing collapsible items is a game-changer. From pop-up tables and foldable seats to versatile beds and dual-purpose appliances like a mini-fridge doubling as storage, creativity is key in outfitting a compact trailer. Embrace a discerning mindset, evaluating necessities versus luxuries. Some sacrifices might be necessary, but the strategic use of collapsible items enhances comfort in your pop-up trailer living space.

14. Personalize Your Camper for Enhanced Storage and Comfort

When faced with the dilemma of choosing between heating/AC and a functional fridge, customization is your solution. Begin by insulating walls and floors to retain heat and reduce noise. Next, craft shelves and storage cubbies across the trailer, maximizing every inch, from walls to floors. Tailoring your camper to meet storage needs ensures a more comfortable and efficient living space.

15. Transform Your Pop-up Tent Trailer with a Stylish Remodel

Once your trailer is fully functional, it’s time to consider its aesthetics.

For wooden walls, a fresh coat of paint can enhance visual appeal. Introduce rugs or carpeting to add warmth to the floor, especially during chilly nights. Install pressure-mounted curtain rods for easy application of curtains, providing shade in the morning. Consider adding cozy pillows to create a welcoming atmosphere.

Your pop-up trailer serves as your home away from home, so why not infuse it with personalized style and comfort? It’s yours to own and make uniquely yours!

16. Explore the Affordability of Used Pop-Up Tent Trailers

As you weigh the possibility of acquiring a pop-up trailer, your budget becomes a key consideration. Opting for a trailer provides a glimpse into the RV lifestyle without the added bulk.

Now, let’s address the financial aspect. Visit the National Automobile Dealers Association or NADA Guides website for the latest prices on pop-up trailers. This resource proves valuable not only for your current choice but also for future RV purchases.

While pop-up trailers offer a more budget-friendly alternative to RVs, they still involve a significant investment. Many savvy buyers explore the option of purchasing a used trailer, potentially saving thousands. However, exercising caution in the used market is crucial.

17. Affordable Campers: Watch Out for Scams!”

While some drivers sell pop-up trailers for less than $1,000, exercise caution. Explore Facebook groups, Craigslist, and RV communities for potential deals.

Remember, “you get what you pay for.” Photos can be deceptive; editing tools and angles make a trailer look better than it is. Filters may hide imperfections.

Prioritize a personal inspection before finalizing the deal to avoid potential disappointments and scams. Stay vigilant in your search for budget-friendly campers.

18. Exercise Caution with Trailers Requiring Significant Repairs

Another reason to examine the trailer? It might demand extensive repairs.

Not suggesting that every budget-friendly used pop-up trailer is a scam, but stay vigilant. Recognize signs of potential scams to steer clear of contractual issues or financial setbacks.

Camper affordability may stem from cosmetic issues or, more critically, major repairs. Concealing these problems in photos is simple. A firsthand assessment of the camper is crucial.

If you observe bent frames, a malfunctioning lift system, or tattered canvas awnings, explore other sellers. Be mindful of a cracked roof, soft spots on the roof or floor, and rotted wood in the walls.

While repairs are an option, the associated costs might surpass the trailer’s purchase price, defeating your intention to save money.

19. Minor Repairs Are Acceptable, Though

If you’re considering a used trailer, perfection might not be on the table. And that’s perfectly fine. The seller might acknowledge that the trailer requires minor repairs.

Firstly, appreciate their honesty. If all that’s needed is fixing the awning, making small replacements, or overlooking a dent in the metal wall, it’s manageable. These repairs won’t break the bank.

Don’t dismiss all used campers just because they need a bit of tender loving care (TLC).

20. Take Your Time in Making a Decision

After spending hours searching online and exploring Facebook groups for the perfect pop-up trailer within your budget, you might come up empty-handed.

Does this imply giving up? Certainly not! Does it mean settling for a subpar trailer just because it’s inexpensive? Absolutely not!

It does mean taking a break from the search and revisiting it later. You want your trailer to be ideal, don’t you? Or, at the very least, perfect for you. Achieving that may require some time. Be patient. You might just discover the pop-up trailer of your dreams.

21: Enjoy the Journey of Ownership

Above all, owning a pop-up trailer is meant to be an enjoyable experience.

This doesn’t imply there won’t be hard work involved. From budgeting to research to remodeling, you’ll invest a lot of effort into your camper. The outdoor adventures, unforgettable memories, and valuable bonding experiences will make every bit of work worthwhile.

Categories
RV

11 Essential Driving Tips for New RV Owners

Congratulations on your new RV! Before hitting the road, grasp these crucial driving tips for a safe and smoother journey. Get familiar with RV driving nuances beforehand to navigate various terrains, turns, and parking challenges. Explore RVShare for test drives before making a purchase—it might change your preferences. Ready to embark? Dive into these 11 essential tips for first-time RV owners.

1. Embrace Practice Sessions

Navigating an RV feels like those early driving lessons in high school—awkward and uncertain. Don’t worry; it’s normal. Take heart; you’ll get the hang of it.

Just like learning any new skill, practice is key. Choose a spacious empty lot to rehearse turns, parking maneuvers, and tricky driving techniques.

Don’t expect expertise on your first drive. Commit to regular practice sessions. Spending dedicated hours behind the wheel will soon make you feel like a seasoned RV driver.

2. Fine-Tune Your Mirrors

Visibility is crucial when driving an RV. Take time to adjust all your mirrors before hitting the road. If needed, make frequent stops to fine-tune them for better rearview coverage.

3. Monitor the Weather Conditions

Not every journey offers clear skies. Weather can impact your RV drive significantly. Stay updated with a weather app. Rain or snow aren’t showstoppers, but exercise caution. If weather gets severe—heavy rain, snowstorms, thunder, lightning, strong winds—find a safe spot. Avoid driving in fog, ice, or hail. Remember, safety trumps pushing forward. It’s easier to fix a car than an RV after an accident.

4. Avoid Driving While Fatigued

When traveling from Point A to Point B in your RV, the distances can be substantial, spanning several states. Your urge to stick to a schedule might tempt you to ignore signs of fatigue, but it’s crucial to address them.

Operating an RV demands keen attention, especially for new drivers. Everything feels fresh and requires full alertness. Even a momentary lapse in focus can lead to an accident.

Prioritize your well-being. If fatigue hits, don’t fight it. Avoid excess caffeine; it can cause jitters, worsening the situation. Instead, opt for either a rest stop or ask a passenger who’s adept at RV driving to take the wheel. Safety matters, for you and other motorists.

5. Be Aware of Size Limits

During your RV journey, various road structures like tunnels or overpasses may become part of the adventure. However, worrying about whether your vehicle fits can be stressful.

To avoid this concern, know your RV’s measurements before you hit the road. If you’re unsure of the specifics, measure your parked RV—width and height. Most RVs range from 11 to 13 feet tall. Remember this when encountering tunnels or overpasses.

Encounter a structure with less clearance than your RV? Utilize GPS, either on your phone or a separate device, to reroute and avoid risking a stuck situation. It’s best to navigate an alternative path than risk getting wedged in an unsuitable passage.

6. Drive with Consideration

As you share roads with numerous other vehicles, practicing courtesy becomes crucial.

In a larger, less common RV, some drivers might feel uneasy. To ease tensions, signal your intentions well in advance. If a left turn is ahead, switch on your signal early and begin merging.

This proactive approach allows fellow drivers ample time to adjust, reducing accident risks.

Be familiar with your route and signal early—unlike a car, you can’t expect last-minute maneuvers in an RV. Rushing or assuming you’ll seamlessly merge might lead to missed turns, exits, and unsafe conditions for others on the road.

7. Embrace a Slower Pace

Driving an RV isn’t about rushing to reach a destination—it’s a leisurely experience. Experts suggest a speed of around 63-65 MPH, prioritizing a steady pace over speed.

Even on high-speed highways or with impatient drivers tailing you, maintain that consistent speed. Let others pass if they wish, but don’t compromise safety for their urgency.

Plus, driving at a steady pace has another perk: improved fuel efficiency.

8. Stay Right

Staying in the right lane while driving is standard practice, unless you’re abroad. For RV drivers, it’s more than just a rule.

On highways, RVs often feel out of place amid faster vehicles. To stay clear of others and maintain the speed limit, stick to the far-right lane.

Why? Firstly, it offers proximity to the shoulder in case of mechanical issues. Plus, it provides optimal visibility through your driver’s side mirror.

When exits approach, shift one lane left until all cars clear the ramp. Then, return to the far-right lane and continue smoothly.

9. Understand Braking in an RV

Though braking seems straightforward, it’s a different ballgame in a motorhome.

The weight—over 5,200 pounds without supplies—requires careful planning for stops. Your 7,000-pound vehicle demands anticipation, no sudden halts.

There are no abrupt stops; vigilance is crucial. Plan well ahead, as halting takes time. Ensure a clear path before braking.

10. Maintain Safe Distances

Avoid tailgating to ease fellow drivers’ nerves about your RV’s size.

How far? Aim for 400-500 feet—roughly 4-6 seconds behind cars. This distance allows safe braking. If someone tries closing the gap, increase the gap further for safety.

11. Know Your Tail Swing

Understanding your RV’s tail swing is crucial before hitting the road.

Tail swing? It’s the distance the rear part moves in the opposite direction of the front during turns. Your RV’s body doesn’t pivot simultaneously.

Calculate it: With a partner, align your RV with a white line in a safe, empty space. Turn slowly while they observe. Tail swings range from 18 to 30 inches, but sizes and turns vary. Practice to gauge and master this measurement for confident turns.

Categories
RV

Key Mistakes I Made with My Trailer This Year: Learn from My Big RV Blunders

This year, diving into the world of travel trailers, I’ve encountered my fair share of RV missteps. I’m here to shed light on the blunders I’ve made with my trailer and the common mistakes spotted among fellow RVers during our travels.

RV Blunders Newbies Must Avoid

Explore the insights gained from my RV mistakes and those frequently observed among new RVers. Discover key strategies to maintain your trailer or motorhome in excellent shape

Awning Mishap

At a family gathering, my brother-in-law left his RV awning out on a scorching day and went to the store. Within minutes, a sudden gust of wind tore it apart, leaving me unable to reach it in time.

RV Parking Woes: Watch for Trees!

In my neighborhood with lots of trees along the roads, parking my RV needs extra care. Once, trying to avoid hitting tree branches, my trailer ended up tearing its roof on a limb. I had to trim the branches overhanging the street afterward!

Relying on the Carbon Monoxide Detector

Dependence on the onboard carbon monoxide detector for safety in RVs is critical but can become problematic. These detectors might issue false alarms when running on low power, often causing frequent alerts, especially if using battery-powered heating systems at night. Deciphering whether it’s a genuine emergency or simply low power is crucial to prevent ignoring potential dangers.

Overlooking RV Tire Inspection

RV tires top the list as the most frequent failure point, often leading to roadside predicaments due to blowouts. Several factors contribute significantly to tire issues:

  • Opting for low-quality manufacturer-provided or inexpensive tires during purchase
  • Driving at excessive speeds (beyond 35mph) on gravel roads
  • Overloading the RV or failing to distribute weight evenly across the axles, leading to excessive strain on specific tire sets.

Misjudging Curves: A Costly Mistake

Witnessing an unfortunate incident, I realized the gravity of taking curves hastily in an RV. The consequences were dire, with the entire rig overturning into the roadside ditch, barely surviving the crash.

The key takeaway: Avoid speeding through curves. RVs have a higher center of gravity, making them susceptible to accidents. Such mishaps often result from:

  • Uncontrolled fishtailing
  • Maneuvering in strong winds
  • Taking curves at excessive speeds

Those seemingly ignorable sharp curve signs on the road? Crucial to heed when navigating a motorhome or towing a trailer.

The Perils of Choosing a Cheap RV Backup Camera

I once debated the necessity of a wireless backup camera for my RV, I settled for a one from Amazon. It turned out to be a savior in various situations:

  • Maneuvering at gas stations amidst moving cars
  • Safely backing into campsites, avoiding obstacles like stumps or branches
  • Navigating the RV into storage without assistance
  • Numerous other instances

Lesson learned: The backup camera isn’t just an expense but an investment in preventing costly RV repairs. It’s a lifesaver, revealing dangers unseen without it.

Installation was a breeze, taking under 10 minutes, and its seamless functionality even aids me on winding mountain roads, ensuring I don’t hinder traffic behind me.

RV Fuel Range Oversight in Remote Areas

I just returned from a trip where I learned a big lesson. I was driving my truck with a trailer to a remote desert. I filled up the gas tank in the last town, but my truck uses a lot of gas. Before reaching our camp, the gauge showed we used half the tank.

We were only halfway and needed to return, so we had to stop our trip. We were just 20 miles away, but we couldn’t risk running out of gas. Sadly, we had to turn back and find another camp. We had extra gas, but needed it for the generator, so we played it safe.

Lesson learned: Always know how far your vehicle can go on a tank of gas, especially in faraway places. And having extra gas cans is a good idea!

Misusing RV Stabilizers for Leveling

I didn’t personally make this RV mistake, but it’s an important lesson I learned. I asked an expert at Camping World about common RV repairs that could be avoided easily.

His advice: Many folks use the stabilizers to lift the trailer for a tire change or crank them too high, causing damage.

Lesson learned: Stabilizers aren’t for lifting your RV. They’re for light contact with the ground to prevent bouncing while you’re inside. Over-cranking can lead to breakage.

Forgetting Winterization for Your RV

Don’t overlook winterizing your RV, especially before the temperature drops to 32 degrees (0 Celsius).

Lesson learned: Even with empty tanks, remaining water can lead to winter problems, so winterizing before the cold hits is crucial.

Failing to Activate 4×4 Low

This mistake stemmed from my lack of familiarity with my new truck during its first tow. Exiting a steep dirt road from a camping spot, the truck lost traction and started to dig in.

Repeated attempts to ascend the incline failed until I engaged 4×4, or so I thought. What I didn’t realize was that my truck required about 2 seconds of idle time in neutral before it engaged 4×4 LOW.

Lesson learned: While 4×4 high activated immediately, the low setting needed extra time. As soon as it engaged, we easily maneuvered out, realizing we’d wasted time trying other methods to no avail.

Moving the Slide Without Checking for Obstacles

I’ve made this mistake twice, almost damaging my TV mounted on a tilting bracket outside the slide. Placing the TV near the slide wall caused it to get caught while moving in or out.

Lesson learned: Always check around both inside and outside the RV before operating the slide to avoid damaging anything.

Overlooking Ground Clearance

My friend borrowed my travel trailer and encountered this issue. Going up a rugged dirt road, the trailer’s front contacted the ground, bending the stabilizers. An inexpensive fix, but a reminder to drive more cautiously.

Lesson learned: Drive slowly to prevent scraping the bottom.

Although replacing RV stabilizers is relatively easy and inexpensive, costing around $70 and taking 20 minutes, it’s best to avoid such mishaps altogether.

The RV Pre-Departure Check

Our “walk-around rule” has been our savior countless times. Before setting off, my wife and I separately circle the RV and truck. Almost without fail, we uncover something crucial we might have missed.

It’s shockingly easy to overlook locking a storage cabinet or retracting the stabilizer jacks or stairs, which can lead to hazards on the road.

Lesson learned: Consistently perform the RV walkaround before, during, and after each trip.

Having a checklist of essential tasks before leaving ensures no critical steps are overlooked.

Neglecting Generator Oil Changes

I didn’t make this mistake with my generator. But I did make it with another small engine (my lawn mower) this year which destroyed it.

Lesson learned: check your RV generator manual and follow the maintenance recommendations.

At the start of each camping season to put new oil in the old generator to keep it humming.

Avoiding Locked Hitch Mishap

Once, I nearly caused a catastrophe by forgetting to unlock the hitch of my boat trailer before driving off. After lowering the hitch onto the ball, I overlooked unlocking it, leading to a few feet of unsettling trailer bouncing.

Lesson Learned: After lowering the hitch onto the ball, raise the jack to ensure it picks up the back of the truck, confirming the lock and proper seating.

Drowsy Driving Dangers

While I didn’t doze off while driving my RV this year, I witnessed numerous accidents caused by fatigue. A considerable portion of severe freeway crashes stems from drivers falling asleep at the wheel.

Lesson learned: Avoid driving excessively long distances without breaks. Pull over if you feel drowsy to stay safe on the road!

Overlooking RV Roof Maintenance

It’s crucial to inspect roof seals biannually for any signs of damage like cracks or tears. While I haven’t made this error in my first year, observing other RVs, especially fifth wheels, highlighted the damage such oversight can cause.

Lesson learned: Rely on dealership inspections. Their vested interest ensures thorough checks for potential water infiltration issues.

Using Stabilizer Jacks Improperly with the Winch

I’ve made this mistake twice and narrowly avoided damaging the stabilizer jacks. Stabilizers aren’t built to support the weight of the RV; they’re for balance.

Lowering the RV onto the ball using the winch with the stabilizer jacks down can easily bend them. It’s also common to forget one stabilizer jack when adjusting the others.

Lesson learned: Conduct a thorough check around the RV before operating the winch to prevent mishaps.

Considering a Fifth Wheel with a Half Ton Truck

As I explore the idea of switching from a trailer to a fifth wheel, I’m drawn to their family-friendly layouts. However, I currently own a Ford F-150 half-ton truck.

People often match their truck’s tow capacity with the RV weight and assume they’re good to go. Yet, it’s a bit more complex than that.

While there are some half-ton towable fifth wheels, the reality is, most rigs assumed to be half-ton towable actually aren’t.

Lesson learned: Understanding the RV’s GVWR (Gross Vehicle Weight Rating) is crucial. It’s essential to scrutinize every number to ensure safety on the road, especially considering the pin weight.

Failing to Turn Off the Stove Burner Correctly

Recently, I learned about an important safety measure regarding RV stoves that’s worth avoiding. When using the stove, there’s a risk if the burner blows out instead of being properly turned off.

Lesson learned: Always ensure you turn off the stove burner using the dial to prevent any propane leaks inside the RV. Safety first!

Overloading the Trailer Bumper

When we purchased our travel trailer, storing the generator posed a challenge due to limited space in our SUV. To avoid gas odor inside, I considered mounting my powerful Champion generator on the RV bumper. Fortunately, a friend intervened and advised against it.

Lesson learned: Many RV bumpers aren’t designed to support heavy generator weights.

Leaving the RV Uncovered

One mistake I’ve noticed people make is keeping their RV exposed without any cover. I firmly believe investing in a covered storage space or a cost-effective carport at home is worth it in the long run.

Lesson learned: Spending a bit more on covered storage might seem unnecessary, but it can significantly extend your RV’s lifespan, reducing the need for frequent roof repairs. A single hole in the roof during winter could lead to severe water damage, and water intrusion is often the leading cause of RV deterioration.

Assuming RVs are All-Weather When They’re Not

The label “four-season” on an RV might not align with its actual capability. I was surprised by the number of RVs touted as “four-season” that had exposed lines and pipes.

Lesson learned: Take the time to inspect and don’t rely solely on marketing claims.

Inspect the underside of the rig. Are there visible lines lacking insulation or heating? Trust what you see, not just what’s advertised.

Leaving RV Ceiling Vents Open in Rainy Weather

I once made this mistake but caught it in time. We were playing Clue as a family when I noticed the bathroom vent was open. Luckily, I closed it before any major issues, just a bit of water to clean.

Lesson learned: Shut the ceiling vents during bad weather, while driving, and when storing the RV to prevent unexpected rain surprises.

Conclusion

In wrapping up, avoiding common RV mishaps can lead to smoother adventures. Take charge of your RV upkeep and learning from these experiences can pave the way for hassle-free journeys ahead. Happy and trouble-free RVing comes from attentive ownership and ongoing learning about your RV’s care.

Categories
Camper Van RV

The Ultimate Guide to Living in an RV and Loving It

A comprehensive handbook for embracing the RV lifestyle and finding joy in it: The Definitive Manual to Embrace the RV Lifestyle and Discovering Its Charms.

Living in an RV presents a distinctive and exciting way of life that enables individuals or families to fully embrace the liberating spirit of the open road. Whether you choose to be a full-time RVer or simply enjoy occasional road trips, maximizing your RV living experience necessitates the application of practical advice and clever strategies. This all-encompassing guide will delve into crucial aspects of RV living, encompassing topics such as celebrating Christmas while on the move, ensuring warmth during chilly winters, effectively managing laundry, sustaining a healthy lifestyle, and even earning a livelihood while residing in an RV.

The Joy of Celebrating Christmas in an RV:
Experiencing the holiday season in the cozy confines of an RV can be truly enchanting. To ensure your Christmas on the road is a memorable one, consider the following suggestions:

  • Adorn your RV with compact yet festive decorations to save space.
  • Utilize your RV’s kitchen facilities to prepare a special holiday feast.
  • Engage with fellow RVers at holiday-themed campgrounds to foster a sense of community.
  • Embrace the simplicity of gift-giving by opting for thoughtful and compact presents.
  • Establish new traditions that perfectly complement the mobile lifestyle.

Enduring the Chills of Winter while Residing in an RV:

Don’t let cold weather ruin your RV adventure. To ensure a cozy and enjoyable experience, there are several steps you can take. Firstly, consider purchasing a high-quality, four-season RV that is specifically designed to withstand extreme temperatures. This will provide you with the necessary insulation and protection against the cold. Additionally, it is important to insulate your RV properly to retain heat. This can be done by adding insulation to the walls, floor, and ceiling. Hang thermal curtains on the windows to minimize heat loss and keep the warmth inside. When it comes to clothing, dressing in layers is key. This allows you to adjust your clothing according to the temperature. Make sure to have warm bedding readily available, such as thick blankets and cozy comforters. To add an extra layer of warmth, you can use electric blankets or space heaters sparingly. However, it is important to use them with caution and follow all safety guidelines. Lastly, don’t forget to inspect and insulate your water lines to prevent freezing. This can be done by using heat tape or foam insulation to protect the pipes from the cold. By following these tips, you can ensure that your RV adventure remains comfortable and enjoyable, no matter the weather.

Keeping Up with Laundry When Traveling in an RV

Dealing with laundry while traveling can present difficulties, but with proper preparation, it can be made much easier. One option to simplify the process is to stay at an RV park that offers laundry facilities. This way, you can conveniently wash your clothes without having to search for a laundromat. Another solution for those who are constantly on the move is to invest in a portable washing machine. This handy device allows you to do your laundry whenever and wherever you need to. Additionally, you can also take advantage of laundry services available in the areas you visit. By planning your laundry schedule to align with restocking supplies, you can effectively manage this task on the go.

A Daily Exercise Routine is Crucial to Living in an RV:

Maintaining an active lifestyle is essential in a limited environment. To prioritize your mental and physical well-being, it is important to include regular exercise in your daily routine. Despite being on the move, make an effort to engage in outdoor activities like hiking and biking. Establishing a consistent exercise schedule will help you stay fit while traveling. Compact exercise equipment like resistance bands can be used effectively, and practicing stretching exercises and yoga within the confines of your RV is also beneficial. Additionally, consider exploring nearby gyms or fitness classes in the places you visit for added convenience.

Earning Money While Living in an RV:

To transform RV living into a sustainable lifestyle, one must think outside the box and explore various avenues to generate income. One option is to investigate remote work opportunities or freelancing gigs that can be done from the comfort of your RV. This allows you to have the flexibility to work from anywhere while still earning an income. Another idea is to establish a mobile business, such as selling handmade crafts or offering services like mobile pet grooming. You can also consider providing online services, such as consulting or virtual assistance, which can be easily managed from your RV. Another way to generate revenue is by monetizing a blog or YouTube channel that chronicles your RV journeys. By sharing your experiences and insights, you can attract an audience and potentially earn money through advertisements or sponsorships. Additionally, when you visit different places, you can explore seasonal or temporary employment opportunities. This allows you to immerse yourself in the local community while earning some extra income. Embracing the gig economy is another option, where you can engage in jobs like ridesharing or delivery services to supplement your income. By diversifying your income streams and being open to different opportunities, you can turn RV living into a sustainable lifestyle that supports your financial needs.

With the correct mindset and practical approaches, residing in an RV can offer a satisfying and enriching experience. By adhering to these guidelines for holiday festivities, winter coziness, managing laundry, daily physical activity, and sustaining a livelihood, you will embark on a gratifying life on the open road. During holiday festivities, you can decorate your RV with festive lights and ornaments, creating a warm and cheerful atmosphere. To ensure winter coziness, insulate your RV properly, use space heaters, and cozy blankets to keep warm during the colder months. Managing laundry in an RV can be challenging, but by utilizing laundromats or portable washing machines, you can maintain cleanliness and convenience. Engaging in daily physical activity is essential for your well-being while living in an RV. You can go for hikes, bike rides, or even practice yoga outdoors to stay active. Lastly, sustaining a livelihood while on the road is possible through remote work, freelance opportunities, or starting a mobile business. Embrace the liberty, adaptability, and thrilling spirit that RV living grants, and seize every moment of your expedition.
In addition to these tips, it’s important to prioritize safety while living in an RV. Regularly inspect your vehicle for any maintenance issues, invest in a reliable GPS system, and familiarize yourself with emergency protocols. By taking these precautions, you can ensure a smooth and secure journey as you embrace the nomadic lifestyle.

Categories
RV

RV Depreciation: 10 Things You Need to Know

It’s important to note that RV depreciation rates can vary widely, and these guidelines are generalizations. To get a more accurate estimate of depreciation for a specific RV, consider consulting resources like RV valuation guides, industry experts, or online marketplaces where similar models are listed for sale. Additionally, factors like regional market conditions and individual buyer preferences play a role in determining resale values.

Let’s delve deeper into some of the key factors and guidelines influencing RV depreciation:

1. Type of RV: Class A motorhomes typically depreciate faster than Class C motorhomes. Class B motorhomes, being smaller and often built on van chassis, may have slower depreciation rates.

Motorhomes:

  • Class A: These are often large, luxurious motorhomes and can depreciate faster due to high initial costs and rapid technological advancements.
  • Class C: Generally more affordable than Class A, they may depreciate at a slightly slower rate.
  • Class B: Smaller and more maneuverable, Class B motorhomes can have slower depreciation, especially if they are well-maintained.

Travel Trailers and Fifth Wheels:

Towable RVs often depreciate more slowly because they don’t have engines or complex drivetrains. Fifth wheels, known for their spacious interiors, can have relatively stable resale values.

2. Brand Reputation:

  • Established brands with a history of quality manufacturing and customer satisfaction tend to retain value better than lesser-known brands.
  • High-quality construction and features can contribute to slower depreciation.
  • Positive reviews and a strong reputation within the RV community can contribute to slower depreciation.

3. RV Age:

    – New RVs experience the steepest depreciation in the first few years of ownership.

   – After the initial drop, depreciation tends to level off, with well-maintained RVs holding their value better over time. 

4. Condition of RV:

   – Regular maintenance and proper care, including routine inspections, fluid changes, and repairs, can help slow down depreciation.

   – Cosmetic and functional upgrades may improve resale value. A clean and well-cared-for interior and exterior can make a significant difference in resale value.

5. Market Demand for RVs:

   – The overall demand for RVs in the used market influences depreciation rates. Popular models and types of RVs may depreciate more slowly due to sustained demand.

   – Seasonal trends, such as increased demand for RVs during the summer months, can affect depreciation.

6. RV Mileage:

   – Higher mileage can contribute to faster depreciation, especially for motorhomes  where engine wear is a significant factor.

   – Low mileage may help maintain resale value.

7. RV Features and Amenities:

   – RVs with desirable features and amenities, such as modern appliances, entertainment systems, and comfortable interiors, may depreciate more slowly.

   – Upgrades such as high-quality flooring, countertops, and comfortable furnishings can positively impact resale value.

8. Market Conditions:

   – Economic conditions and fuel prices can affect the demand for certain types of RVs.

   – Regional variations in demand and supply can influence depreciation rates.

9. Upgrades and Modifications to Improve Resale Value:

   – Thoughtful and functional upgrades may positively impact resale value.

   – However, excessive or poorly executed modifications may have the opposite effect.

10. Insurance Claims and Accidents:

A clean history with no accidents or insurance claims generally results in better resale value.

   – Accidents or extensive repairs can negatively impact depreciation.

Understanding these factors and their interplay can help RV owners make informed decisions about maintenance, upgrades, and when to sell or trade their vehicles. Keeping abreast of market trends and staying informed about the specific characteristics of your RV model can also aid in predicting depreciation more accurately.

Categories
RV

Navigating Pitfalls in RV Camping: Lessons in Avoiding Common Mistakes

Embarking on an RV camping trip embodies the spirit of adventure and the allure of living life on the open road. However, this nomadic lifestyle comes with its own set of challenges that can catch even the most seasoned travelers off guard. In this guide, we will delve into specific pitfalls associated with RV camping, providing insights to help enthusiasts steer clear of common mistakes that could dampen the joy of their outdoor experience.

Underestimating Campground Reservations

Picture this: you’ve planned the perfect RV camping trip, only to arrive at your desired campground and find it fully booked. Underestimating the importance of campground reservations is a common pitfall for many RV campers. Particularly during peak travel seasons or in sought-after locations, securing a spot can be a daunting task. To avoid disappointment, make reservations well in advance. Research the availability of popular campgrounds and plan your itinerary accordingly, ensuring a smooth and stress-free camping experience.

Rushing the Setup Process

The excitement of reaching your camping destination may tempt you to rush through the setup process, but this haste can lead to a host of issues. From uneven surfaces to improperly connected utilities, overlooking crucial steps during setup can result in unnecessary stress and potential damage to your RV. Take the time to level your rig, properly connect water and electricity, and secure your awnings and slide-outs. A slow and methodical setup ensures a more comfortable and trouble-free camping experience.

Overpacking and Under-Organizing

RVs may offer more space than traditional camping, but they still come with limitations. Overpacking is a common pitfall that can lead to a cluttered and disorganized living space. Prioritize essential items and pack thoughtfully to avoid unnecessary weight and chaos inside the RV. Investing in storage solutions such as collapsible containers and organizing bins can maximize available space, ensuring a more efficient and enjoyable camping experience.

Forgetting to Secure Items Inside

RVs are essentially homes on wheels, and like any home, they can experience movement while on the road. Forgetting to secure items inside your RV is a common mistake that can result in a mess and potential damage. Invest in bungee cords, non-slip mats, and storage solutions to keep your belongings secure during transit. Taking these precautionary measures will not only protect your possessions but also contribute to a smoother and more enjoyable journey.

As you embark on your RV camping adventures, being aware of these common pitfalls and taking proactive measures to avoid them will significantly enhance the overall enjoyment of your journey. From careful campground planning to a deliberate and thoughtful setup process, and from efficient packing to securing your belongings, these practices will ensure that your RV camping experience remains a source of joy, relaxation, and unforgettable memories. So, hit the open road with confidence, and may your RV camping trips be filled with the wonders of the great outdoors and the serenity of a well-prepared and organized campsite. Happy camping!